![]()
VS57
Air Solenoid Regulator Rebuild
By Dwight Finney
Hi,
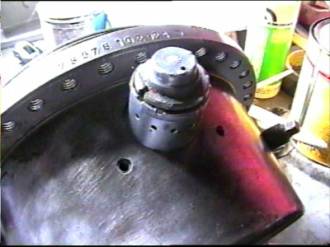
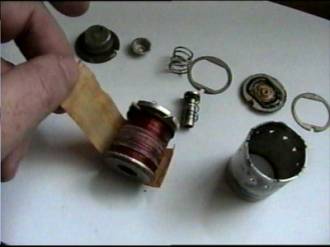
I am grateful to submit to the VS57.COM website, a basic “How-To” section on repairing one of the most common failures of the Air Solenoid, the positive wire breaking off, As a new fan of the VS57, I am planning to put the one in this article in my 1969 Fairlane 500 Fastback with a 351 4v. After long discussions on “if it could work” and the efficiency of the Supercharger to huff enough air into that many cubes, I decided to do it. First, find the supercharger, done VS57R. Upon inspection of the supercharger, I found the Air Solenoid regulator positive lead was broken off at the surface of the top of the solenoid. After I disassembled the supercharger I also found that one of the labyrinth rings was broken. I will address this later…….
After disassembly, push the regulator out from the inside
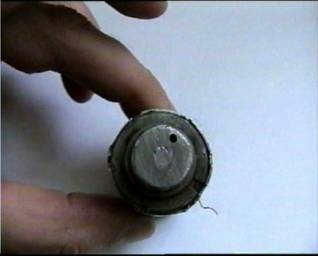
Don’t forget to check the O rings inside.
Open the crimps carefully, all the way around making sure to go only as far as not to warp the casing
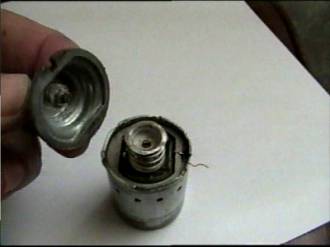
Loosen the top cap and remove. DO NOT force from the bottom!!!
Find spring and endcup. Set these aside.
Now with the top off, there is a three layer metal sandwich that compresses the diaphragm in place. Pry off the first layer with a small jeweler’s screwdriver.
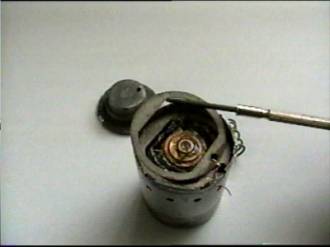
Carefully remove the next layer (the diaphragm section) there is a spring loaded air valve underneath this.
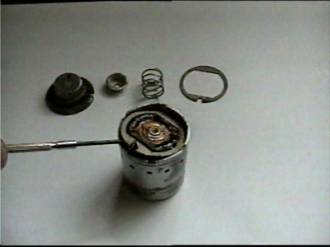
Last layer of the sandwich... same as above as far as removal.
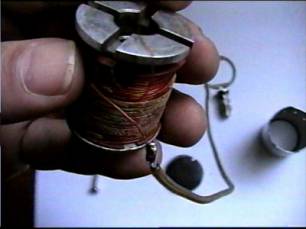
Ok now the air passages are exposed and the top of the air valve can be seen on top of the weak black spring. This is pushed up by the solenoid actuator which is underneath it. Here is the exploded view.
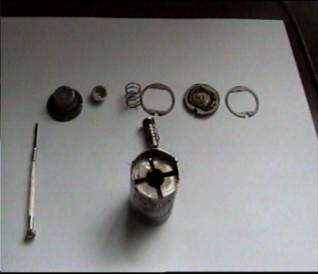
After shaking the air valve and spring out, push the solenoid section out of the casing with your thumb slowly.
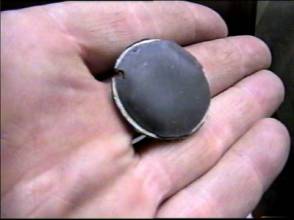
The coil for the solenoid is covered by a varnished woven cloth. Notice the burn mark on mine
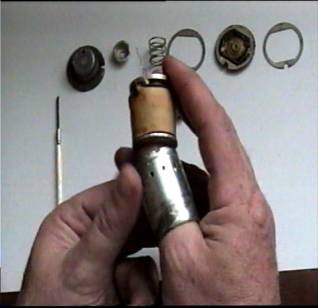
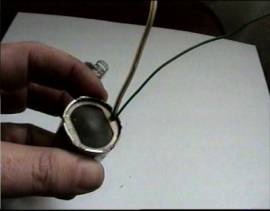
The positive lead of the coil, (which is just varnished 20ga. Copper wire) is on the OUTSIDE of the coil and the negative lead is the INSIDE.
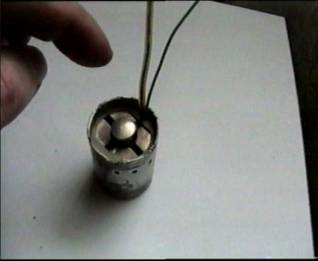
Make sure that the solenoid actuator arm moves freely and is lightly lubed.
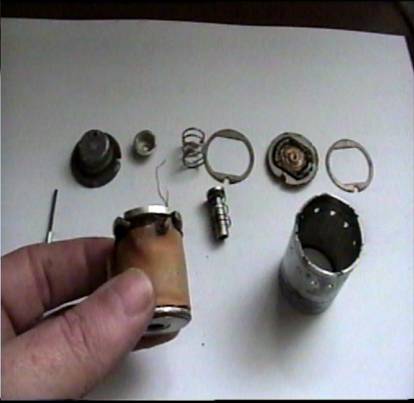
Remove the cloth covered positive lead and cloth insulator from the solder joint and de-solder the cloth covered wire.
With an ohm meter, check for open or closed circuit. Ohms should be about 250.
ASSEMBLY
Attach a new positive lead with plastic insulation about 12” with some shrink wrap on the solder joint.
Re loom through the fiber spacer.
Negative lead, attach small 22 gauge copper single strand to the negative (inside) coppers wire and loom through the fiber spacer.
Wrap some high quality tape around the wraps
Test with 12vcd. It should move the solenoid actuator and not short out. If it does, there is a break in the varnish coating the wire somewhere else..
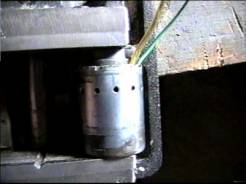
Insert new coil into casing guiding the wires to the notch in the case and insert the weak black spring and Air valve.
Insert first steel spacer, notch to the wires.
Insert diaphragm section, notch to wires
I was able to repair the diaphragm with a small thin tire patch.
Insert last spacer, notch to wires
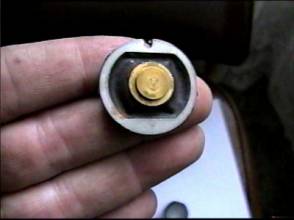
Insert stiff spring and solenoid and insert top cap, notch to the wires.
Re-crimp the casing and solder the negative lead to the case.
Test solenoid with 12vdc (VS57 Models), it should Bump hard on and off.
All fixed!!!