
Bob's Resource Website (2007)
So you want to subframe your M5 Studebaker truck? Here's the process I went through to graft my subframe.
The subframe I chose to use was a front steer 1970 Camaro piece. When looking for a subframe you must find one with a track width within an inch or two of your original suspension. This is important because if a poor choice is made you will end up with tires sucked way back under or hanging outside the fenders. Once you have a suitable candidate its time to subframe.
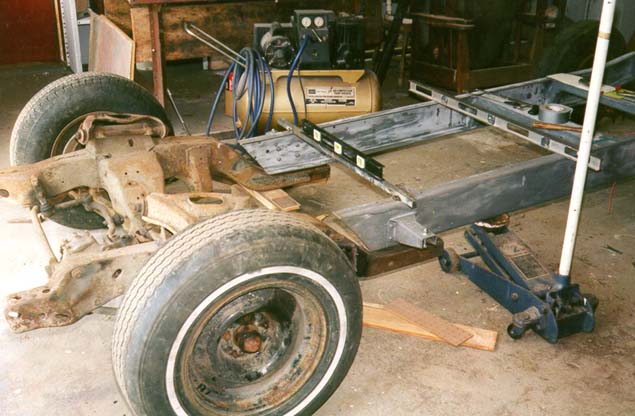
The first step is to make sure your chassis is level and true. Now you're ready to ACCURATELY measure the axle centerline. This determines where the front wheels are in relation to the frame. Poor measurements will result in the wheels being too far ahead or behind when the subframe is grafted. Next transfer this line back to a part of the frame which won't be cut off. It is from this line you will line up the new suspension placement. Now weld a couple of braces across the frame to prevent it from moving once the front is removed. Determine an appropriate place to cut and cut carefully. This picture shows my frame cut off with the subframe slid up for a trial fit.
To set the proper ride height for your application take the springs out of the subframe and cut some wooden blocks to hold the suspension at mid travel. The subframe tails must also be parallel with the ground when installed correctly. This maintains proper steering geometry. I chose to leave most of the subframe tail on my truck to make a shelf for the original frame to sit on. Some rodders cut them back to make the transition a little less noticable. Once you decide which design is best slide the two frame sections together and start checking measurements. Measure back to front, side to side, and corner to corner. Then measure again. The happy rodder's motto is "Measure twice, cut once."
If all measurements are acceptiable you can start to tack the subframe in. If you are not an experienced welder have some one who is do the welding for you. A chassis is not the place to learn how to weld. After a few tacks recheck your measurements. If everything is good you can continue welding and measuring until the subframe is completely welded.

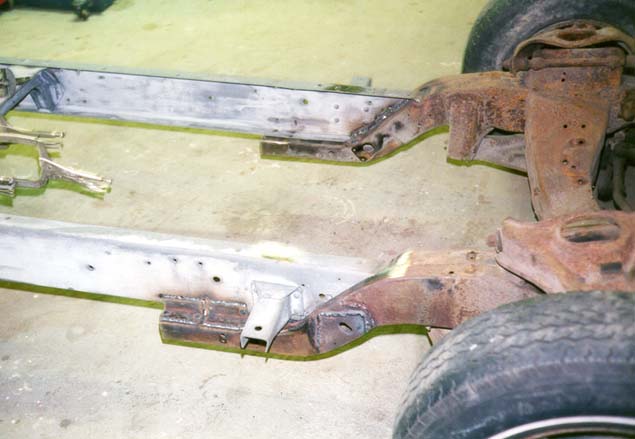
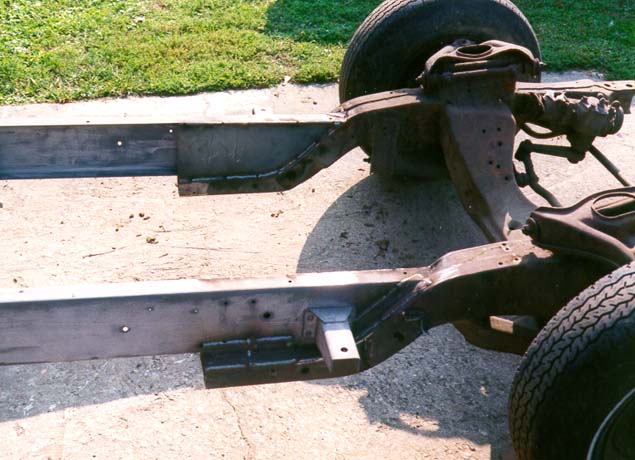
The best joint for joining a subframe is to overlap or fish scale the joint with steel plates. This joint is stronger than an unboxed butt weld between the two halves. In this picture you see the plates I made to box the inside of the frame. I also used some heavy gauge angle iron to box the outside as seen in the second picture. Once fully welded and boxed a subframe is part of the original frame.
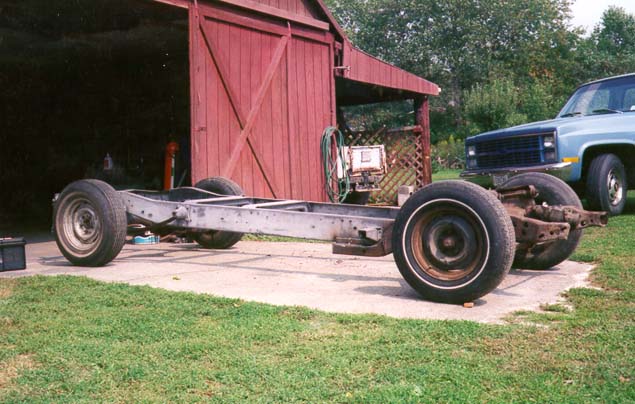
Here's photos of my finished frame. Its strong, low, and should handle great. Remember to always rebuild your subframe with new rubber, ball joints, and tie rods. The kit I bought was $140 to completely rebuild it.
I hope this helps anyone who is planning a subframe graft. I'm happy with my results, but if I was going to do it over I would probably have chosen to use a Mustang II set up. This suspension is relatively simple to install and you get to retain your whole stock frame and crossmembers. With a subframe it is required that a new radiator support to be fabricated. Fat Man Fabrications makes outstanding Mustang II suspensions for just about anything with four wheels. Go to my links page to contact them. And that is how to subframe your Studebaker truck.
Questions or comments, mail me here .