


| Studebaker V8 Rear Main Seal Responses to Comments on Bob Palma's Hemmings Article on the Studebaker V8 |
|
Jim Pepper
11 Jan 2020 - 12:17 PM The rear main seal leak issue is usually caused by a few issues. Working at Franklin Motors in 1967 – 69 era, I did numerous oil leak and rear seal replacements. Some of the things I do today I learned back then. We always used Fel Pro gaskets on the oil pan. Their cork composite seemed to be the best. I did not trim end seals when they appeared too long. I let them squash in place. I used long 5/16 – 18 bolts with the heads cut off as guide pins for installing the oil pan. At the time we would replace the front filler block with a new one (it was a stock item). I would bottom tap the holes and use bolts ¼” longer. That helped them stay tight without stripping. Rear main bearing clearance is critical. .003” or greater and the seal would leak. I think it was a combination of the seal lips opening at the split plus more volume of oil present. We would use a .001 under rear main bearing to get the clearance down to .0015 - .002” verified by plastigage. I used Permatex in the gasket corners. It worked well. Fast forward to today. I use silicone in all the gasket corners. I still use guide pins for the pan. I still bottom tap the filler block but now I install set screws in it as studs and use nuts to fasten it. Done right, Studebaker engines are no more prone to leak than a smallblock Chevy. Jim
Nelson Bove
11 Jan 2020 - 12:20 PM In adding to what Jim mentioned, I’ve noticed it is often the felt front seal that leaks and runs back down to the rear of the pan where it drips. Often mistaken for a rear main leak. Nels
Jim Pepper
11 Jan 2020 - 12:45 PM Quite often oil breakdown left the front felt seal hard as a rock. The reverse spiral groove in the damper hub also got plugged. Poor tuning with a lot of fuel in the oil did not help. Those were the ones that leak a lot and had a lot of crud inside the engine. Today’s oils coupled with unleaded fuel and accurate tuning make those conditions a thing of the past. I can’t remember when I opened up a newer engine that was not relatively clean on the inside. The Studebaker timing cover does not always center on the crank center. The bolt holes are not drilled. They are cored holes with draft in them. Depending on how much material was removed from the gasket face on the rough part, the hole diameter can be very small. At times there is less than .015” bolt clearance which is not enough for normal tolerance stack up. I usually run a 11/32 (.343) drill through the holes drilling out some of the draft. This gives .032” bolt clearance. I leave the bolts a little loose when installing the damper allowing the cover to center itself then tighten the bolts. It works well. Jim
Nelson Bove
11 Jan 2020 - 1:27 PM The weep hole at the 4 or 6 o’clock position in the metal retainer of the felt seal was introduced late and Im sure it helped reduce oil dripping on the floor after the engine was shut down while still allowing some oil retention in the felt.
Bo Markham
11 Jan 2020 - 4:36 PM Interesting topic and some rather good advise discussed to correct the condition. The only thing I could add from our experience with Studebaker engines is that most, certainly not all, complaints about rear main engine oil leaks have been with the thick front and rear cork pan gaskets. We've found that over time, either the front, rear, or both have collapsed (shrunk) and separated where the side gaskets meet them. Very often, we've fount the front felt and rear main in good shape. Well, except for the 61 Hawk. It only had about 30k on it, and still had the factory installed seals, I know because the fella was meticulous about keeping records on the car since buying it new. Discovered the rear seal had been installed back wards. It didn't start leaking, though, until about 1995. In 1997 we took the engine and transmission out and resealed both. Today, the car has 50k on it and the front felt weeps a little. Typical of a Studebaker. Enjoyed the read and advise. Keep up the good work guys. Bo Markham Motors
Jim Pepper
15 Jan 2020 - 10:34 AM I agree with Bo. Most times the leak is not the seal. His statement about cork gasket shrinkage is the reason I do not trim end gaskets. On smallblock Chevy I will turn the seal slightly so the split in the seal does not align with the block/cap split. On a Studebaker you cannot do that because of the added split seals. Those seals do not always reach the edge of the cap register and oil will migrate down the register corner because it is open. I use a very small drop of silicone in those corners to insure a 100% seal there. Jim
HUCK63STUEDE@AOL.COM
15 Jan 2020 10:57 AM I am loving all these comments. Thank you. I understand the rods in my R1 were shot peened. Could someone talk about the benefits? Also Bob Palma once said that Stude motors make more torque than a small block Chevy. No wonder I can't spin the tires on my daily driver '82 Malibu 350, 350 Turbo. Peace, Huck
John Metzker
15 Jan 2020 - 4:03 PM
As one who has spent much time at the rear of the Stude V-8, I will offer my experience. I agree that the rear main seal gets a bad rap. When asked to repair a leak in this area, I first check and repair other areas first. The lower rear corner of the valve covers and their mounting stud grommet, the valley(lifter) cover and road draft tube / smog valve housing, flex hose for the pressure gage, and gasket under the distributor, which is often missing. Leaks in any of these areas wind up at the bottom of the pan. Also, high mileage full flow engines will expel oil From the right hand breather cap due to excess crankcase pressure. I have found correcting these areas to reduce the”rear main” leak significantly.
Jim Pepper
15 Jan 2020 - 9:49 PM Shot peening does two things. First it work hardens the steel surface and creates compressive stress. The compressive stress counters tensile stress encountered during operation. Fatigue life improves because of it. A second and more impactful result from shot peening is the elimination of stress risers on the part. A stress riser is an imperfection like a groove on a part. Those imperfections cause stress to be concentrated in one spot. Stress risers are almost always the origin point for a crack by overloading the material in one spot. By eliminating most stress risers through shot peening, chances of a crack in the part is greatly reduced. An old hotrod trick to improve fatigue life of production connecting rods is to grind and polish the forging parting line on the outside of the beam. This operation gets rid of all the irregularities on the surface of the rod beam which is the area of the highest load. This operation goes further eliminating any stress risers completely. I tested this theory on an actual connecting rods in a laboratory environment. The result was an improvement in fatigue failure of about 25%. What this means is the cyclic load needed to be increased 25% to induce a failure. Jim
COMATUS
16 Jan 2020 - 12:40 AM "Wow," that's just what I expected: the most concise coverage of shot-peening without reverting to engineering math. To use that one expression the kids now apply to everything? "Now do" -- magnafluxing. In the 70's that was a term we bandied about with no idea at all of what it really meant, kind of like "billet."
Dwain Grindinger
15 Jan 2020 9:15 PM
About the 'rear main seal leak'. I too am one that believes it's too often from shrunken end filler corks. Many years ago I experimented with rubber substitutes. In place of the front cork I used a bungee cord,flat on both sides, cut to length. For the rear cork I used a SBC timing chain cover-to-oil pan seal. There are two sizes, thin and thick. I think I used the thick ones. The first one tore. I greased the outside of the second one and it went well and did produce very dry engines (a 6 and a V8)
Other Responses
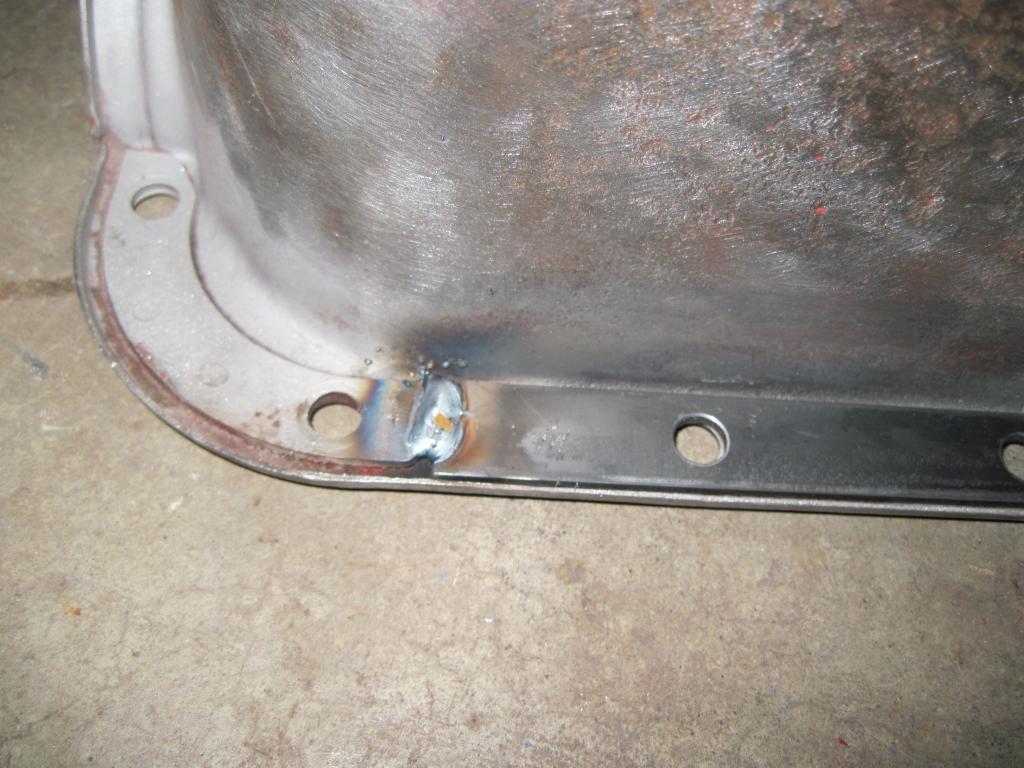
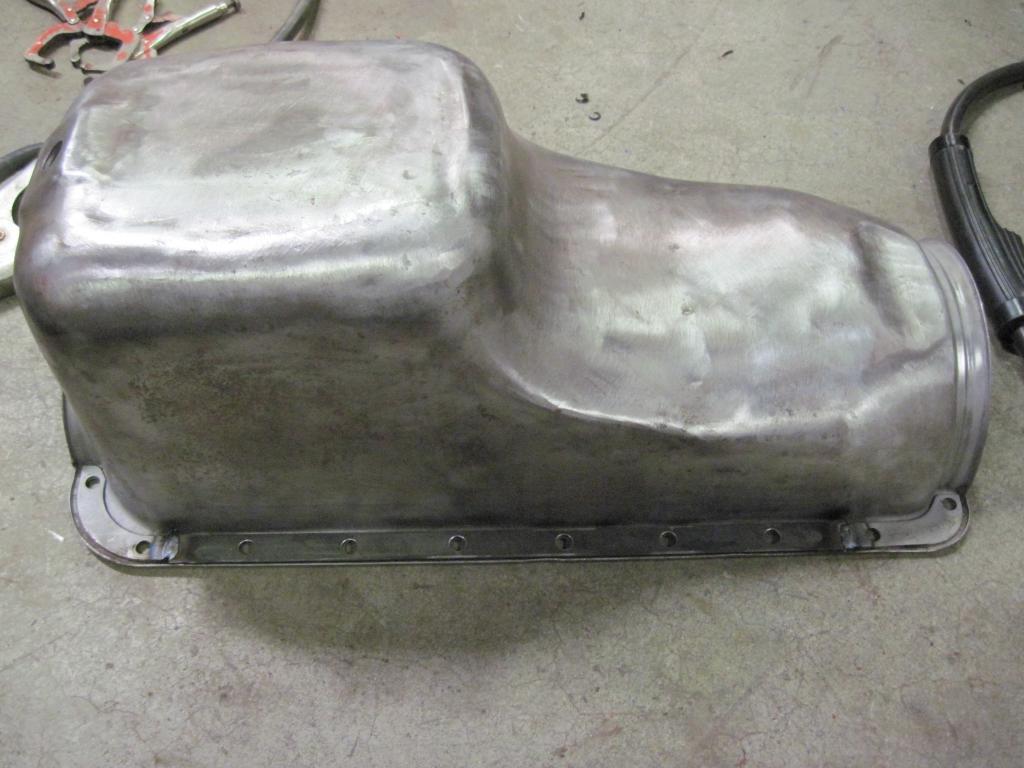
Doofus 10-03-2018 PackardV8 10-03-2018 R&R the rear main seal in situ is no fun, but sometimes necessary. You've probably already done this, but for those who haven't. 1. Pressure wash the pan and especially the area around the front and rear corner bolts. 2. Verify the oil isn't dripping down from the left rear of the head/block gasket. 3. Verify the oil isn't dripping down from the oil pressure gauge line. 4. Verify the oil isn't coming out of the oil pan gasket area. Bensherb 10-03-2018 I just fixed my "rear main seal leak". It was oil over flowing the rear of the pan, it was just pouring out. There was absolutely NO oil on the back of the engine above the oil pan. By the way, replacing that pan gasket is a bitch. I pulled the engine and turned it upside down and it still wasn't easy, it gave me a chance to clean up the engine compartment though. The end gaskets do NOT want to stay in place, you need to glue them down somehow to get the pan installed. Also when the pan was off , as recomemded, I flattened out the flange and added reinforcement to it's entire legnth. a piece of 1/8" x 3/4"wide flat bar worked well. I also tack welded it to the factory corner reinforcements. 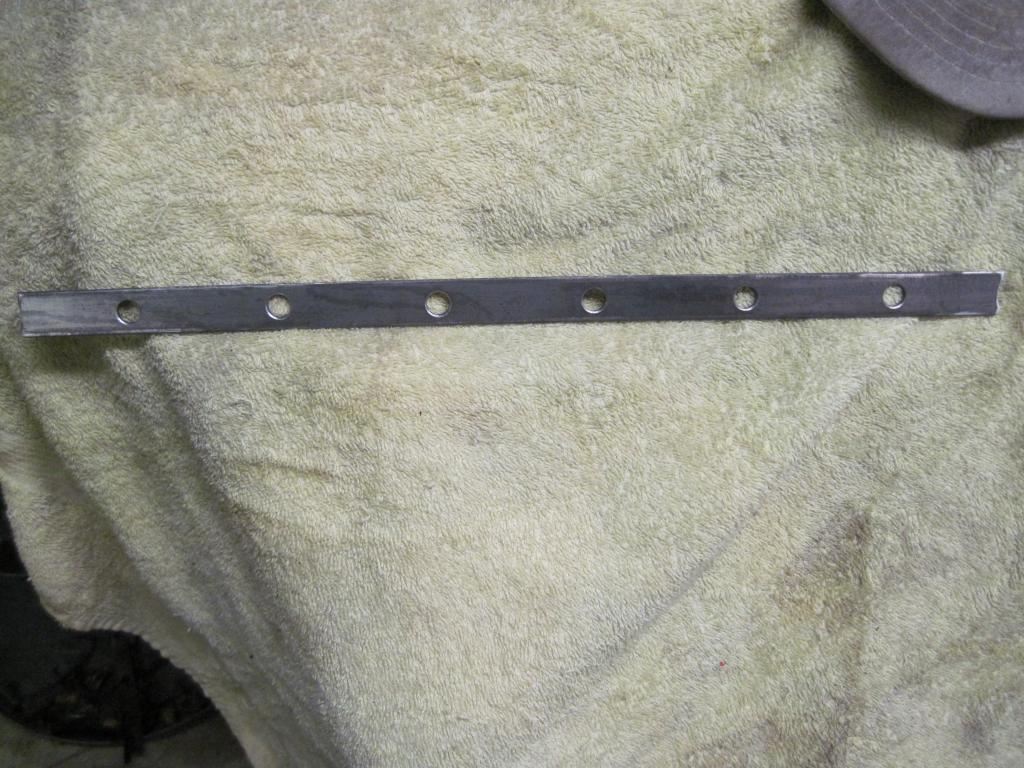
Altair 10-04-2018 Usually the top component of the seal gets very little wear and rarely has to be replaced similar to main bearings, all the thrust is downward. Some main bearing kits do not include the top halves just the bottoms only. Rear main seals should last hundreds-of-thousands of miles unless they were damaged when firstly installed and/or if the crankshaft was rusty or scored where the seal rides. Steve Winzar 10-04-2018 As a 'first-timer', I attempted this job last year and I found the seal half stuck in the block difficult to remove (despite slackening off bearing caps) and inexperience didn't help. Eventually I found that you can get it to move if you utilise a 'Drift' to tap against the inbuilt steel reinforcement bonded to the rubber. I used a length of 3/16" dia steel bar, but be really careful where you place it!. This will eventually break the adhesion and allow the seal half to rotate. Then you can grip it properly and pull it away. Cleaning the groove out is also important here. I also made up some 1/8" steel strips the same as in Bensherb's post- I recommended this practice. Steve Altair 01-24-2019 I don't think the top component of the seal is that important as all the pressure is on the bottom, same as the main bearing shells, the top shells never get touched. I once ordered a main bearing set and only the bottoms were in the kit. There is never any pressure on the top shells so therefore there should not be any pressure on the top seal either. There never seems to be an overwhelming consensus when there is an oil leak at the rear of a Studebaker engine whether it is the rear main seal, the pan gasket or possibly the valve cover gaskets??? Many installers cut off the cork gaskets because they think they are too long, many oil pans are over tightened and gaskets are installed improperly, who knows for sure what is leaking? I still think that the top of the rear main seal is the least suspect of all the possibilities. Steve Winzar 01-26-2019 I replaced my rear main seal last year but had never done this in an "in-car" scenario. I loosened all the required bearing capscrews and found the seal would still not budge- it was stuck in there and It worried me. What I found is that I needed to thump the exposed half with a steel or brass drift about 3/16" dia, making sure you impact the inner steel casing the rubber is moulded around. This broke it loose eventually and it was easily rotated out of there. Make sure you get a lint free rag in there and clean the recess out with some solvent of some sort before putting your new seal in. Steve Doofus 01-26-2019 I have always used a piece of thick brazing rod to bump seal loose tapping on metal insert. to install press seal hard against crank and turn into place. a piece of brass shim stock can be used to protect seal from sharp edge of block. dont forget to stagger seal part lines and add a dab of sealer on ends. Luck Doofus StudeRich 03-20-2019 Carefully CHECK that Rear Oil pan Arch Gasket, because a leak there will mimic a Rear Main Seal leak.
GrumpyOne 03-20-2019 Jeffry Cassel 03-20-2019 Definitely check for another source. Had one last year and it turned out it was form nearly new flex line to oil pressure gage. Drain the oil. Let it sit so all the oil drips off engine into the pan rather than your ear or your hair. Remove pan. Loosen all main cap bolts just a bit and remove the rear cap. Carefully! try to turn the upper half of the seal out from under crank. Once started it should come out with patience and needle nose Vice Grip. oil up new one and slide it in. Be sure none of the mains have turned out of place and retorque them . Replace seal on rear cap and bolt it in place. The pan gasket is a pain. You will need 4 studs that hold the pan in place so you can star pan bolts. You'll wand to go around about 3 or 4 times to tightened the pan bolts and compress the cork gaskets. Take a few days to do the job; its less stressful! Good luck Bensherb 03-21-2019 After reading comments on this forum I decieded it would be easier to remove the engine to attempt this than to do it in the car. After having done so, I can't imagine doing it in the car with gravity working against me. The seal was easy, the pan gasket was NOT, even with the engine out and upside down. If I had to do it again, (the pan gasket) I'd remove the engine again. By the way, my rear leak turned out to be the rear of the pan gasket, the seal was clean and dry like it should be. With the engine out it also gave me the opportunity to clean up the engine bay. |