
View This Page In Any Language
Bob's Studebaker Resource Website
Studebaker Factory Rear Drum Brakes for a Disk Brake car
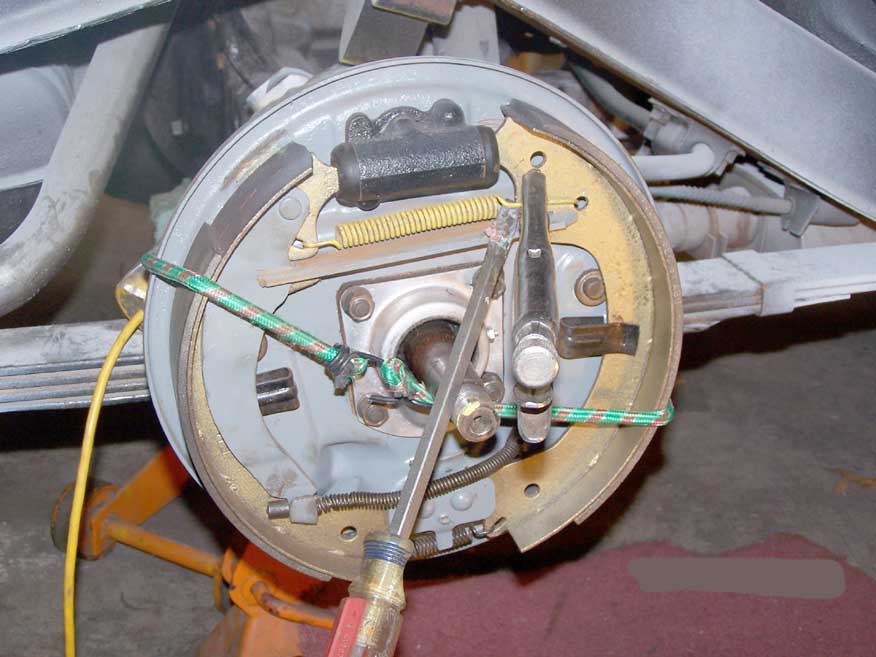
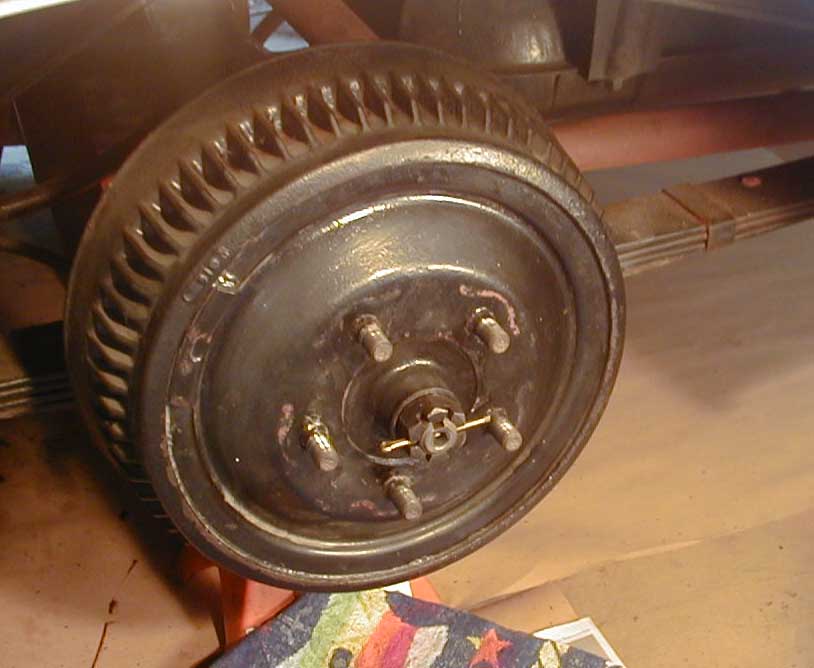
After removing the cotter pin and breaking the axle nut loose, Remove the nut, flip it over and spin it back on the threads so the ends of the nut and shaft are flush. This will protect the threads from being damaged by the puller. Mount a suitable brake drum puller, like the ones shown (*) to remove the drum / hub from the axle shaft. Tighten the puller drive pin up to the axle shaft and smack it sharply with a small sledge hammer (5 lb) to break the hub loose. A couple sessions of tighten, rap should release the grip. It can take time for a really rusted assembly (*) DO NOT USE any other type of puller to remove the drum/hub. You must grab the lugs to remove the drum. If you use a tool that grabs the rear edge of the drum, you will destroy it. You can use heat (Mapp, acetelene) to get the parts to expand if they are really difficult.Target the heat on the hub, close to the center and don't overdo it. Kroil is a good rust dissolver, but be sure to clean every last bit off, before you reassemble the parts. |
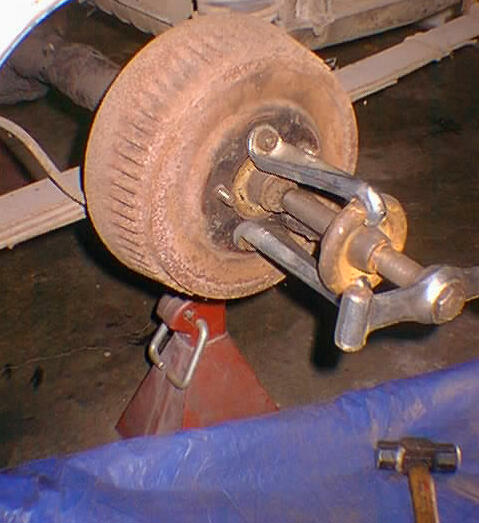 You have to remove the flange AND drum as an assembly from the tapered axle |
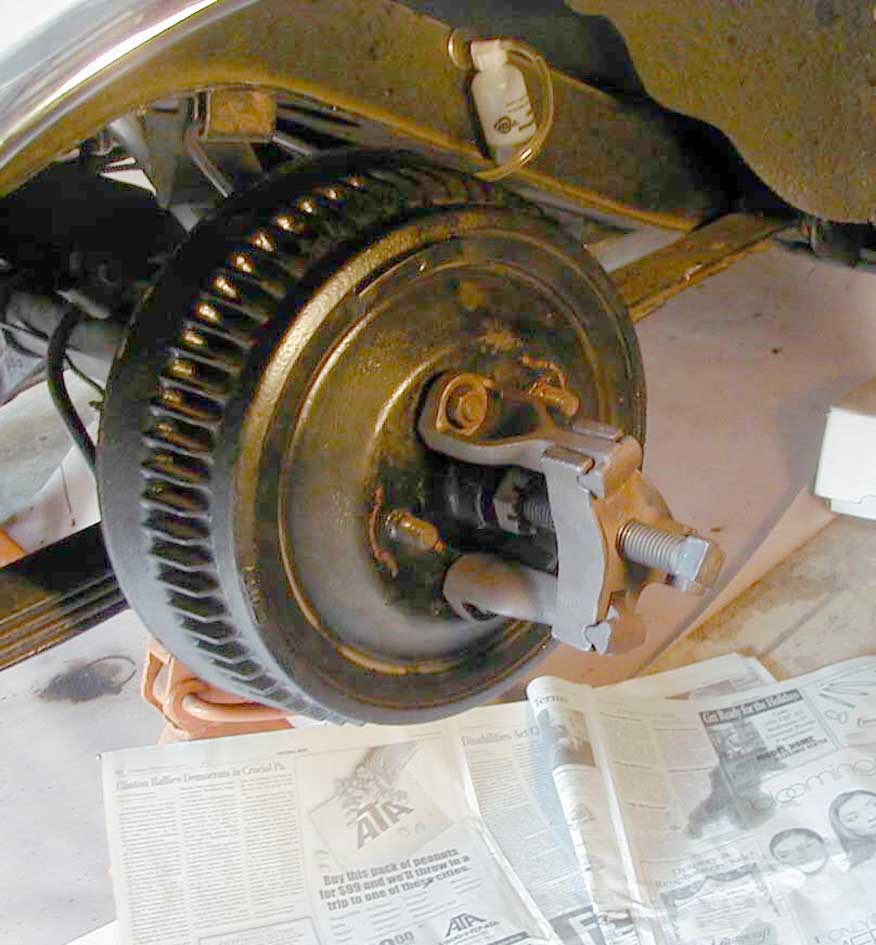 This is another style of brake puller... does the same thing.. |
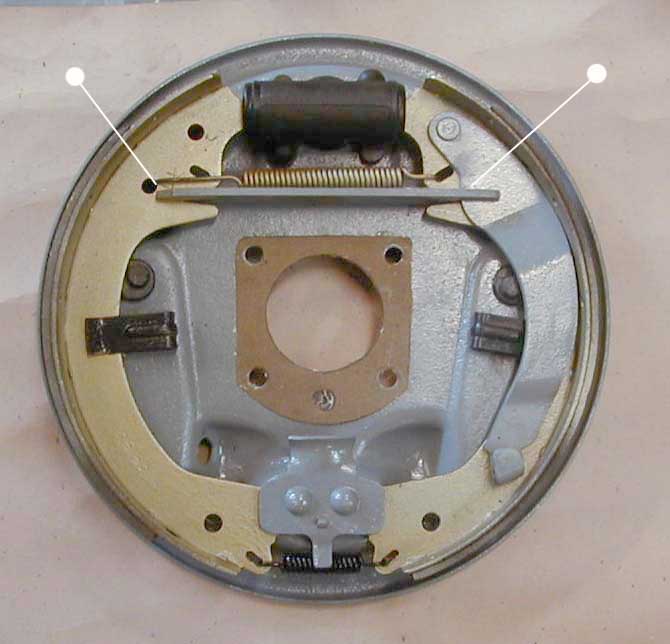
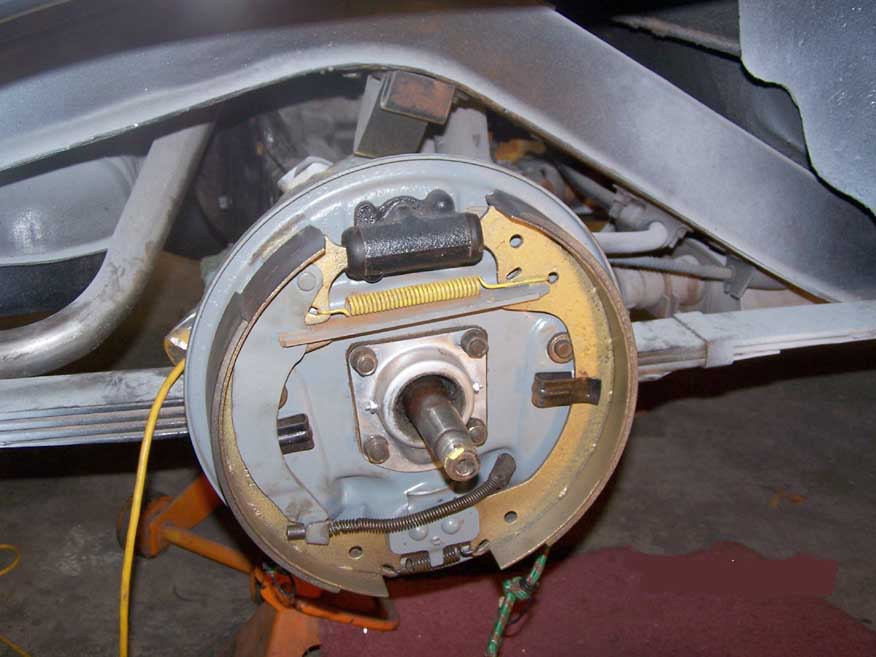 This is a rear drum for a Disk Brake car. The brake shoes do NOT have self adjusters or star wheels and are NOT self energizing. Other than those features, they are serviced like most other shoe brakes. |
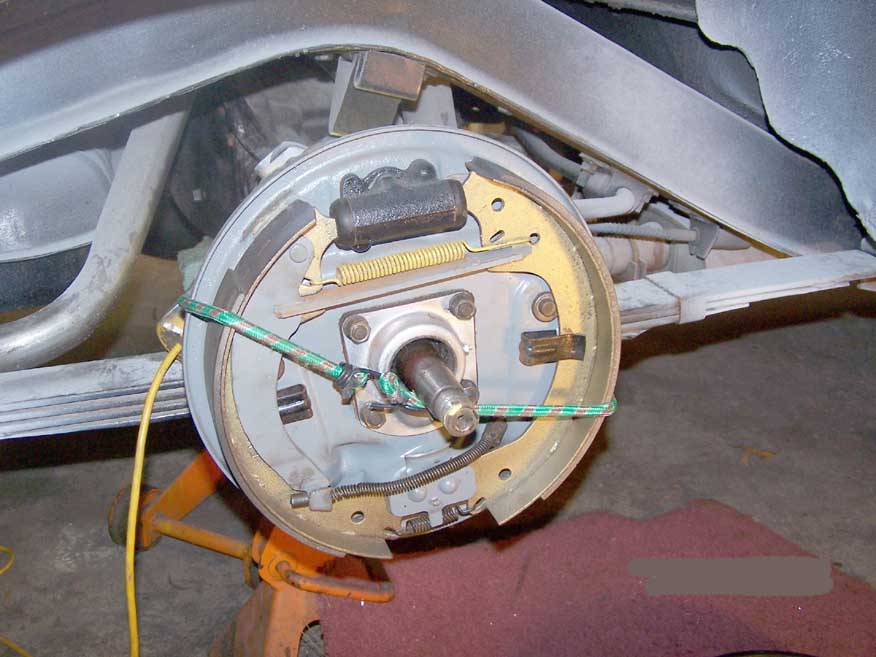 Wrap a bungy cord around the assembly to start |
 Pry up on the main retracting spring and bite it with the vice grip |
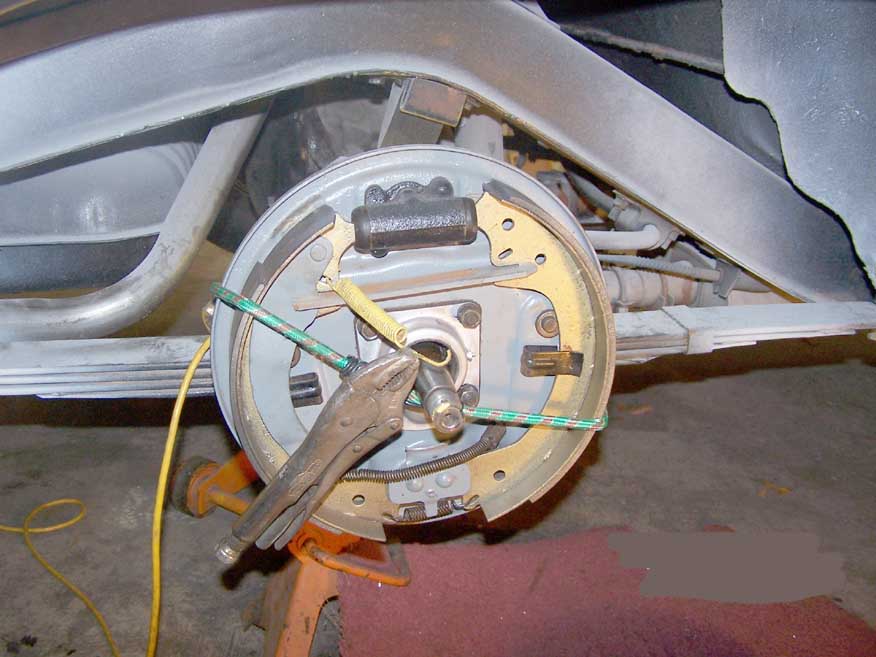 Pop the spring loose and the bungy holds things in place.. |
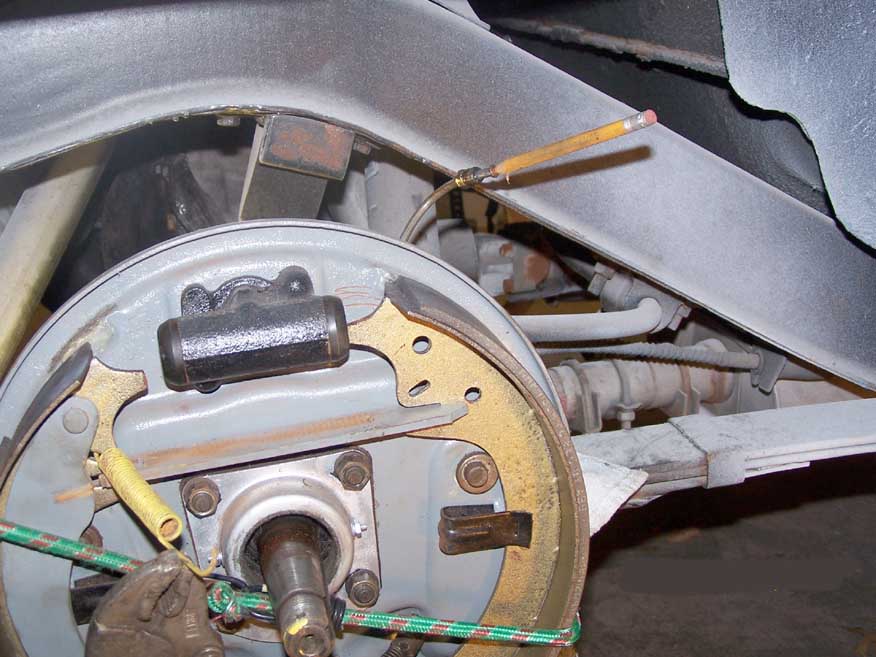 If you're R&R'ing the wheel cylinder, plug the line with a "pointless" pencil/ It holds the fluid back nicely and minimizes bleeding later |
Replace the shoes. Remember that, on a Studebaker with Disk Brakes, the primary (short) shoe goes on the REAR. The longer secondary shoe goes toward the front. See shop manual pic below  NOTE: This scan is from the shop manual and shows the long shoe on front. The shop manual refers to the shoe with the longer lining, as the "Forward shoe" and the rear shoe as the "Reverse shoe". |
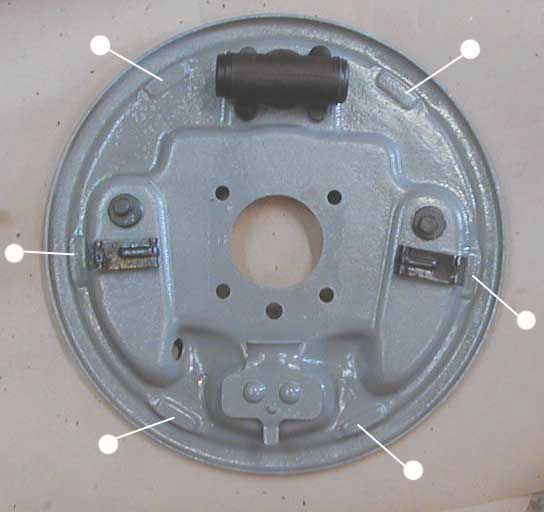 Put a smear (NOT A GOB) of white lithium grease on these spots or comparable ones on other brake style backing plates, This allows the shoes to slide easily on the raised backing plate lands |
 Here also, where the e-brake lever actuates the shoes. |
April 2010 Update:
The replacement shoes for these brakes are: Ref...
O’Reilly’s
NAPA
Rock Auto (online only) https://www.rockauto.com/catalog/raframecatalog.php
|
 |
IMPORTANT: REINSTALLING THE DRUM.... CLEAN the tapered shoulder of the axle and the inside of the hub where the axle shaft resides with lacquer thinner or a good degreaser. Thoroughly dry and allow NO oil or grease to remain when the drum/hub is fitted to the axle shaft. If there is any lubrication on these parts, the hub may split when it's torqued down.) Leave the key out until you get the drum on the axle, then rotate the drum to match the keyways and then slip the key into the slot, tapered end first. Take a drift punch and tap the key into the axle until it is flush with the hub. The shop manual torque spec is 'tighten the axle nut to 170lbs and then to the next cotter key slot.' This is fine, but the consensus of opinion is to tighten the nut with a 2 ft breaker bar ( stand on it) until it binds and then to the next slot. |