
| Reverse Hood Opening
|
|
Reverse Hood design for a Hawk Images can ne enlarged by clicking on them
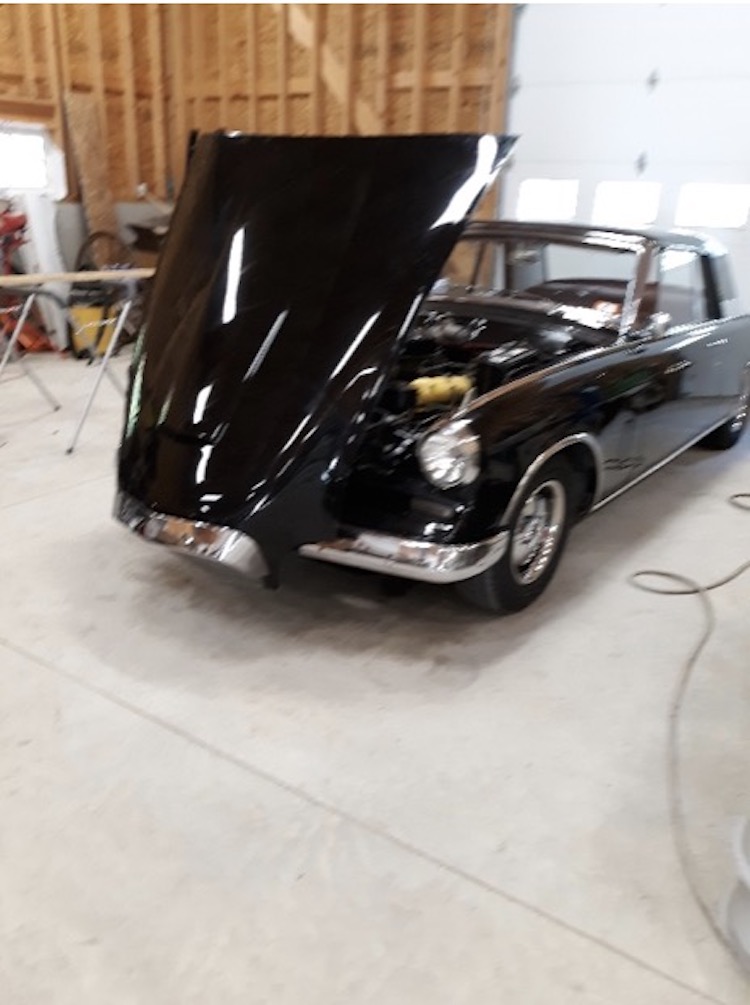
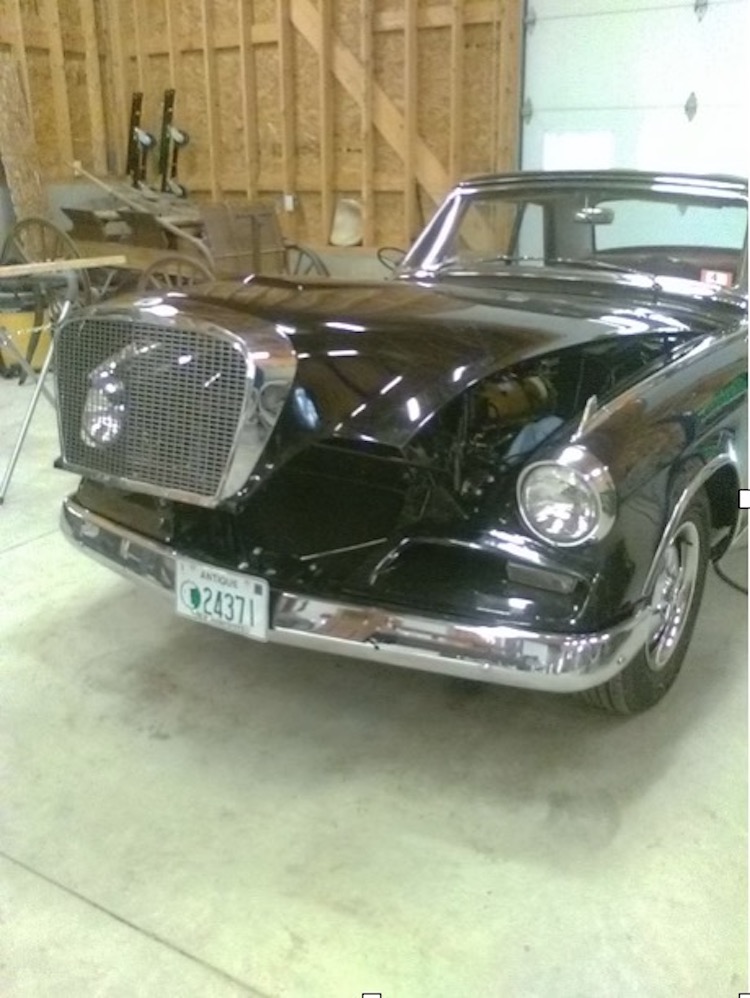
I got into this project to reverse the standard front opening Studebaker hood design to a rear opening hood to save my scalp and to allow more open access to the engine compartment. I reviewed all the photos of Jerry Forrester’s C/K reverse hood design and decided to tackle my 1962 GT Hawk. I will warn you that much of the work is trial and error fabrication. I will give dimensions/direction to as much of the hardware as I can but know that you probably won’t copy this design exactly anyway! 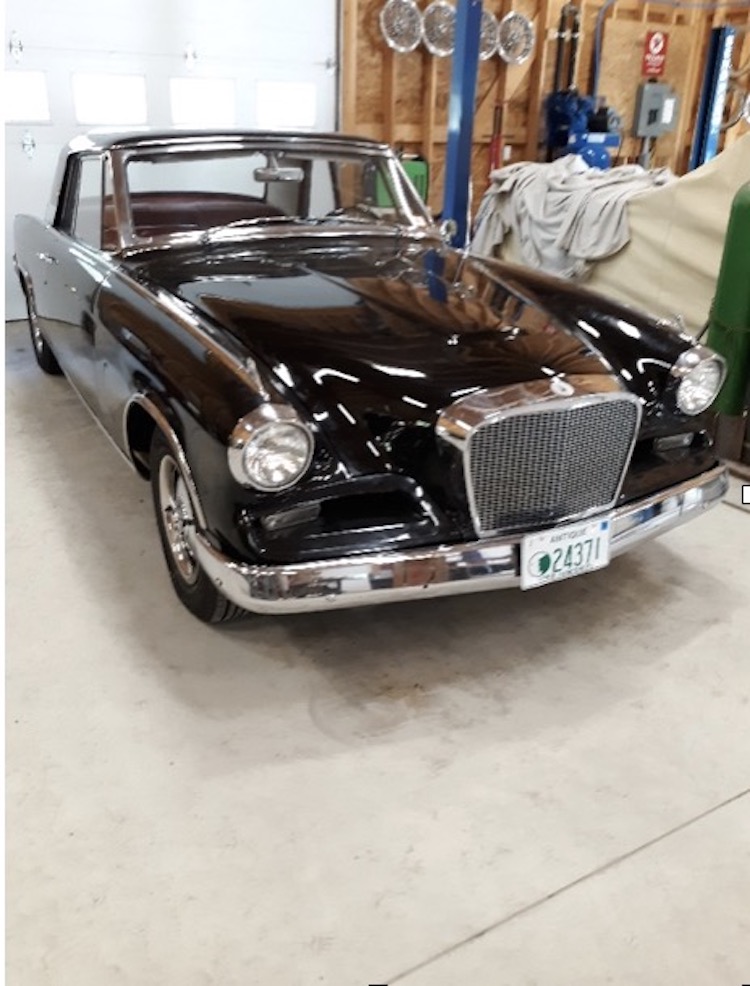
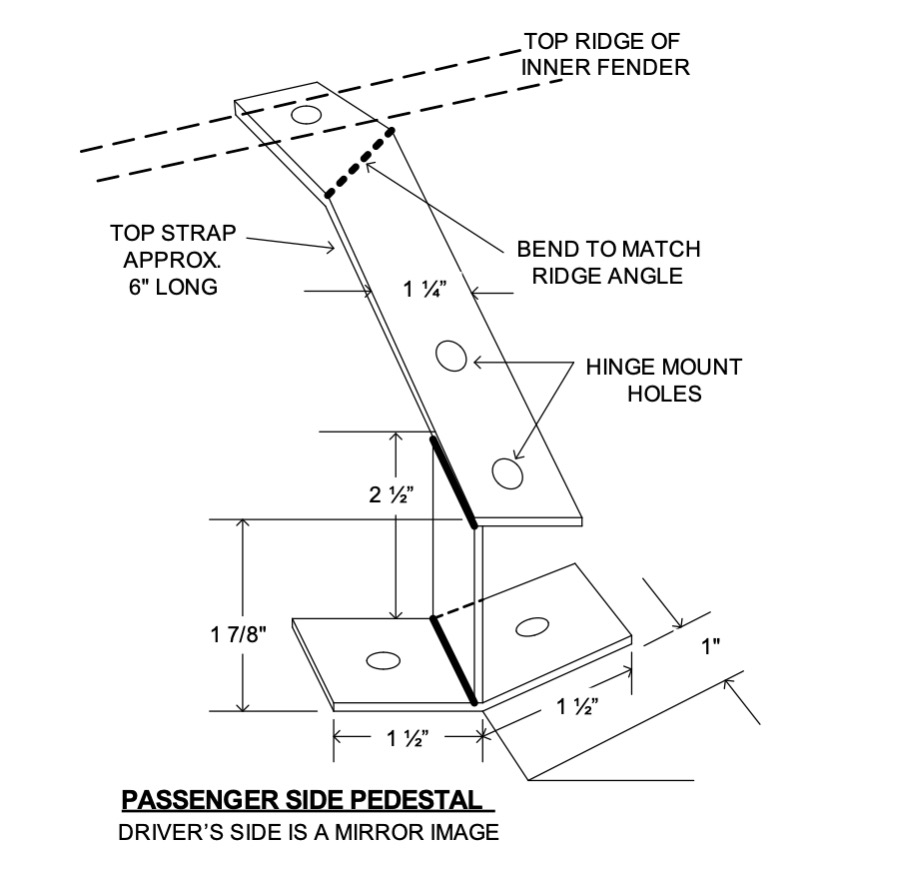
HINGE PEDESTALS
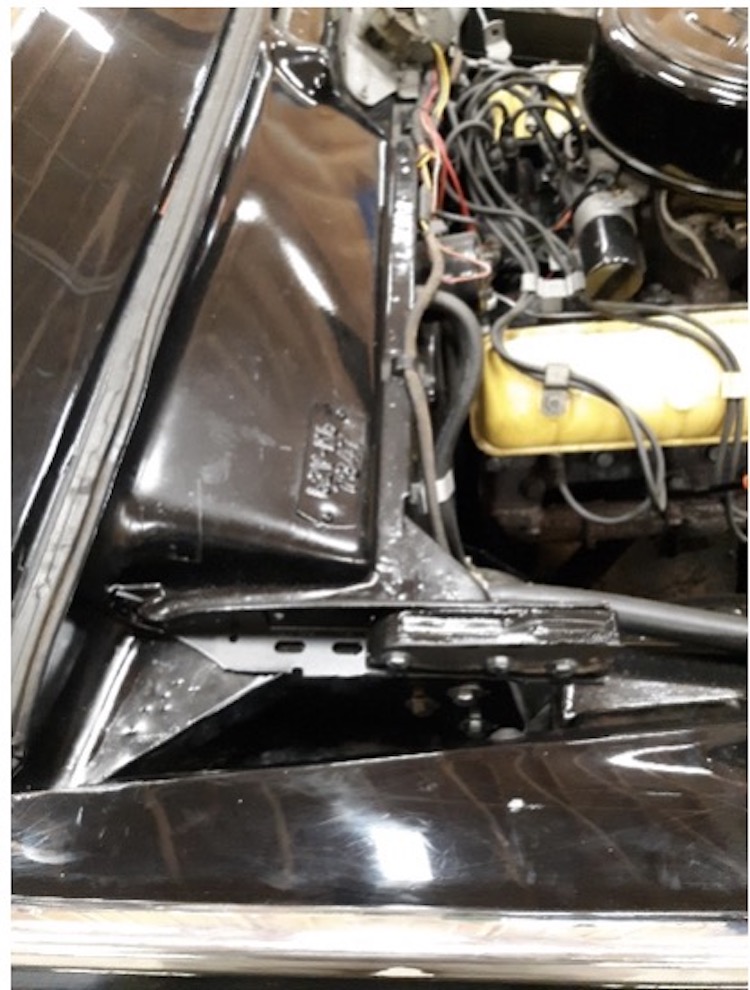
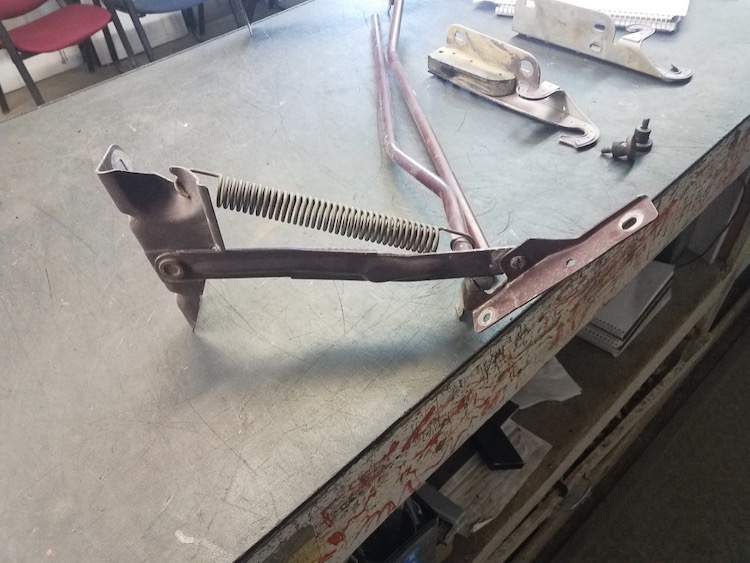
I sourced the 1986-90 Buick LeSabre hood hinges and receiving hardware from a New Mexico salvage yard (A1 Auto Recyclers) as I couldn’t find any around New England. I had them cut the assembly in half for shipping. I did not use the Buick spreader bar and cut it off both hinge risers where the spring attaches. I modified the hinges both to clear the Stude hood when closed and to fit pedestal mounts. I oversized the holes I drilled in the pedestals and bottom hinge mounts for adjustability.
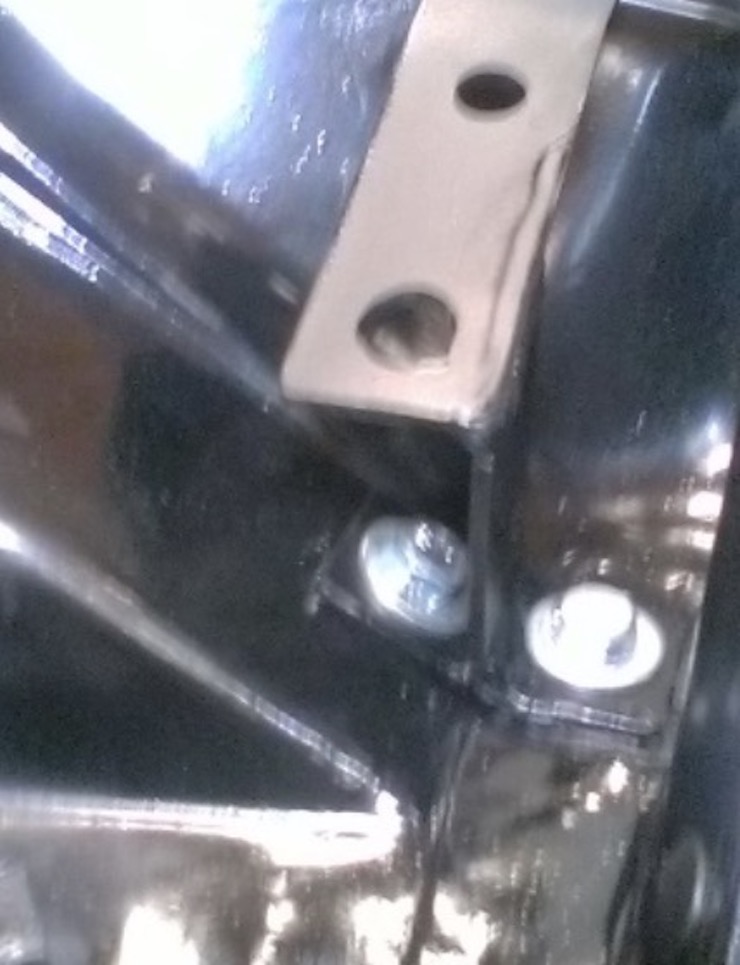
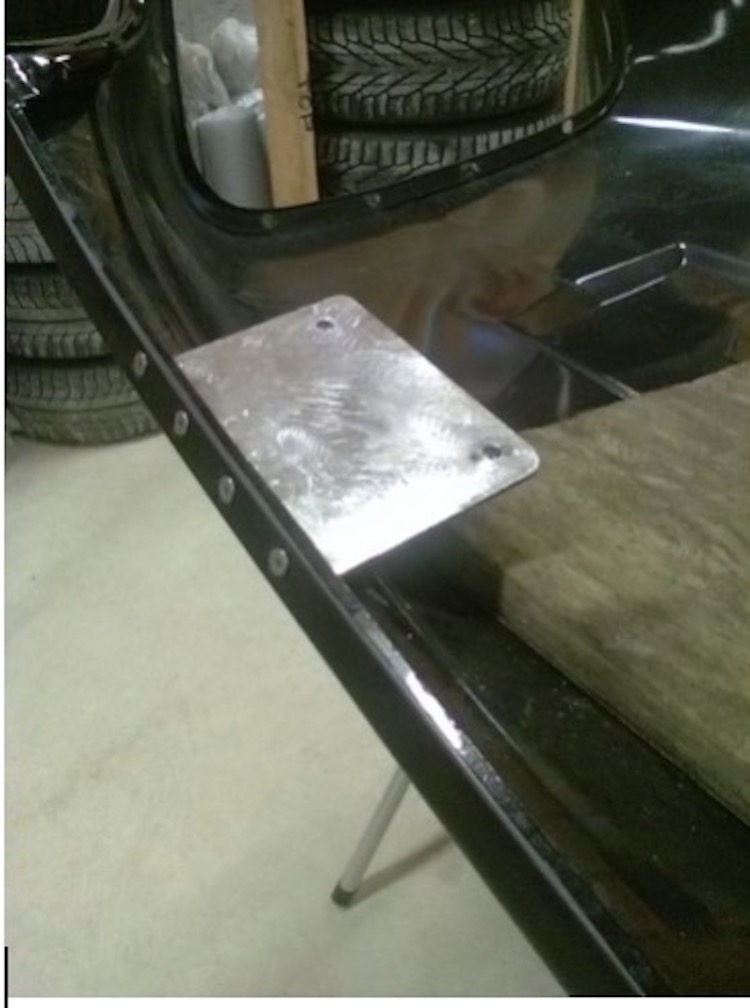
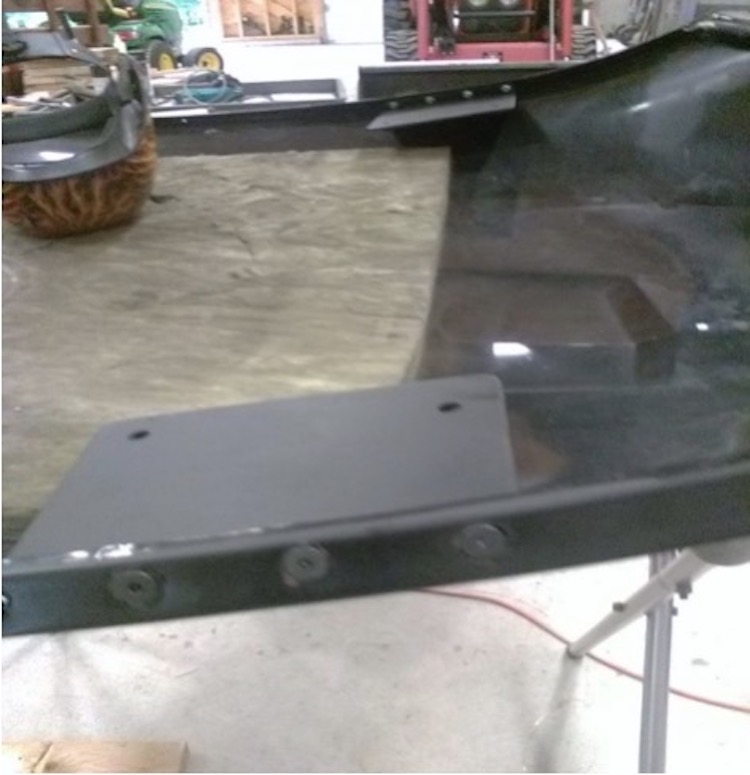
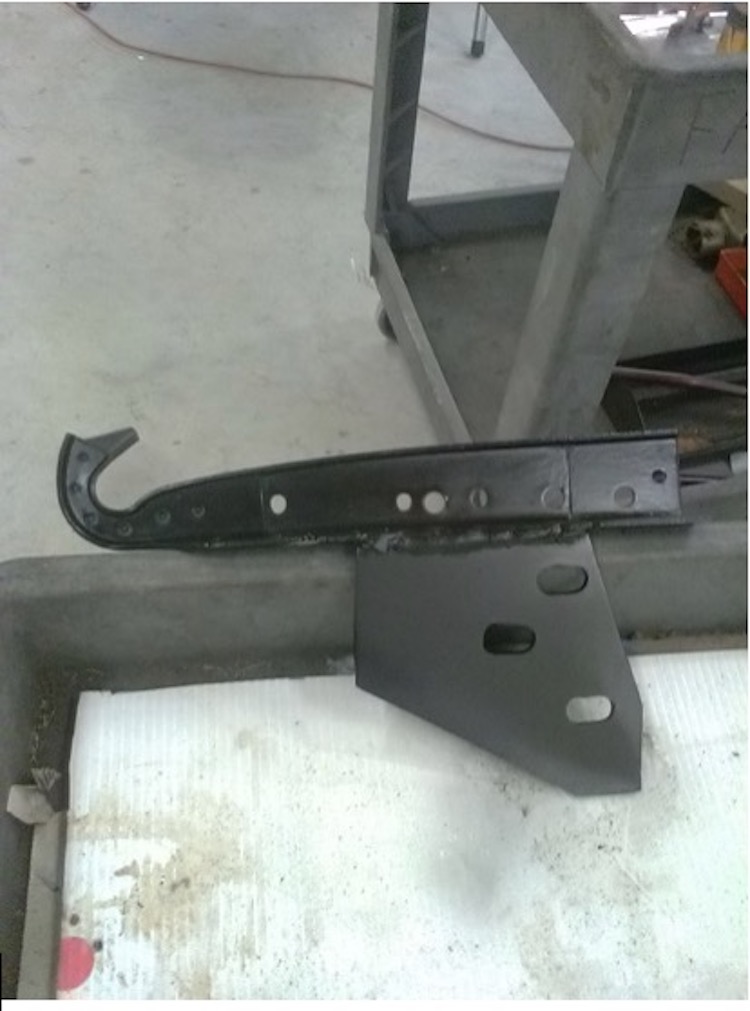
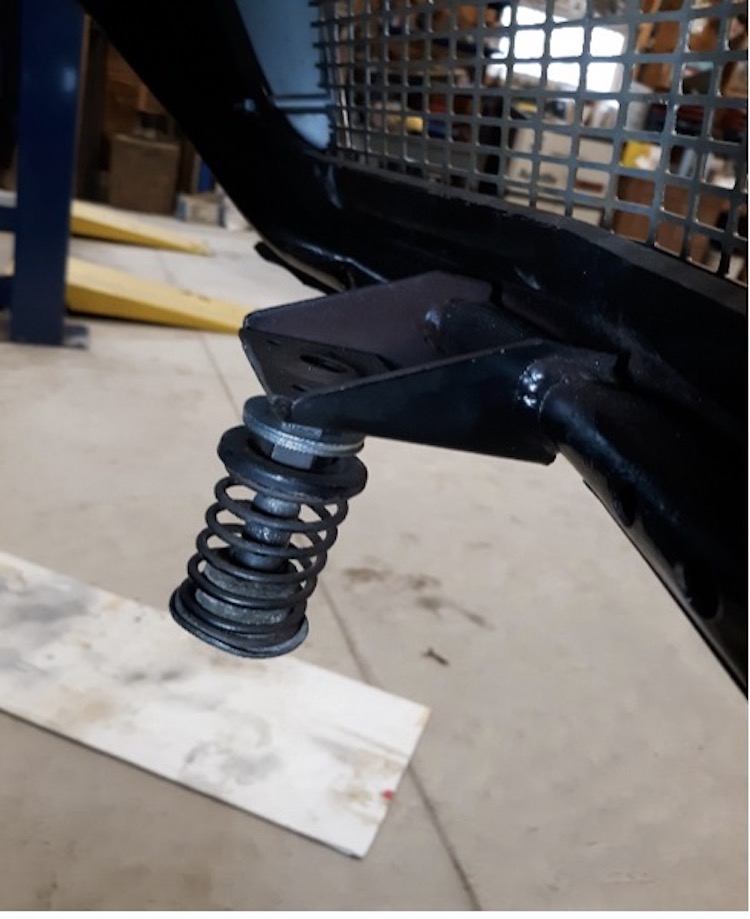
I attempted to keep the height of the pedestals high enough to allow the hinge risers to clear the inner fender structure when folded down. Make a pair of poster board patterns for at least one pedestal. The pedestals are 1 7/8” high in front, the top surface bent near the back for the third mount bolt and the majority kept flat, side to side, to ensure a plumb hinge riser when open. All three attaching bolts are accessible underneath the inner fenders for washers/nuts. Passenger side hinge is shown in the right photo above. Note the material cut off the leading edge of the bottom hinge mounting bracket and the stub of the factory spreader bar pointing toward the radiator. Remove and reshape the hinge mounting bracket in front of the bottom pivot so the hood clears it when closed. Oh, I moved the voltage regulator about 1.5” to one side for hinge clearance on the driver’s side by making a simple 1”x 2”x 1/8” aluminum plate to extend the mounting surface. Since I didn’t use the Buick hinge springs, this worked OK. In the end I still wound up modifying the Buick hinge risers for additional inner fender clearance.
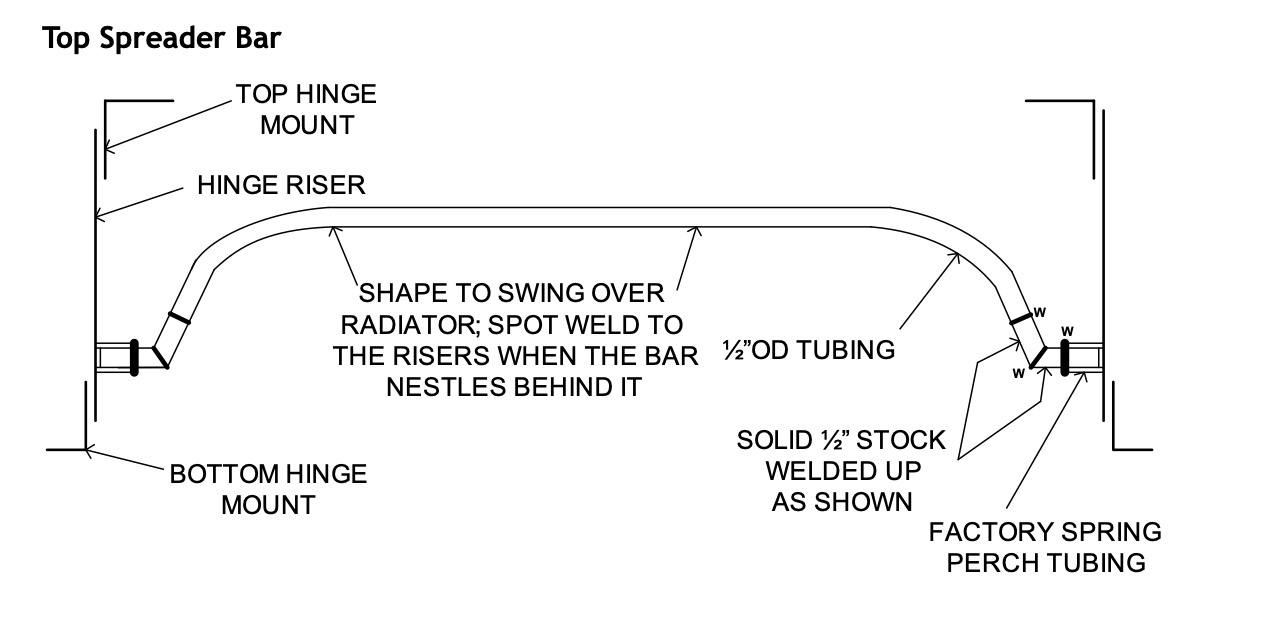
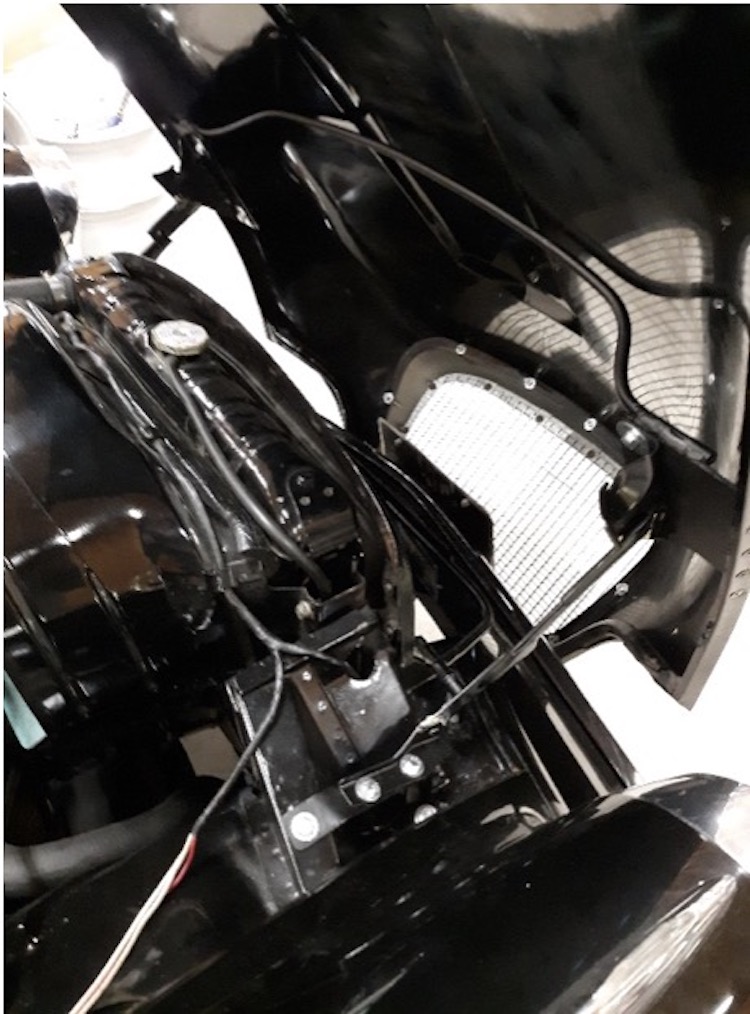
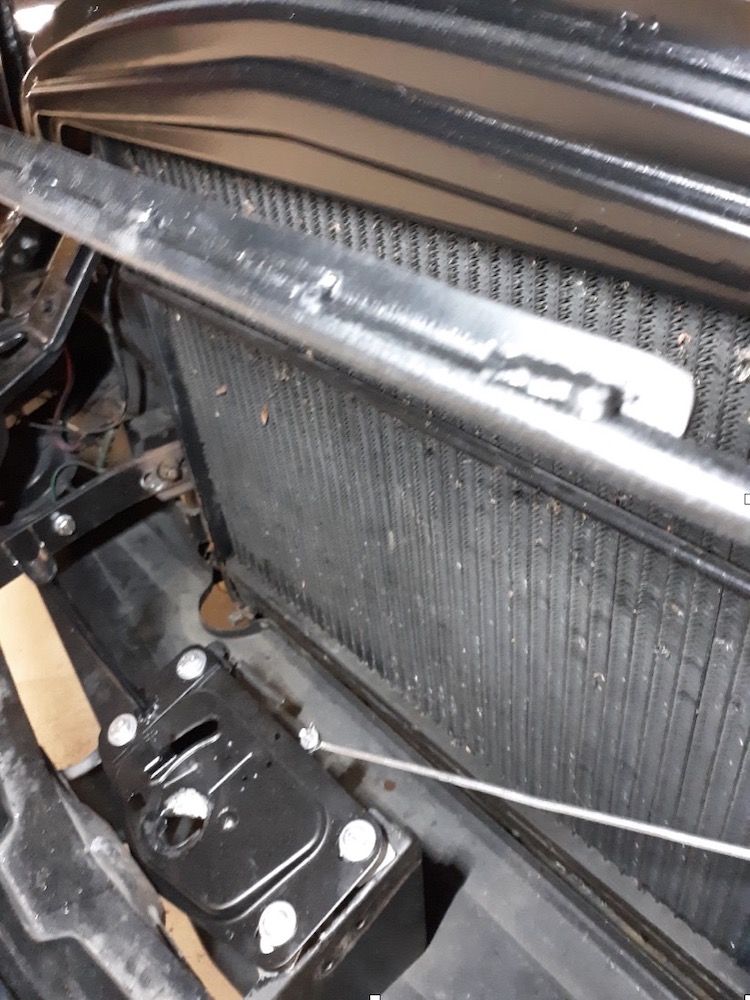
The bottom bar attaches to the hinge at the spring mount (stub). I ran a ½” drill through the factory spring mount stub so I could use ½” solid hardware for strength at the angle this needs to work. The bar nestles in the valley between the radiator and fan shroud when the hood is closed and moves down to near horizontal in front of the radiator when the hood is open. The drawing gives approximate dimensions, but you will need to keep bending the bar & bolting the hinges on until you’re satisfied with the overall fit. I modified the ends of the bolt-on radiator support (the one that the rubber hood seal is stapled to) by removing 4-5 “of the flange on either end for spreader bar clearance. You might try shaping the bar to miss the support entirely.
When you do final assembly of the hood plates and spreader bar, use a little Loctite on the screws as there isn’t much room to use lock washers.
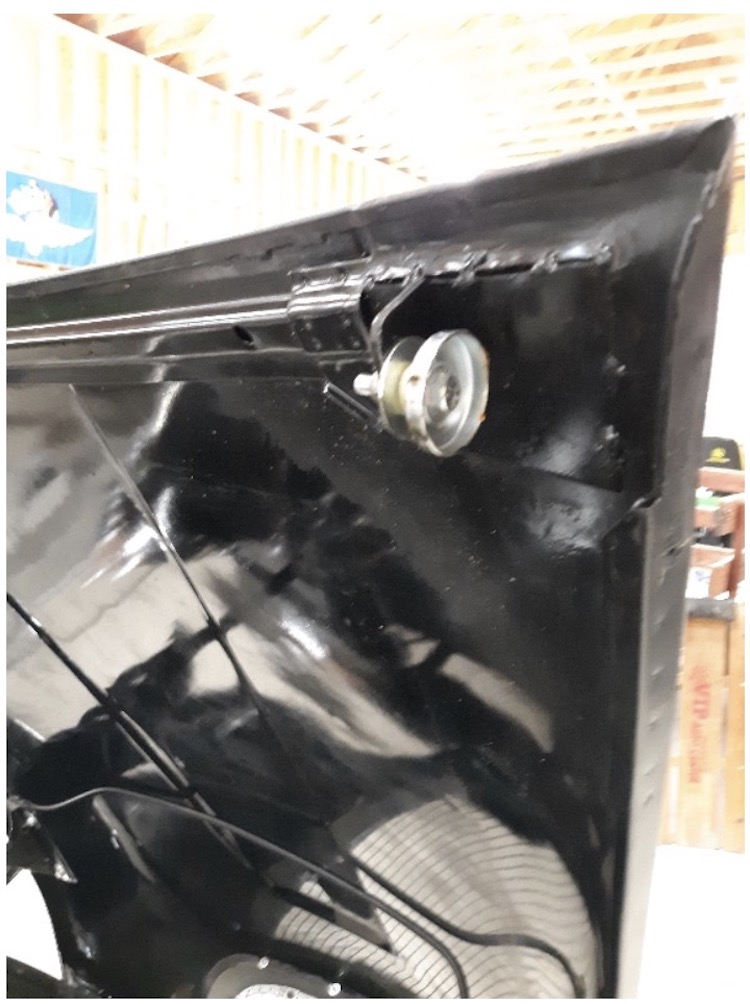
I, later enlarged the slots even more using a burr in an air tool to allow more fore and aft as well as height adjustment. I used the stock Buick rubber guides, actually lengthening the factory guide slots to the whole length of the rubber (not shown). I had to bolt the rubber to the steel guides (1/4” hardware) as they had to be separated for the cutting/welding operations. When mounting to the car, the two forward mount holes need to be shimmed with three flat washers to ensure the receivers are parallel with the car center line. Actually, plan on buying a box of 5/16” flat washers as you’ll need them!
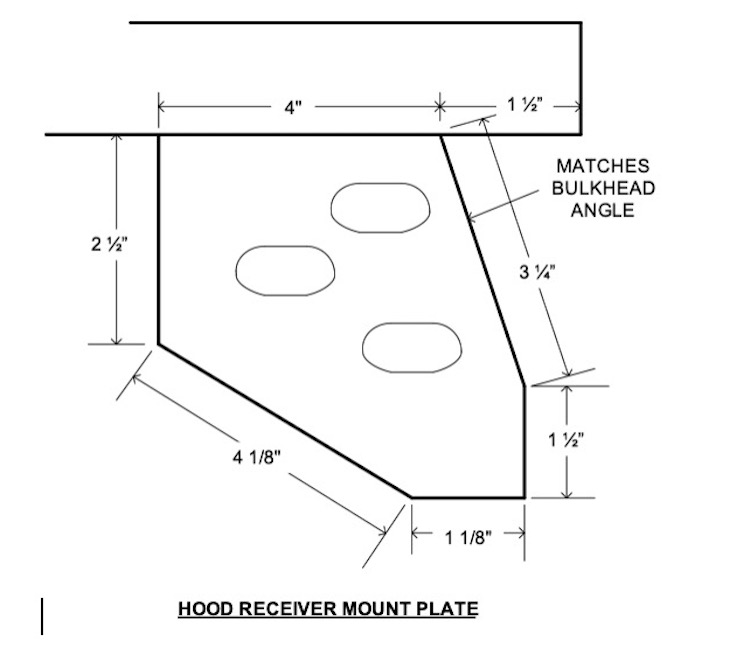
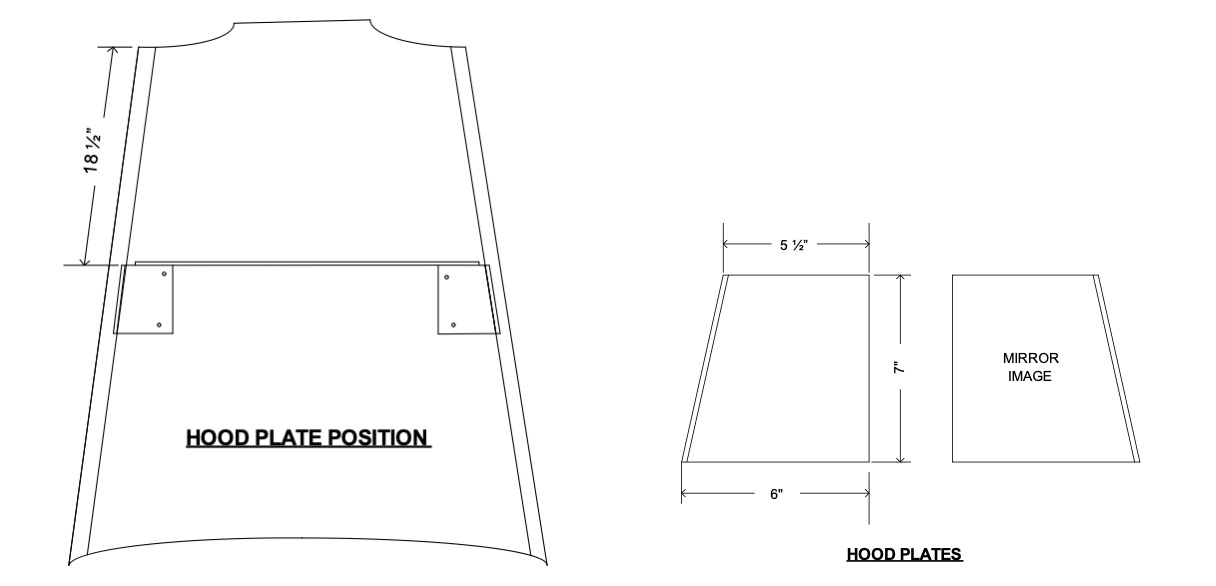
I did not weld them solid to the hood but opted to make a series of spot welds to keep the paint in place! My hood had the normal Studebaker stress cracks on each side and I carefully welded them up while I was in the business. Now that there’s no real stress, the corners shouldn’t crack again! The vertical tabs were cut, slotted from 3/16” plate and located on the hood so that they fell inside the of the two hood receivers. Here the best method is to use a long piece of angle iron that will lay across the fender trim and use it as your measuring layout tool. I did some careful measuring/guessing about slot height to mount plate distance and made the slots large enough to allow some height adjustment as well as decent fore and aft adjustment. I welded the tabs solid (one bead per tab) to the mount plates. The “rollers” are made using 5/16” bolts, 1 ¾” freeze plugs, a 3/8” length of 5/8” nylon tubing (or whatever you can find in a hardware bushing selection), flat washers and self-locking nuts. Adjust the assembly so the tubing spacer fits snugly inside the hooks with hood closed. Since the “rollers” don’t really roll, I use a bit of silicone grease on the rubber receiver runways.
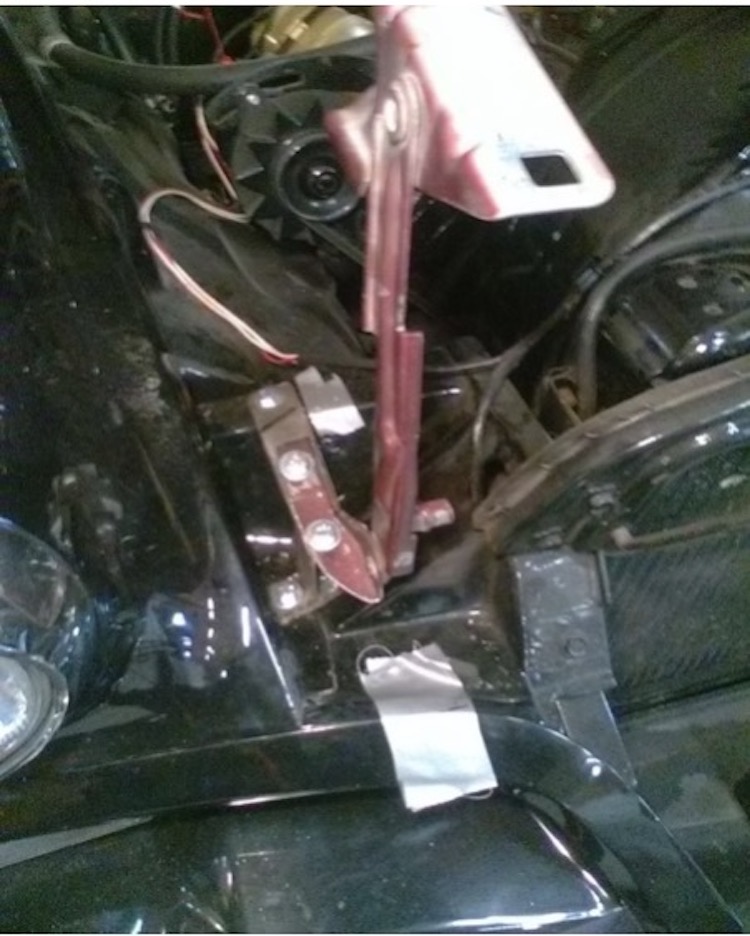
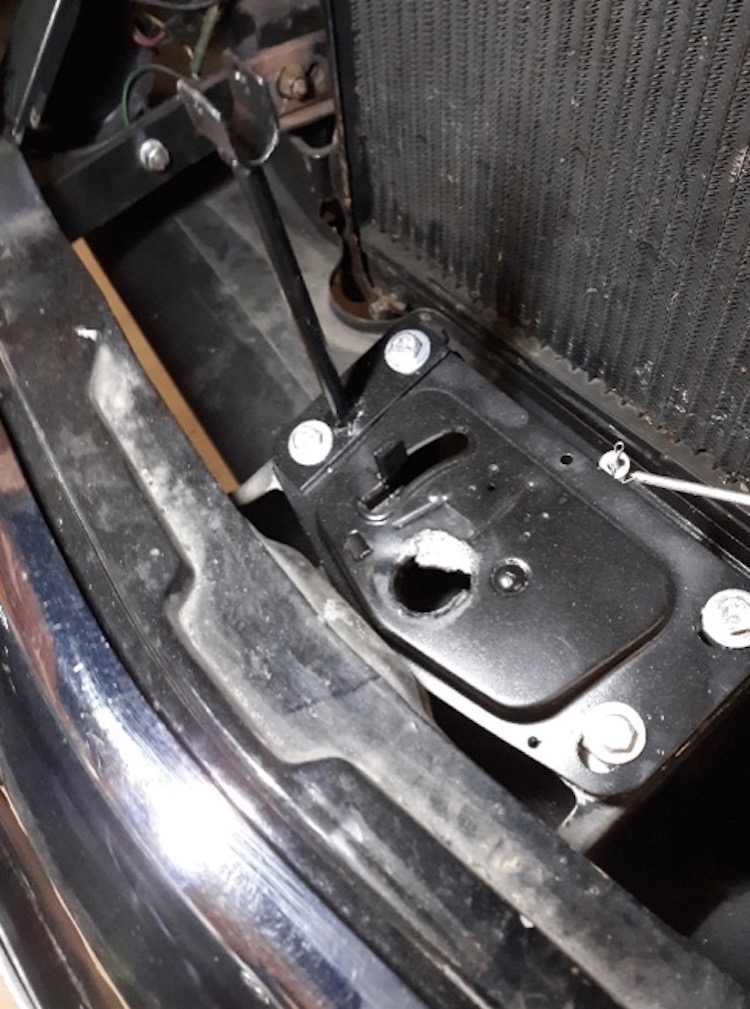
)First, drilled out the spot welds and removed the stock spring-loaded secondary latch from the base plate. ) Cut the secondary latch hook off the hood’s latch assembly mount. Don’t need a backup safety with hinges in front. )I mounted the base about 3/8” higher using ½” nuts as spacers, the factory shims and longer bolts. )I replaced the stock latch spring and bolt with a shorter one from a Lark (Thanks Fred!). The object here is to shorten the latch spring assembly so it won’t hit the front bumper/license plate. While you can grind a bit from the hood hinge stops to give you more bumper clearance, every time you do so you’ll move the open hood horizontal resting position forward and further away from the hood receivers! )I made a straight release rod from 3/16” round stock connecting the release lever to the primary latch release. The 1/8”x1/2” flat stock you see welded to the top of the bottom spreader bar stiffens it to let it take the weight of the open hood when it rests in the small kickstand sticking up at the left of the photo. Here’s another shot of the kickstand. )I would like a better hood rest, but I haven’t come up with a good answer yet.
LATCH SPRING
Plan on installing and removing the hood a bunch of times. While you could rig up a sling to use with your engine hoist, you will need to flip the hood over for some of the operations and lay it on a panel stand. I found manhandling it worked the best. I laid a 2x4 across the fender trim, in front of the windshield motor (air cleaner off) and laid the rear of the hood down first. I mentioned a last-minute mod of the hood hinge risers. I found that even though I had hoped that the hinge pedestals were high enough to allow the hinge risers to have a little vertical clearance over the top ridges of the inner fenders, I still had some interference that kept the hood from completely closing. I solved it by removing a 2”x1/4” piece from each riser where they lay over the high point of the inner fenders. The modified risers looked strong enough but to make sure I welded in two pieces of 3/8” steel rod along the “relieved” areas. I’m thinking about designing lazy “S” shaped replacements for the risers. Sure would be a Studebaker fix!
Front bumper Worth It? Although the process seemed a bit unending, I couldn’t ask for a better result. The action to open and close the hood is smooth and sure. Everything under the hood is easily accessible for maintenance. It has proven to be more than worth the effort. |