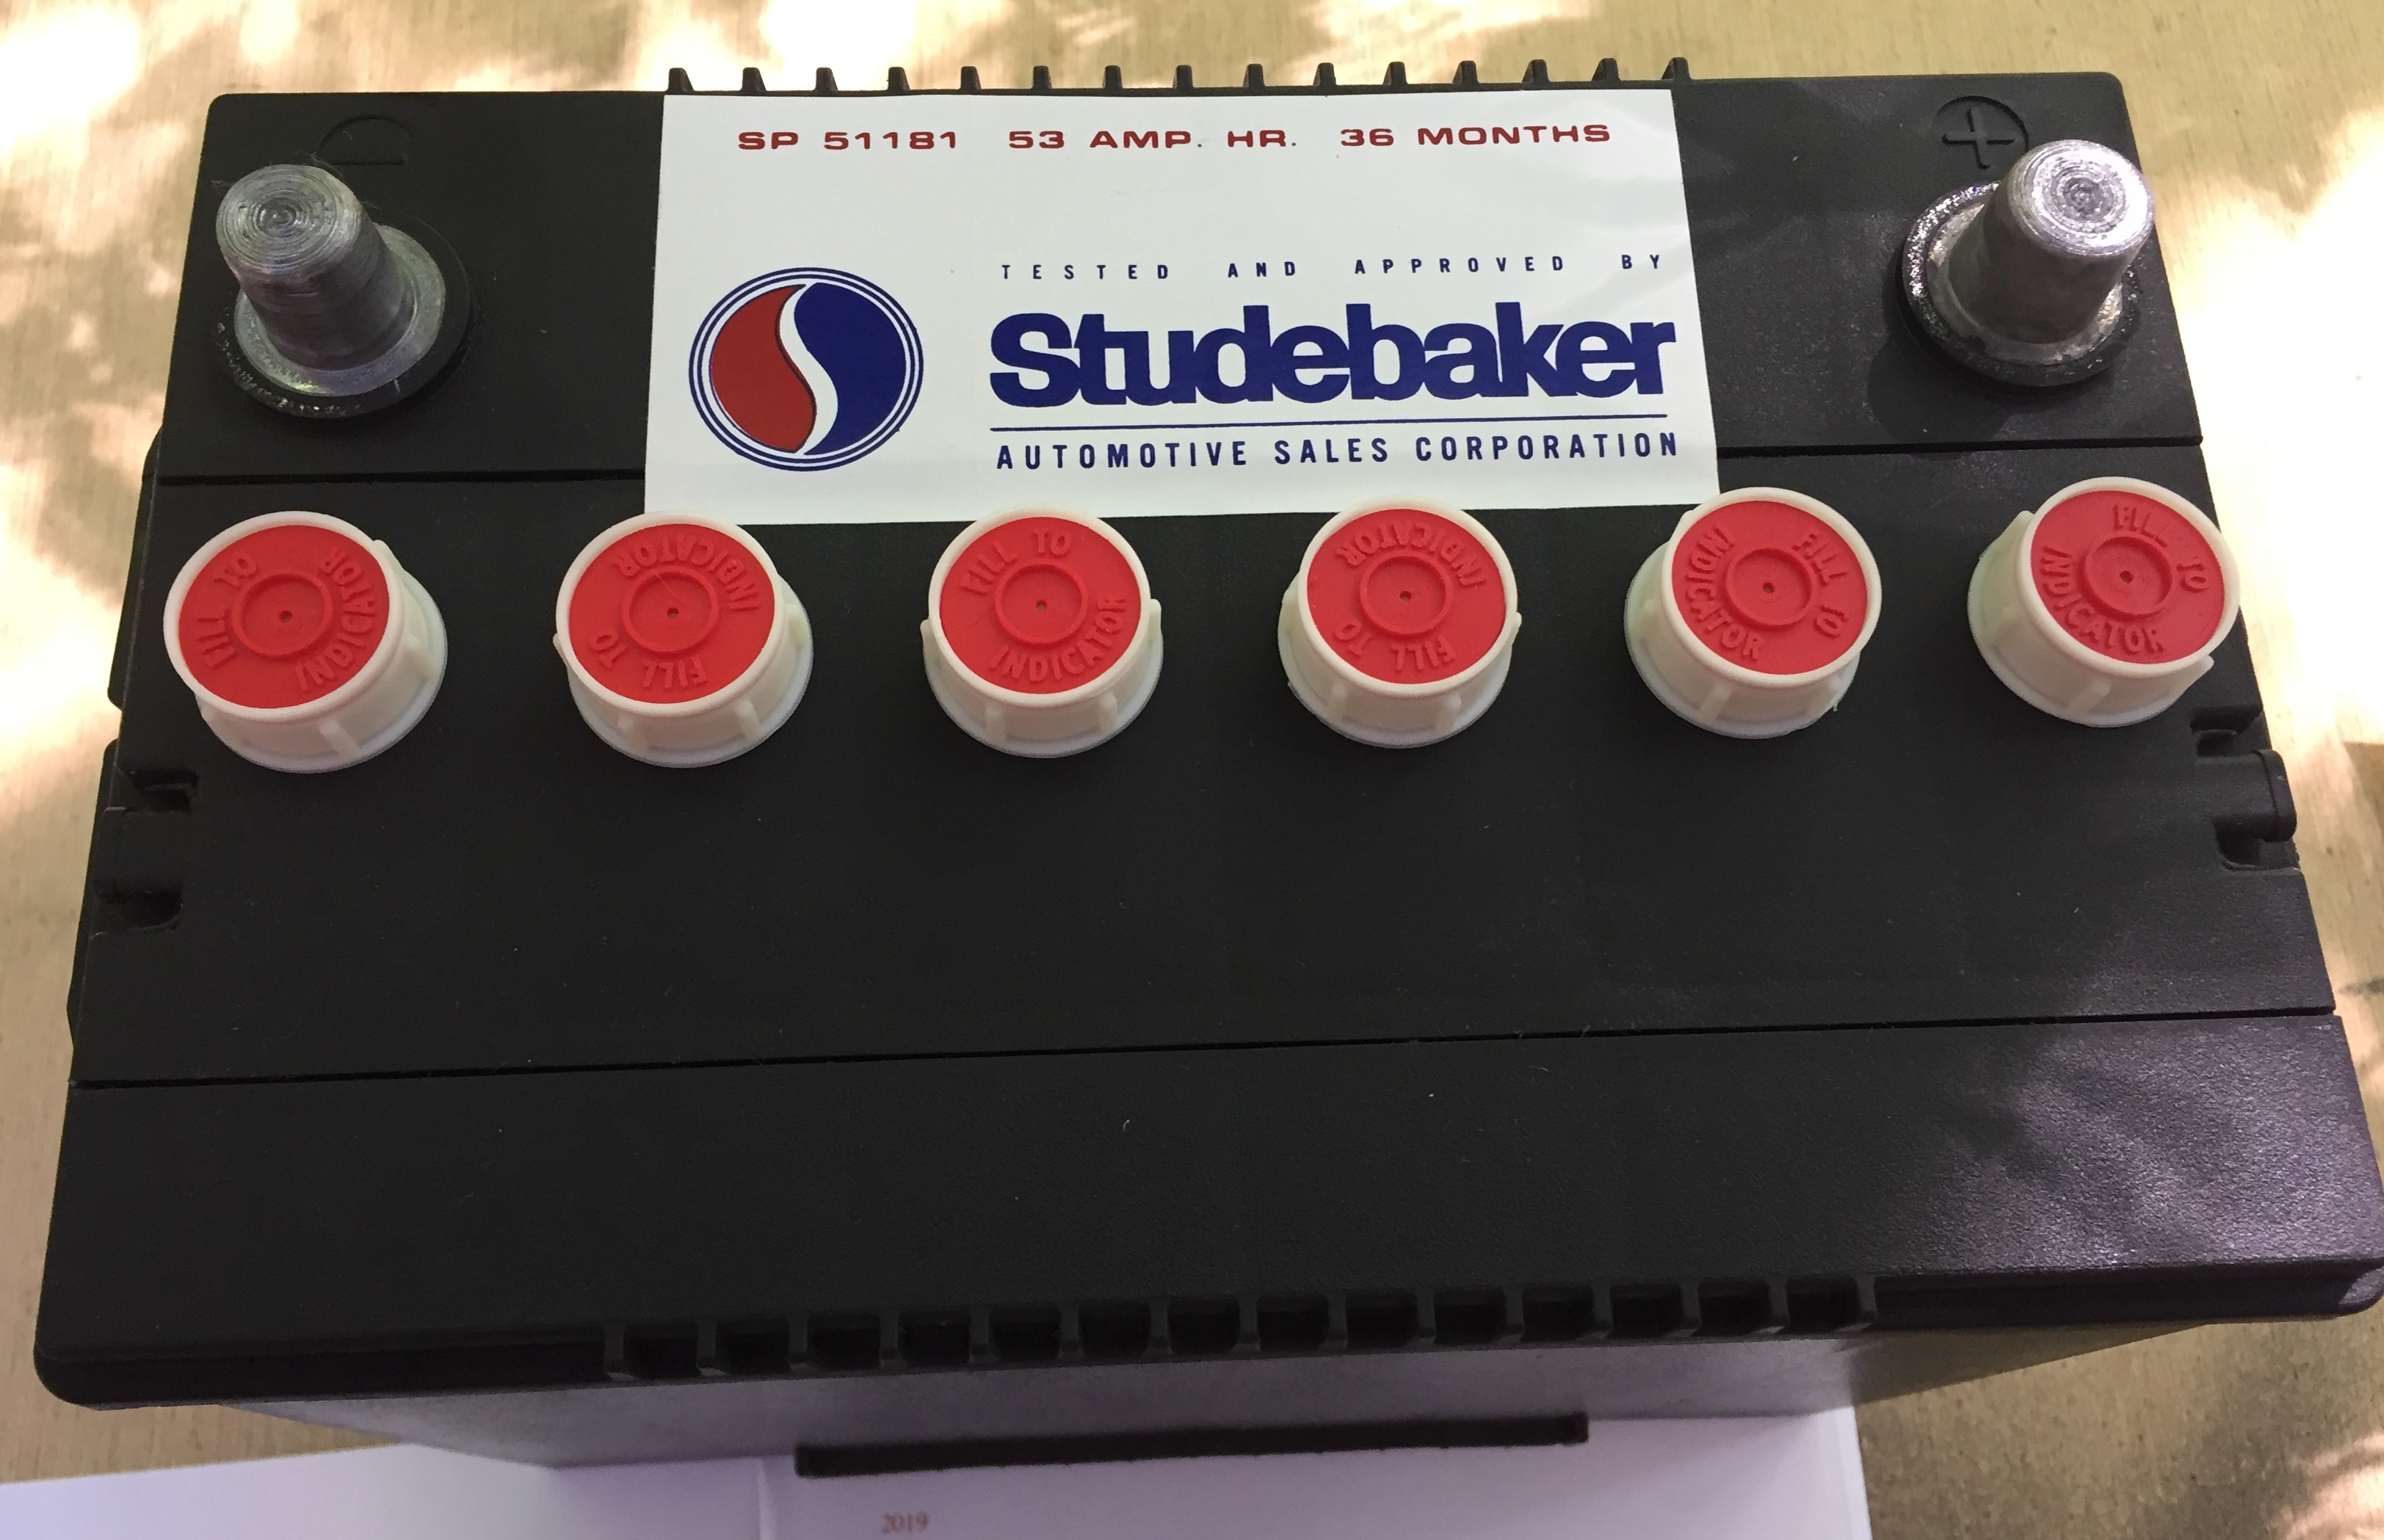
For the 1964 model year, Studebaker began offering a car battery with their name on it. Among other applications, it was used to fill the newly-designed battery tray in the ’64 Avanti, a space formerly designed for and filled by the unusually-shaped (long and narrow) 3EEE battery. While I haven’t researched it, I’m pretty sure that Studebaker did not actually manufacture the battery. Although the new battery looked pretty much like any other car battery, it did have a couple of distinguishing features. It had a nice big Studebaker battery label on top and it had six colorful white and orange filler caps. One of these original batteries is on display at the Studebaker National Museum (according to the Avanti Authenticity Manual). A picture of it can be found in the [1964 Avanti Accessories Manual – proper title?].
For some of the more popular collector cars (e.g., Corvettes), you can actually buy reproductions of the batteries originally in these cars (or even a false topper that makes most any battery look like and original). Probably needless to say, reproductions of vintage batteries are quite expensive, and I’ve read that they often don’t last all that long. One cannot, however, but a reproduction of a 1964 Studebaker battery. But you can easily and economically make your own. The Studebaker battery label is readily available for only a few dollars from Studebaker parts sources like Studebaker International and others. But the best, and most surprising part is that you can also get reproductions of the distinctive filler caps. One day recently while searching for vintage battery reproductions on ebay, I noticed a seller in Belguim, of all places, offering stick-on battery caps for Mopar muscle cars that looked strangely familiar. He sells them complete with a Mopar battery sticker so that a Mopar muscle car owner can dress up a modern battery to look like the one originally in their car. All they need to start with is a flat-top battery, i.e., one with no protruding filler caps. Then they can stick on the Mopar sticker and the stick-on filler caps and, voila, a “vintage Mopar battery” with the reliability and affordable price of a modern battery. The best of all worlds.
Well, the Belgian battery caps looked familiar because they look exactly like the Studebaker battery caps—orange center, white periphery, and the words “Fill to Indicator” embossed on each cap. So if we start with a flat-top battery, add the Studebaker battery sticker in the right location, and then add the Belgian stick-on caps in the right places, voila, a “1964 Studebaker battery.“
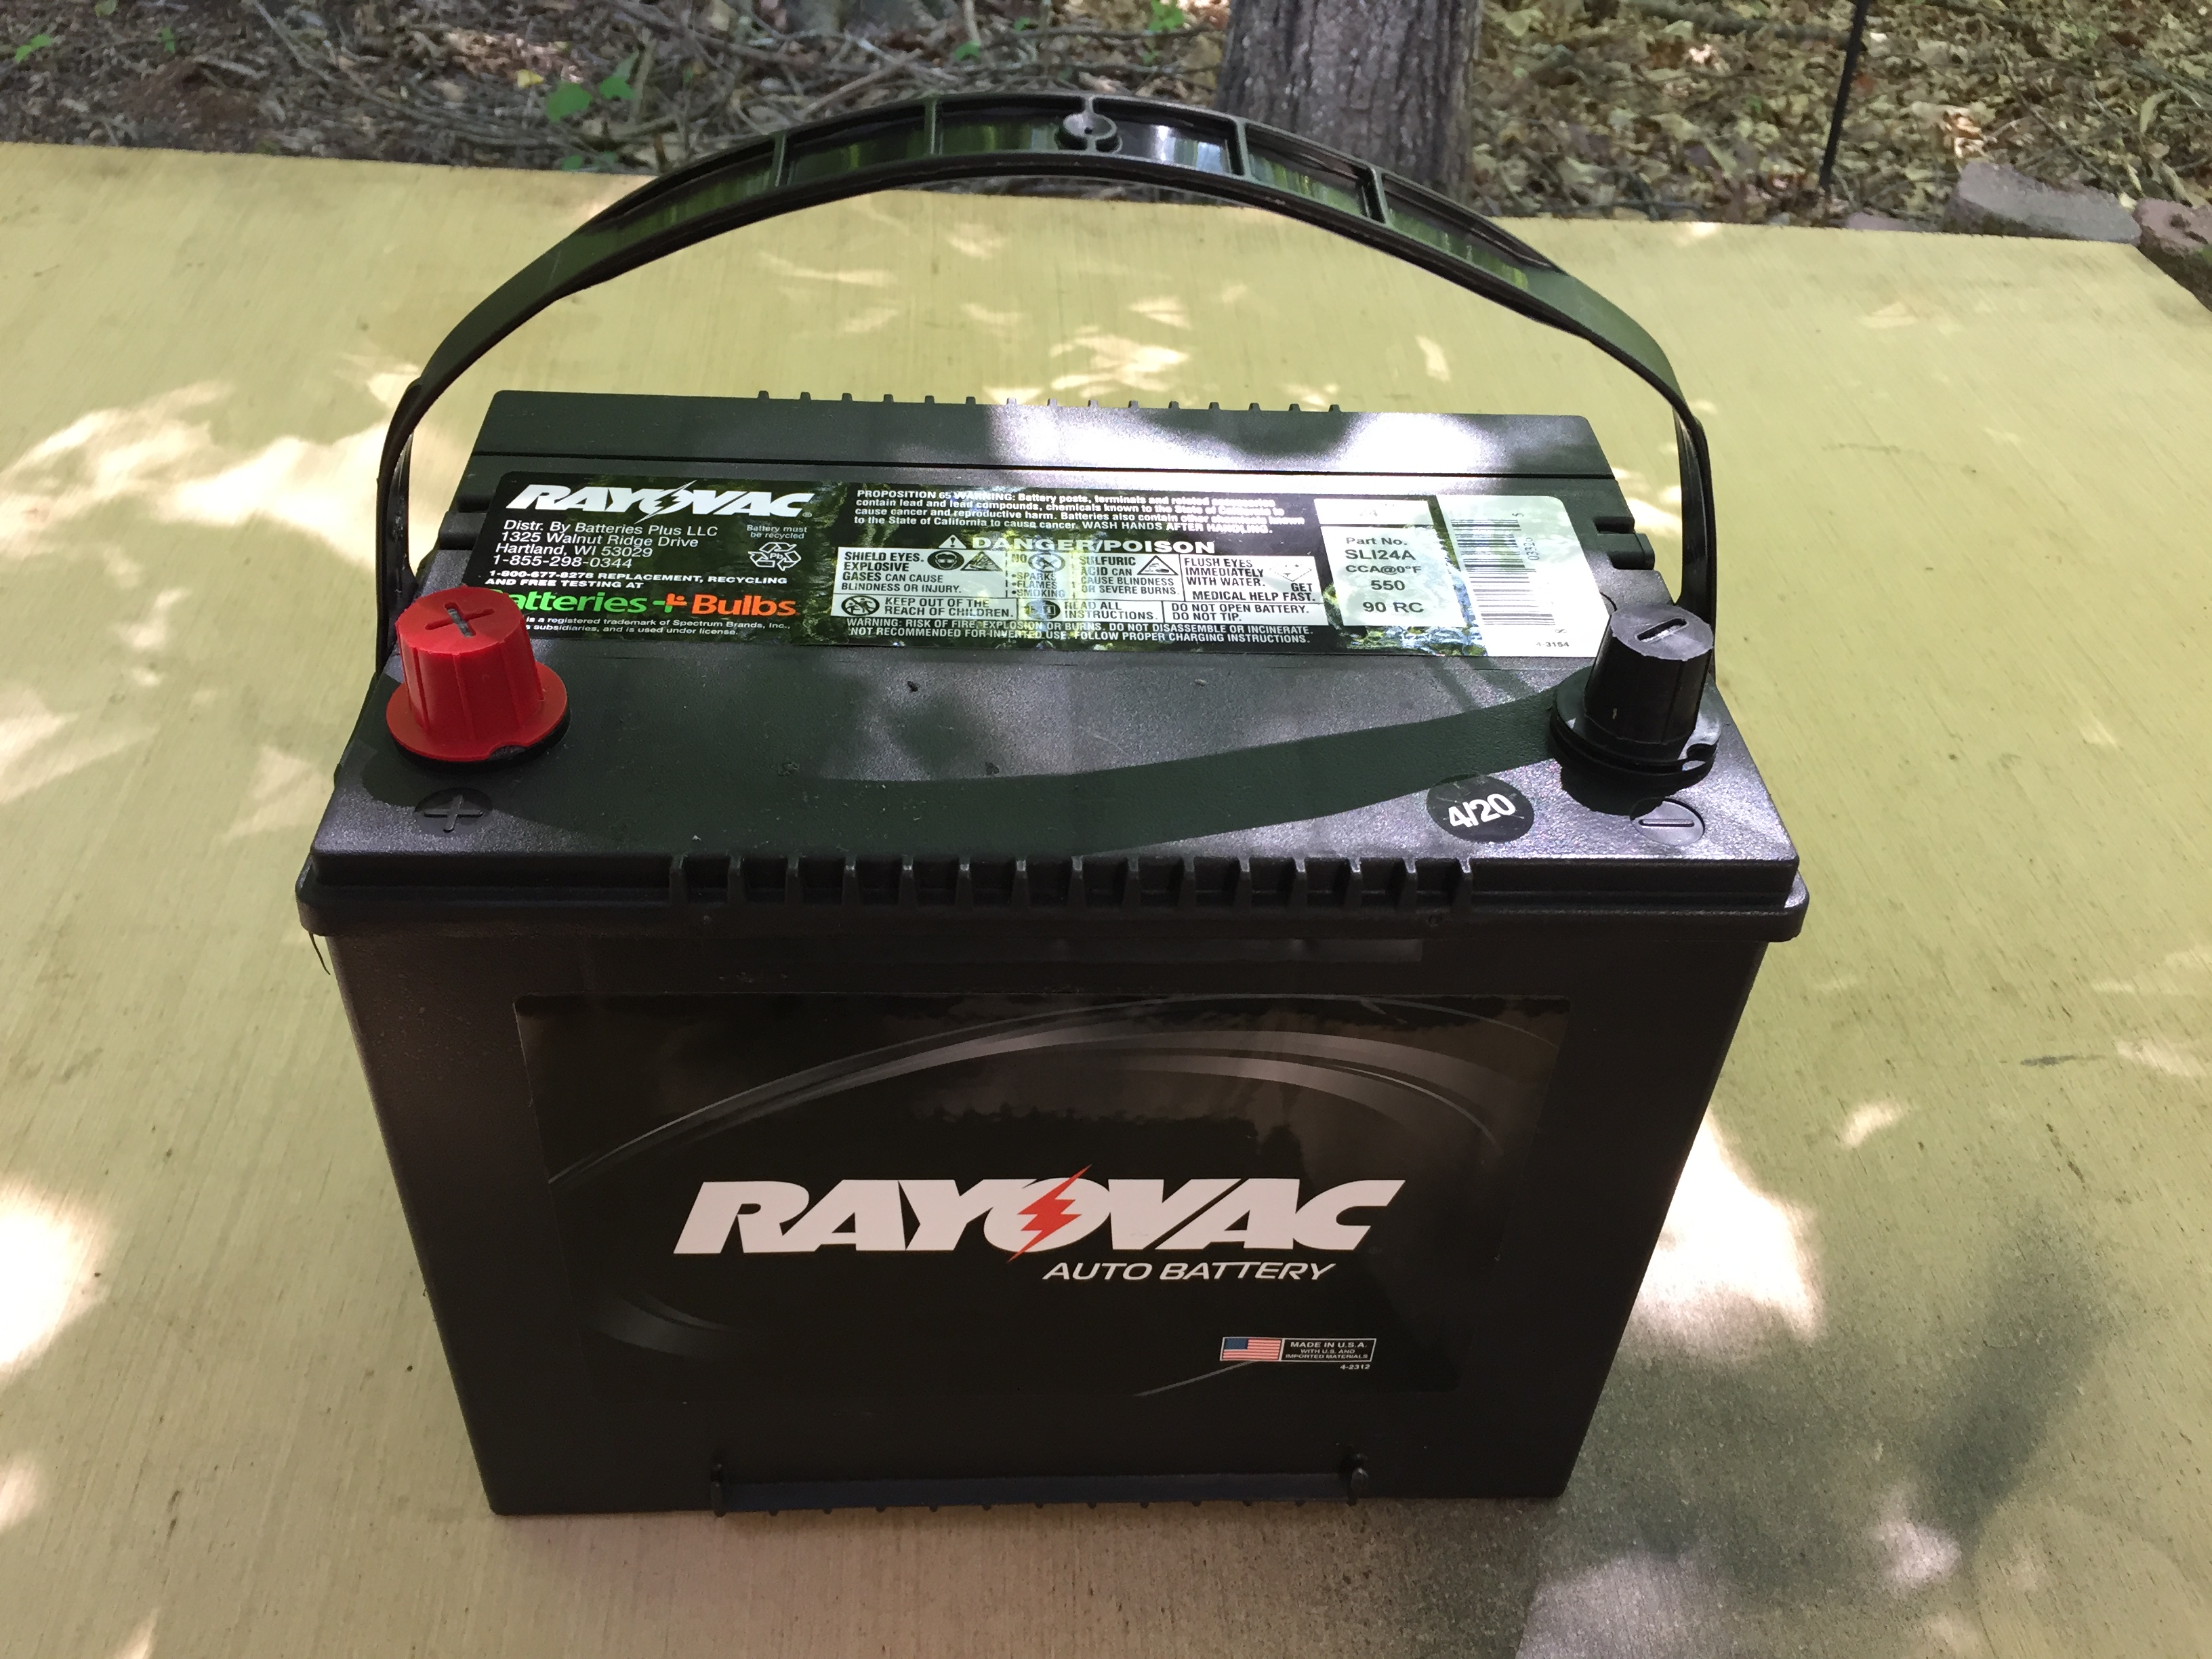
For a 1964 Avanti, there is probably any number of flat-top group 24 batteries to choose from. But the case needs to be black, which rules out some batteries that have white, green, or some other color case. And it should be devoid of any embossed brand names or other words on the case. In other words, it’s a battery that can be made completely anonymous by simply removing its brand name stickers. It should also have a conventional and simple cubic shape with relatively plain edges. I shopped on-line and based on appearance and price chose a Ray-O-Vac battery from Batteries and Bulbs. Unfortunately, Batteries and Bulbs is discontinuing the Ray-O-Vac battery and replacing it with Duralast. I preferred the Ray-O-Vac because based on the on-line picture its case design was simpler, like the Studebaker battery case. My local Woodbridge store had none of the Ray-O-Vac batteries, but I found that one was available in Springfield. And it was even cheaper (about $85), so I went there and got that battery. As it turned out, the battery case did not match the on-line picture. Instead, the Ray-O-Vac battery case looked just like the Duralast battery case, even though it was labeled Ray-O-Vac. I guess there are fewer battery manufacturers than we think. Oh, well, the battery bracket in the car covers most of the edge of the case that has the frillier appearance. So I went home with what was essentially a Duralast battery in Ray-O-Vac clothing. If you follow my example, you will most likely end up with a Duralast-labelled battery with the same case as mine.
I had previously ordered and had on-land a Studebaker battery sticker from Studebaker International and the six stick-on battery caps for about $23 from the Belgian Ebay seller (https://www.ebay.com/usr/weskcar?_trksid=p2047675.l2559).
The first thing I did in transforming my new Ray-O-Vac battery into a 1964 Studebaker battery was to remove the handle. Then I removed all the manufacturer’s stickers and cleaned the battery with grease and wax remover solvent. That left me with a pretty simple-looking, clean, black, flat-top battery. Comparing what I had with the picture of the Studebaker battery in the Authenticity Manual, I trimmed some white off the Studebaker battery label for a better fit and applied it in the proper location on the top of the battery. Conveniently, this battery has six small, flat (flush), filler ports in the top that are in the same locations where the six filler caps on the Studebaker battery were located. I used these as guides, together with a paper template that I made, to locate where the stick-on filler caps should be installed. I carefully applied the stick-on caps. Voila, for a total cost of about $111, a new, reliable, “1964 Studebaker battery.” After installation in the car, I was pleased to notice how the orange in the caps nicely complemented the orange radiator fan and the orange supercharger, to add just a little more bling to the engine compartment.
I also like the fact that when this new battery gets old and needs replacement, I will be able to remove the stick-on filler caps and use them on my next “1964 Studebaker battery.” Of course, I might have to spend another $3 on a fresh Studebaker battery sticker.
|