
Bob's Resource Website (2007)
(Powershift Trans)
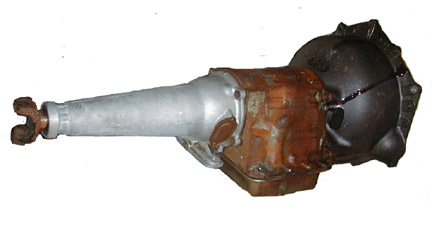
The transmission used in the Studebaker Avantis is called a Powershift', which is basically the same as the FlightOmatic, except the shift quadrant and valve body are different (PNDLR vs PNRD21) and it had more clutches and a larger HD front drum. It was manufactured by Borg-Warner and is described in the Stude shop Manual as an 'AS n-10', with the 'n' differing between applications. The transmission was carried through to the Avanti II and is called an FMX, however the torque converter and bell housing are unique to the Avanti II, in that it is mated to a GM engine.
In the late 50's - early 60's, the FX/MX was redesigned to cope with the horsepower
increases, being made available in the newly introduced muscle/pony cars. The guts of the HD MX were fitted to the smaller case, lighter FX transmisson.
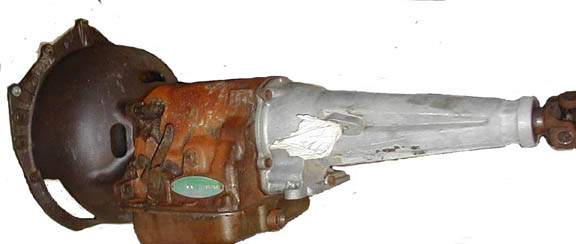
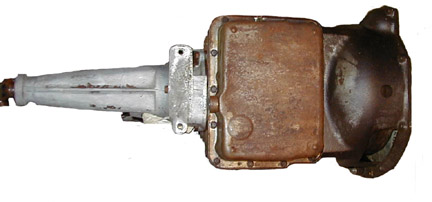
Views:(note: pics are from an Avanti II, so the bellhousing bolts up to a 350small block)
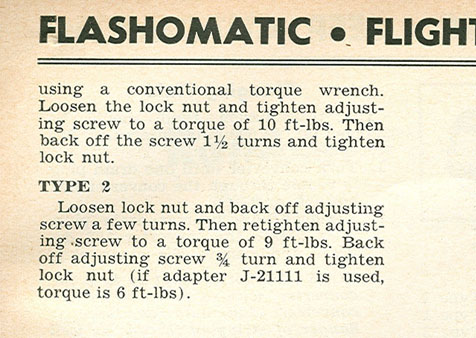
Band Adjustments for Borg-Warner Automatic Transmissions
(Excerpt from web - Sep 2002)
Rear band setting---unlock jam nut and back off adjusting screw untill
free travel is obtained. Tighten adjusting screw to 10 inch lbs--then
back off screw 1 and 1/4 turns. Lock jam nut.
As far as I know the IH tools [ SE-1908 & SE-1910 ] are just fancy torque wrenches that overrun at 10 inch lbs. One [ SE-1910, front ] has a 1/4 in spacer with it. Try looking up the adjustments in a trans. book under AMC.
Excerpt from 1965 Motors manual
REAR BAND INTERNAL ADJUSTMENT
The rear band is adjusted internally as follows:
Drain the transmission fluid. If it is to be reused, pour the fluid through a 100-mesh screen as it drains from the transmission. Reuse the transmission fluid only if it is in good condition.
Remove and clean the pan, fluid filter, and clip.
Loosen the rear servo adjusting locknut.
Pull the adjusting screw end of the actuating lever away from the servo body and insert the spacer tool between the servo accumulator piston and the adjusting screw. [cf2]Be sure the flat surfaces of the tool are placed squarely between the adjusting screw and the accumulator piston. The tool must not touch the servo piston and the handle must not touch the servo piston spring retainer.
Using a torque wrench with an allen-head socket, tighten the adjusting screw to 24 in. lbs torque.
Back off the adjusting screw exactly 1 1 / 2 turns. Hold the adjusting screw steady and tighten the locknut securely. Remove the spacer tool.
Install the fluid filter, clip, and pan with a new gasket.
Fill the transmission with the correct amount of fluid.
======================================================
Re: B&M Shift Kit - FMX Rear Band Adjustment
The internal adjustment requires a special tool that I don't have. I contacted TransGo tech support and they told me to do the following to internally adjust the rear band. It was easy to do, but I hope it works as I don't want to drop the pan again.
1) Remove the rear servo locknut.
re-adjust the throttle rod(s) that determine the shift points on your
transmission.
There should be two, one is at the rear of the driverside of engine. The rod
should be at 1/4 inch and there is an adjusting screw that holds it at a 1/4
inch. The other comes off the carb and can be lengthend and shortened by
unscrewing the lock nut and turning the heavier rod. Making the rod longer
holds off your first shift, and your second shift. Making it shorter makes the
first shift sooner, and a bit harder.
February 29, 2012
The FMX
The FMX is a standalone cast-iron three-speed automatic that was in production in various forms beginning in 1950. There was the large-case MX Ford-O-Matic and the small-case FX transmissions prior to '66. When Ford introduced the C6 in '66, these old ironsides were dropped in favor of the newer, lighter C4 and C6 transmissions.
When C4 and C6 production shortfalls created challenges in the late 1960s, Ford turned to the tried and proven FMX with beefy MX internals inside the smaller FX case for the 351 engines that arrived in '69. It was a rugged and dependable three-speed automatic. Some companies, such as Trans Go, still offer rebuild and performance kits for the FMX today.
What makes the FMX different than the C4 and C6 is its Ravineaux twin-planetary gearset design, which was also employed in the later AOD, AODE, and 4R70W automatic overdrives. The Ravineaux planetary design consisted of fore and aft planetary gear sets in a single package, which is what makes it different than the separate Simpson planetaries used in the C4 and C6. Aside from this difference, the FMX operates much the same way as a C4. Band adjustment is similar, with a setscrew and locknut like C4 and C6. FMX intermediate and low-reverse servos are located inside the case.
Throttle Valve/Vacuum Modulator
The C4, C6, and FMX operate off the same basic principle of throttle valve operation. The throttle valve, also known as the vacuum modulator, gets its signal from intake manifold vacuum, which is controlled by engine load and throttle position. With the accelerator pressed, manifold vacuum is low. With your foot off the throttle, manifold vacuum becomes high. Low manifold vacuum (open throttle) causes the throttle valve to modulate high transmission control pressure. High manifold vacuum (closed throttle) causes low control pressure.
Pressing the accelerator pedal causes the engine to rev and manifold vacuum to drop. This is when the transmission's clutches and bands need high application pressure for better power transfer. Nailing the accelerator does two things in your transmission—high control pressure and delayed upshift. Let up on the accelerator and manifold vacuum increases, which causes reduced control pressure and a smoother, more immediate upshift. By the same token, when you're slowing down, you want reduced control pressure, which causes smoother downshifts.
As a rule, throttle valves are factory adjusted and don't require adjustment. In fact, original factory-installed throttle valves cannot be adjusted. However, service replacements are adjustable. Just follow your Ford Shop Manual instructions. One full turn clockwise increases control pressure 2-3 psi. One full turn counterclockwise does the opposite. Make your adjustments in baby steps (quarter and half turns) and take a test drive.
Think of your transmission's hydraulic control system like a finely tuned watch. We want aggressive upshifts during wide-open throttle, yet smooth and unnoticed during deceleration to a stop. Throttle valve operation works hand in hand with the governor and kick-down system to get shift points close to where they need to be. It takes patience and a feel for shift points when you're adjusting the throttle valve. We suggest the use of a pressure gauge for best results.
Editors Note: The Powershift uses the same filter kit as an FMX
The FMX was a transmission, manufactured by Ford under license from Borg-Warner, It was introduced in the early 60's as a redesign ( See Below) of the Borg-Warner FX/MX transmission that many auto manufacturers had been offered since about 1951. (NOTE: the FX/MX were developed by Borg Warner for Ford, after they were denied cooperative use of the Detroit gear transmissions (DG250, etc), by the Studebaker Board.) It is a very strong transmission and was even used it behind milder big-block applications. The Borg Warner FX/MX was used, pretty much, across the board as far as models of cars go. Other names for it were Lincoln - Turbodrive, Ford -Cruise-o-matic / Ford-o-matic, Mercury Multimatic / Merc-o-matic, Nash & Rambler - Flashomatic, Studebaker & Packard - Flightomatic.
It does have some aftermarket support, torque convertors, HD
clutch packs, and shift kits, but it's limited as to how much you can
increase it's strength. This is so for several reason, but primarily
because the FMX has a cast iron case that weighs a ton so it was never
a choice for drag racing.
AMC used FMX trans in the Ramblers. Studebaker put them in Hawks, on special order, and in Avantis with different valve bodies than everyone else. The pan gasket tells it all tho, just match this outline with your's and it will prove it's the 'FMX"
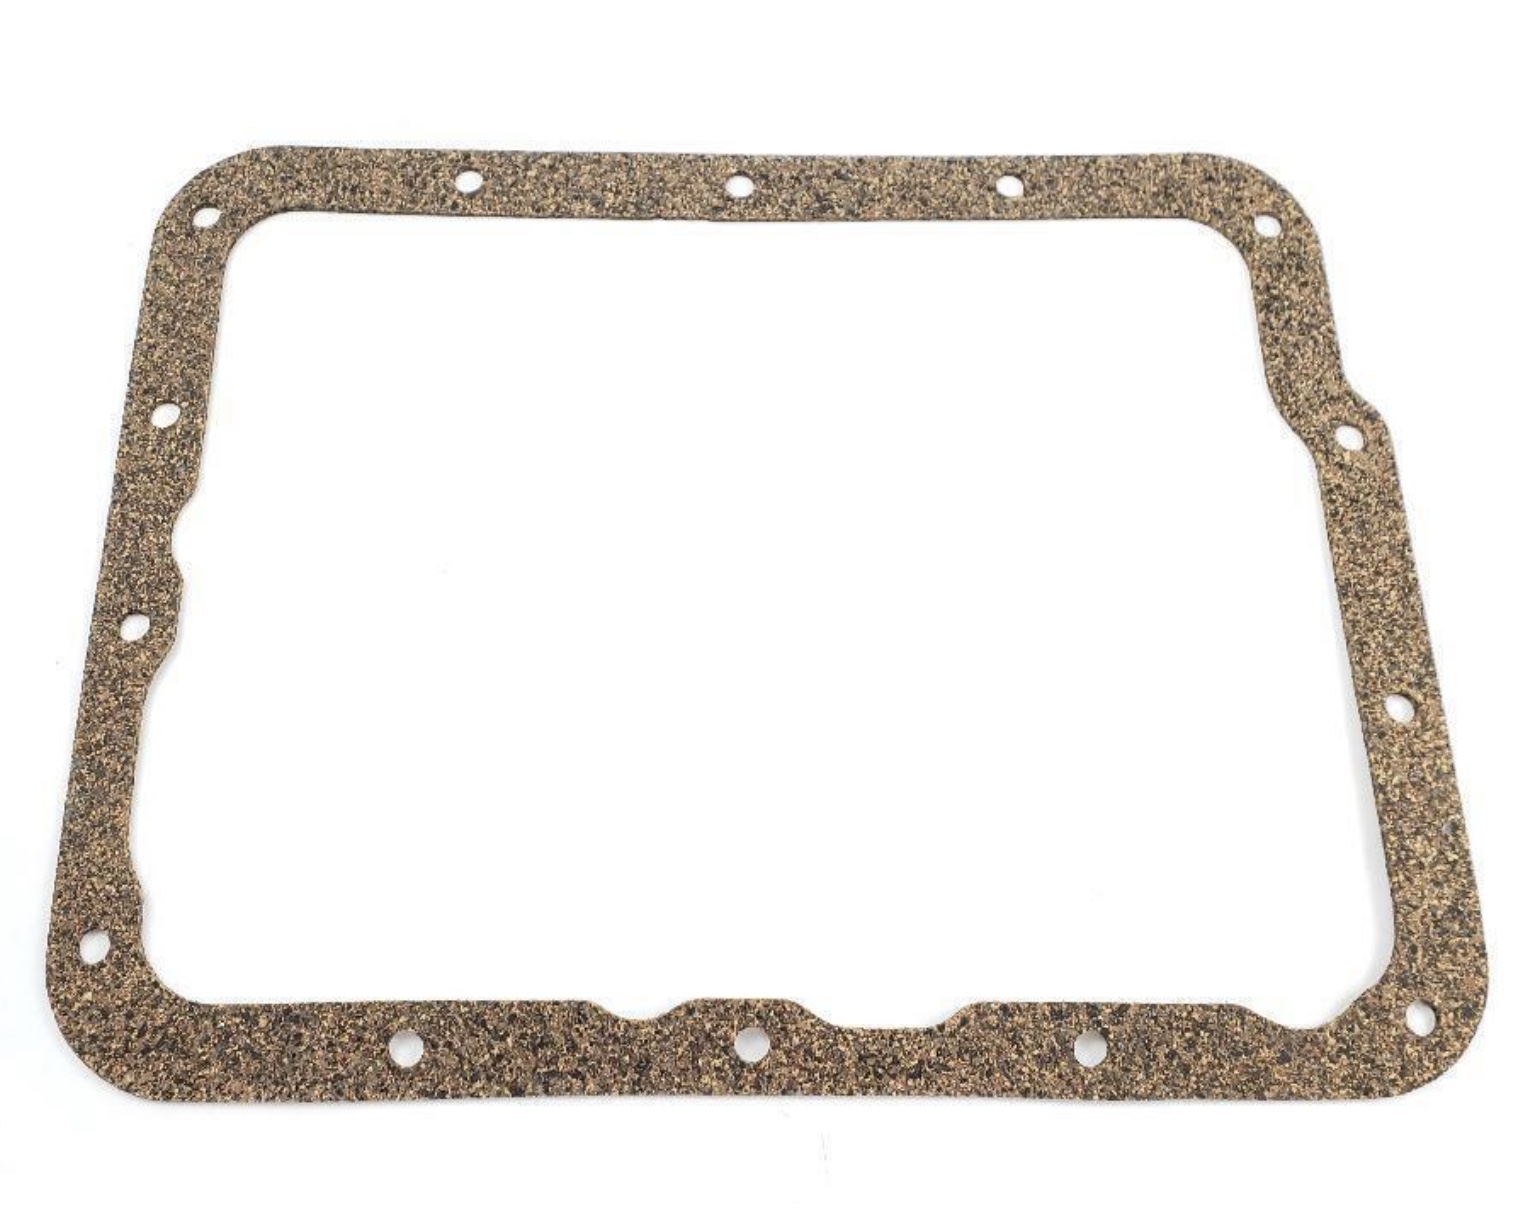 Pan Gasket .......................
 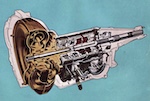 FMX Tech Article
 Left
Left
 Bottom
 Center
Adjustments
(with Pan off)Front band setting--Back off adjusting screw and put a .250in spacer between the adjusting screw and piston pin and tighten the screw to 10 inch lbs. There should be a one-way clutch spring on the adjusting screw that will automatically adjust the front servo. Older units had a lock nut.
[ Tighten lock nut to 20-25 ftlbs ]
Band Adjusments for Borg-Warner Automatic Transmissions - Top
Re: t-409 band adjustment tools
Dana Fisher -- 1/10/2000, 3:33 p.m.
The T-409 automatic transmission is a heavy duty cast iron unit made by
Borg-Warner. AMC called it a Flash-o-matic. The T 39 and T 49 are the same just not as heavy duty in the servo and planetary area. This style goes way back to the 50's with IHC T26 T28. They got better over the years but were quite heavy and I think Warner quit making them in 1971 or there abouts, IH being about the only user. Ford also used this design but used linkage for the kick-down not electrical [ Ford Model FMX ]. I think Japan even copied it but shrunk the mold somewhat.
Adjustments :
Front band setting--Back off adjusting screw and put a .250in spacer between the adjusting screw and piston pin and tighten the screw to 10 inch lbs.
There should be a one-way clutch spring on the adjusting screw that will automatically adjust the front servo. Older units had a lock nut.
[ Tighten lock nut to 20-25 ftlbs ]
They used the same trans called type 12 with 390 and 401 engines about
1969--1971. Hope this helps.
Dana
TYPES:
Stude 58-64 V8 Type 1
Stude 63-64 6 Type 2 Model 35
Page 539- 540
December 2012
December 27 2011, 8:29 PM
2) Tighten the rear servo adjusting screw until it is snug.
3) Back the adjusting screw out 7 turns.
4) Install and tighten the locknut.
Notes on
Flight - O - Matic Adj
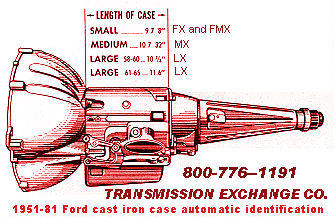
Identify your FMX
Jim Smart
![]()
Some technical opinions are my own from experience, other informational data is from online sources with credits when available and while care has been taken to be as accurate as possible, it is offered only as a guide and caution should be exercised in the application of it.