Great pic's... Good progress!
A good driveshaft shop can lengthen your shaft pretty reasonably.
Jeff[8D]


Great pic's... Good progress!
A good driveshaft shop can lengthen your shaft pretty reasonably.
Jeff[8D]
Thanks Jeff, its coming along.
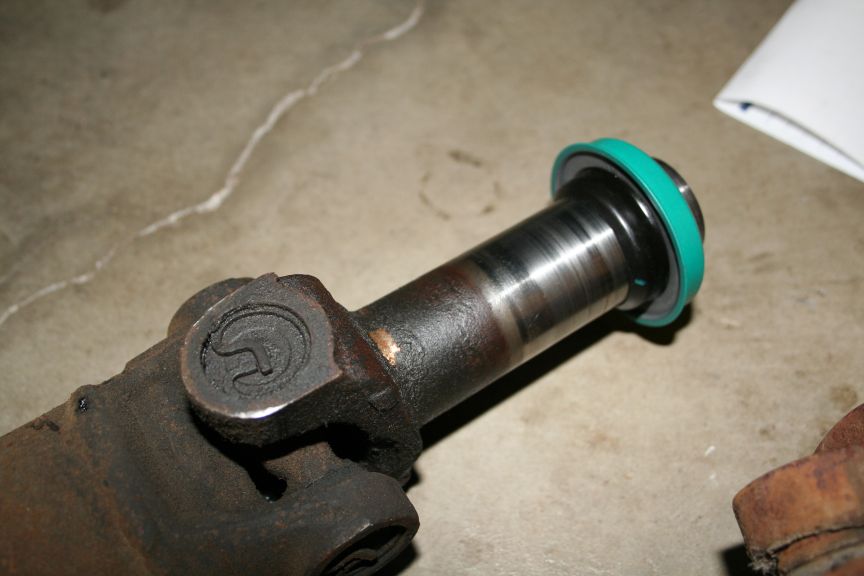
I found a seal that fit the Stude/Ford yoke and also fit the TKO tail
shaft, its Napa part number 14978 (see updated seals picture):
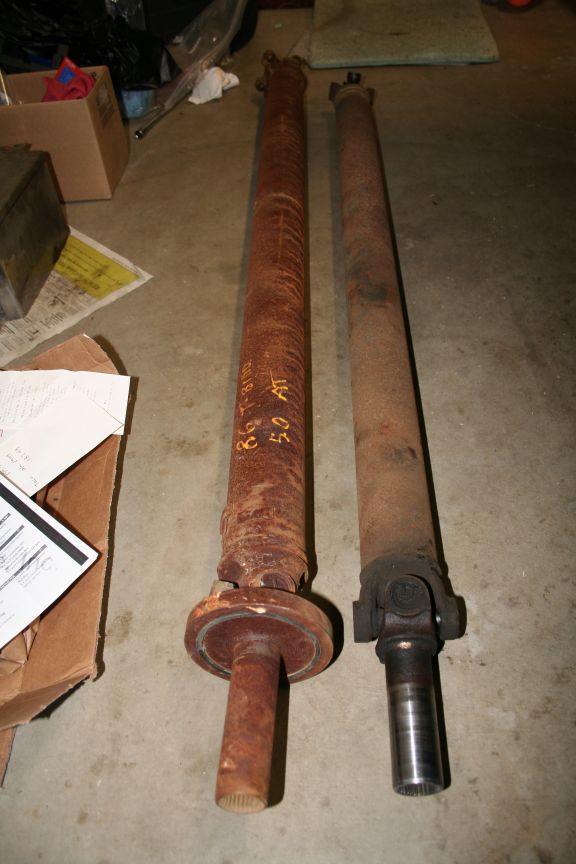
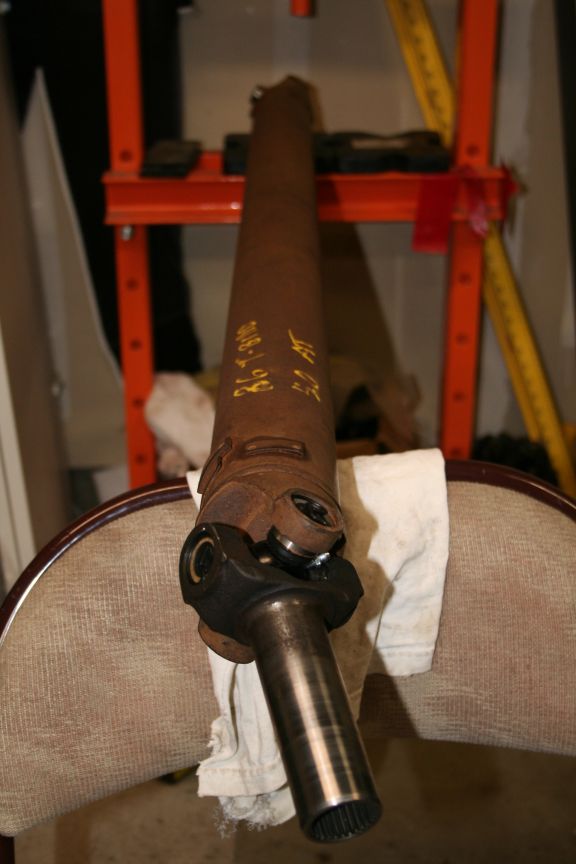
The difference in trans lengths meant I needed a 3-1/2" longer drive-
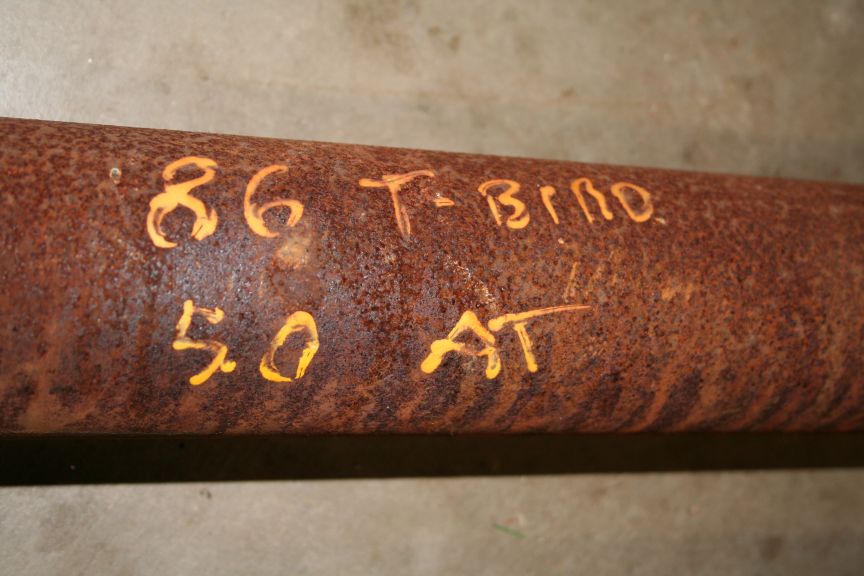
shaft. I went to the local salvage yard and picked up this rusty one.
Its a 1986 Ford Thunderbird driveshaft for a 5.0L with auto trans. The
yoke is the same spline as the small spline TKO.
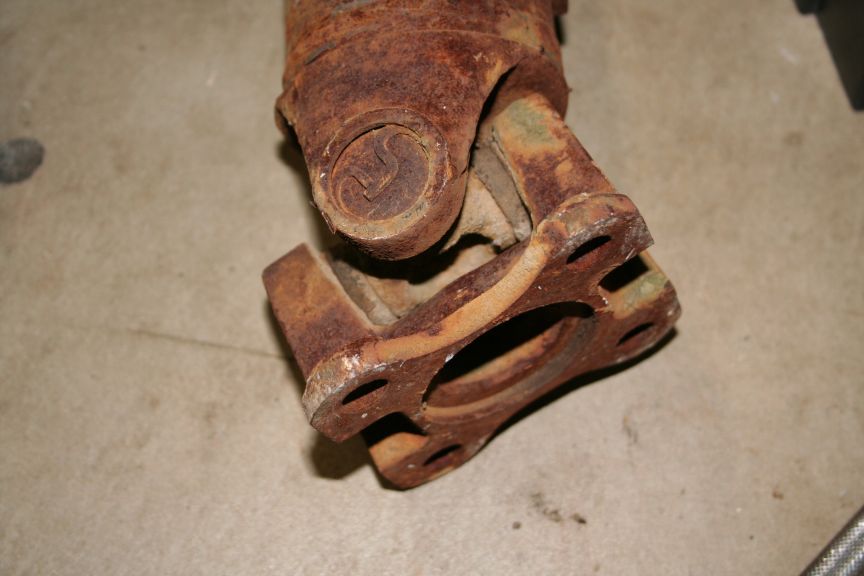
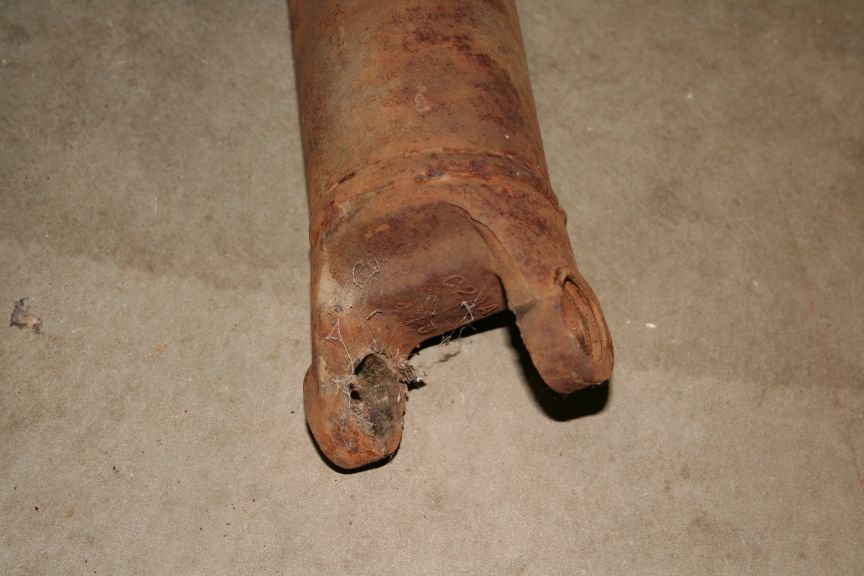
As you can see the yoke isnt useable, but the driveshaft uses and same
universal joint as (early) Studebaker (pre-'63), so I transfered the
Stude yoke to the Ford driveshaft. The Ford driveshaft could be used
as is, as long as you remove this piece :
Then it looks like your normal driveshaft.
I took a wire brush to the driveshaft, cleaned off most the rust and
then oiled it. I thought about painting it, but for 35 bucks, I just
let it stay rusty. I might source a better condition one later now
that I have a model. The driveshaft is 49 inches from universal to
universal and fits perfect. Keep in mind a Hawk would be different.
A couple high performance 15 dollar universals and I have a driveshaft.
Tom
Looking good. Its nice to know the TBird drive shaft is the correct length, that will save a couple bucks and make the install quicker.
If you would have lowered the rear of the engine by undoing the rear cross member, would the trans have fit without the cutting??
When is the test drive?
WOW that is coming along really nice!
Randy Wakefield
1955 President
"For the future that we wait..."
Yah, judging where the tailshaft ended up, its possible that the trans
could be bolted to the adapter and the engine lifted into place. But,
that means the engine would have to drop a LOT, and would require the
removal of the distributor, coil, stainless steel, clutch rod, exhaust
and other things you know would become apparent. Then if you want to
remove it, you have to go through that again. I am one to try to keep
a "Factory" simplicity to things, since the trans came out this way, I
want it to go back in the same way.
The Speedo cable is the next big herdle, Studes use the "old" screw on
type end at the gauge. Ford stopped using this style in 1969. They
did, however, use the same trans end on passenger cars, and the TKO is
included in this group. The stock Stude speedo cable is 67" long. If
you check the NPD (National Part Depot) Mustang catalog, the '65-'66 is
64-15/16" long for the V8 4 speed manual trans. Since the hole in the
trans is further forward, the Mustang cable is perfect length. Its a
regular stocked part and includes the o-ring and clip for $21.50.
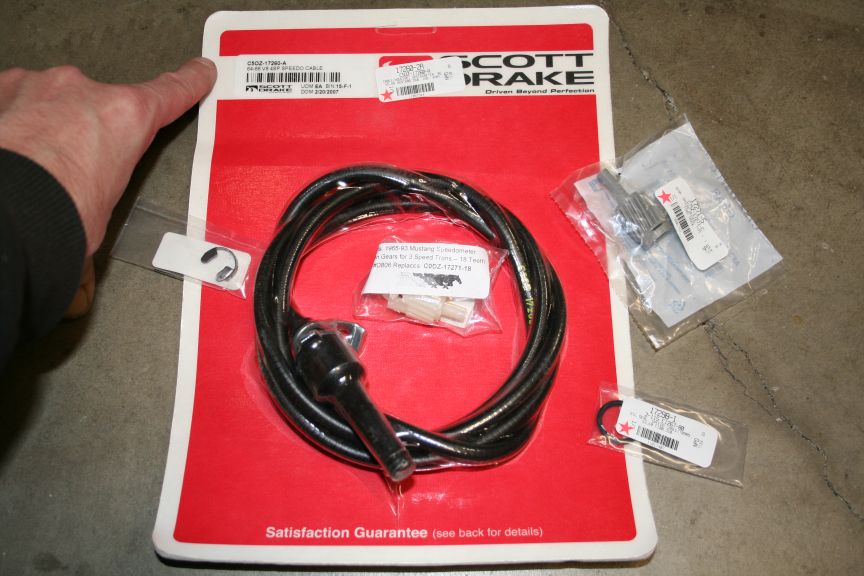
I bought two gears, you see in the picture, one white/one gray. One is
for a truck, the other is for a Mustang, you need the Mustang. The one
you want is the "Type 3a", with the short post. You need a RH, and it
is helpful to use the formula on page 113 of their catalog to figure
out how many tooth you need. In my case, a 245/45R17 with 3:31 gears
and a TKO requires an 18 tooth gear. You need the clip to hold the new
gear onto the new cable, and a 1/4-20 x 3/4 bolt (lock washer/washer).
Cable is NPD# 17260-2 @ $21.50
Gear is NPD# 17271-13A @ $5.75
Clip is NPD# 17292-1 @ $.50
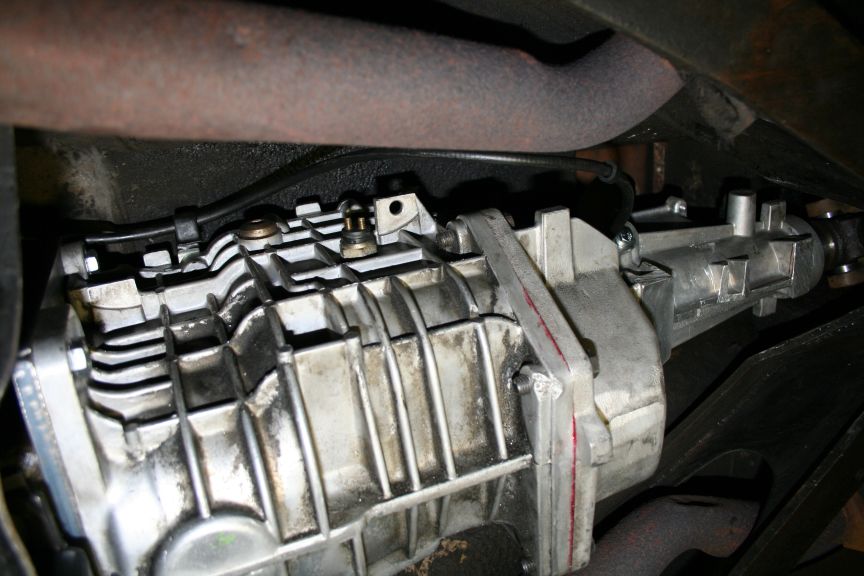
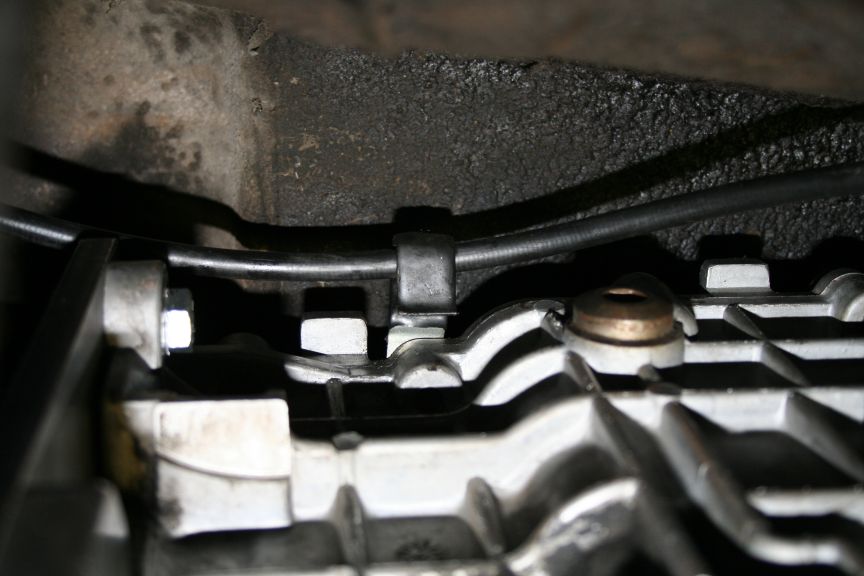
I routed the cable up to the clip on the top of the trans, and down to
the hole, this picture LOOKS like its up against the exhaust but it is
about 3 inches away - against the trans tunnel.
Tom
Tom, everything looks great. Looks like you should have in on the road in a few days. I think you will be thrilled with the preformance of a 5 speed. Was that a 3 speed you had in there before? It didn't look like a t10 from the pictures, and I only saw 2 levers. Have fun....
Dan Giblin
Cincinnati, OH
Tom, very impressive! You did your homework on the detail. It looks as if the install could be done quickly, even at a service garage, now that all the parts can be supplied right off a shelf. How's the shifter location look? Did you have to do anything to Dan's pilot sleeve adapter after you pressed it on? I assume the size was right?
As Dan probably told you, I have a six speed on the floor, adapted to the Stude bell housing and ready to install. The problem is that it looks realy big for the tunnel. I've been hesitant about starting as I thought I might have to abandon the project in the middle. But, now if it doesn't fit I can easily move to the five speed. After seeing the installation I'm tempted to scrap the six speed idea anyway and just get on with the straight forward five speed install.
Both you and Dan have done a nice job on this one and believe me, you will love the five speed in the Avanti!!!....and so will your wallet when it comes time to put gas in it.
Tom, I took a look at the 3550 I have in my garage and there were no additional mounting brackets for a torque arm. I thought that was strange so I climbed under the avanti (TKO trans) and there were remenets of the brackets. The previous owner must have ground or cut them off. Did a really nice job too, I never noticed until now. This is news to me. They must have made different extension housings for differnent cars. That explains why you had all that trouble getting it in there. Let us know after the test drive.
Dan Giblin
Cincinnati, OH
Just got back from the hospital, shes resting peacefully.
Thanks Nels, I prefer to use off the shelf parts, my Cobra brake setup
should make that obvious.
The shifter stick location LOOKS like 2 inches offset from TKO to stock
Avanti location. In other words the TKO stick must move back 2 inches.
The sleeve was tight, it wouldnt go into the bushing at first, I used
my calipers and measured the Stude input shaft : .747. Then I checked
the installed sleeve : .749. I used PB Blaster on wetsanding paper to
"turn" the shaft down to .748, and it went together. It might have a
slight stretch due to being heated twice. It was Dan's second try, so
hey .. its all good! It might have even just been a burr, he made it
clear to test fit both the bearing retainer AND sleeved input shaft in
the bellhousing/pilot bearing respecitively, BEFORE assembling it.
I still have to fill the trans with Dexron III, get the shifter bolted
on, and the shifter stick figured out. I was thinking that HAD I known
that the extra mounts needed to be cut off, I would have done it at my
work and smoothed everything off, but the left over ribs dont look bad.
Tom
quote:Originally posted by nels
Tom, very impressive! You did your homework on the detail. How's the shifter location look? Did you have to do anything to Dan's pilot sleeve adapter after you pressed it on? I assume the size was right?
Tom, are you sure you dont use GM syncromesh in the trans???? That is what I use.
Dan Giblin
Cincinnati, OH

Or better yet ...Redline MTL ....GREAT STUFF !quote:Originally posted by gibbsr1
Tom, are you sure you dont use GM syncromesh in the trans???? That is what I use.
Dan Giblin
Cincinnati, OH
1961 Hawk 4BC,4-SPEED,TT
Lewisville,NC
GM syncromesh is recommended (and so is 91 octane on my Impala SS), but
it also says you can use Dexron III. 87 Octane has worked fine in the
Camaro and the Impala for years, so it might just be hype. I was told
that Dexron works fine, and if you check the Mustang forums they back
that up. I will try it first, and if there is any issues drain it out
and switch to the more expensive. This way I can use the cheap Dexron
to flush out any dirt or metal that might have got into the trans.
Not much will be getting done on this until the wife is back from the
hospital, today I need to get the Christmas lights up before she comes
home tomorrow. I got Santa up just now, and got the lights down from
the attic (which is one of the reasons why the rush to get the Avanti
back on the ground). Once I get this done, its back 55 miles to S.B.
to visit her in the hospital.[:0]
Tom

I run synthetic Dexron in my WC T5s...I would imagine the TKO is similar.
Daddy always said, if yer gonna be dumb, you gotta be tough & I'm one tough sumbitch!
Good to hear she doing OK.

Thanks Karl .. physically good, emotionally not.
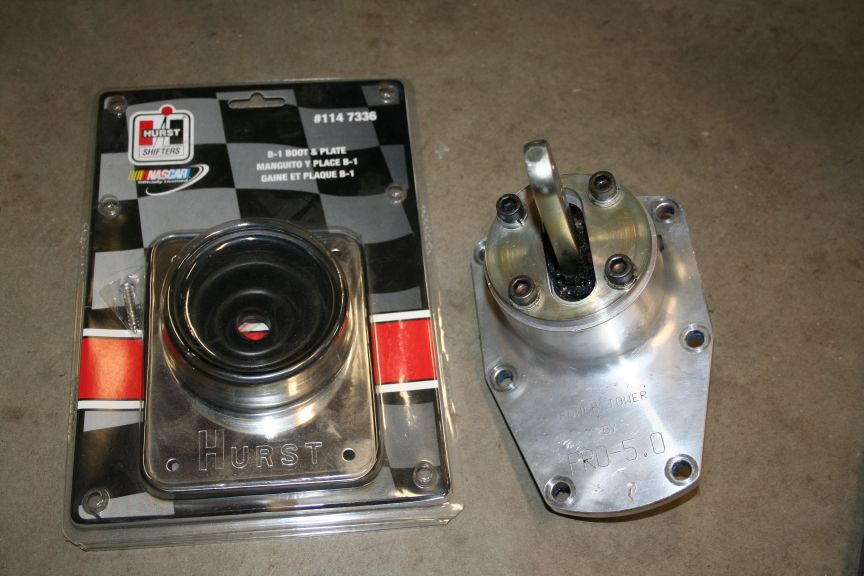
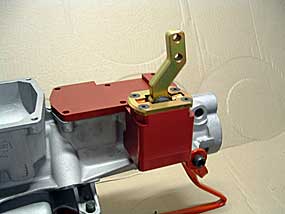
While she was napping today, I went out and took apart the console to
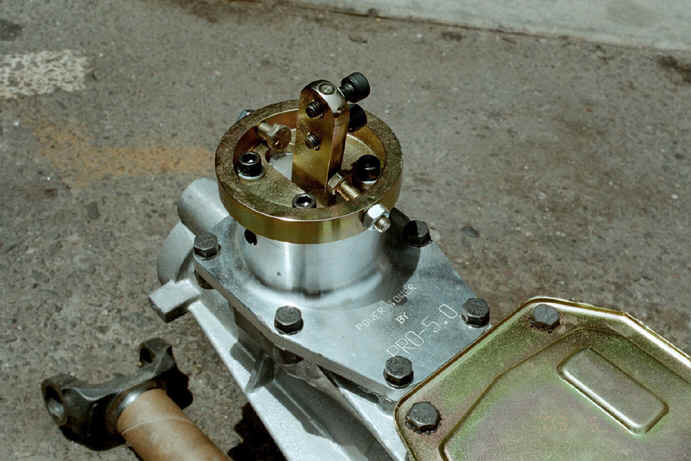
check out my shifter status. Its not too far off, BUT, the Pro5.0 is
too bulky to fit inside the shifter box in the floor.[B)]
The Pro5.0 has an adjustable shifter stop at the front and rear, which
adds a good 5/8 of an inch to the top edge :
This has a molecular overlap with the climate control box bonded into
the floor in front of the shifter. Either I get a new shifter, or I
modify this one for more clearance. I dont want to cut the floor, tho
I guess I can, depending on whats inside the climate box.[?]
Tom
The Mustang guys are quick! I posted up a question about this issue
and they got back to me within minutes! It seems that Tremec doesnt
want you to use shifter stops in after market shifters anyway. They
have internal shifter stops that do a better job and that misadjusted
shifter stops could result in a missed shift and a bent shift fork!
I guess I have some cutting to do!quote:NOTE:From Tremec dated 03/01
Tremec Transmissions
Service Bulletin 03.01
Subject:
Aftermarket Shifter Stops
Transmission Models Affected:
All
Severe damage may be caused by installing an aftermarket shifter with "shift stops" on any TREMEC transmission. All TREMEC transmissions are designed and manufactured with built-in shift stops to prevent over shifting. Therefore; shift stops on aftermarket shifters are totally unnecessary when used on a TREMEC transmission. TREMEC "TR series" transmissions have multiple shift rails with shift stops on the gearing. TREMEC "T series" transmissions have a single shift rail system with stops built into the guide plate.
When installing an aftermarket shifter on a TREMEC transmission it is best to remove the shift stops to avoid miss adjustment, and the potential of the screws vibrating lose. A misadjusted shift stop can cause an under-shift, which may lead to a gear jump-out situation. If the transmission jumps out of gear, the shift fork can be bent causing permanent damage to the transmission. Shift forks can also be damaged by "clash shifting". A clash is caused by a missed shift.
Neither an "under-shift", nor a "clash shift" can be prevented by shift stops. TREMEC shift forks are designed to take loads up to 1,000 lbs. However, a gear jump-out may well exceed 1,000 lbs. of force, which may result in a permanently damaged transmission.
Tom
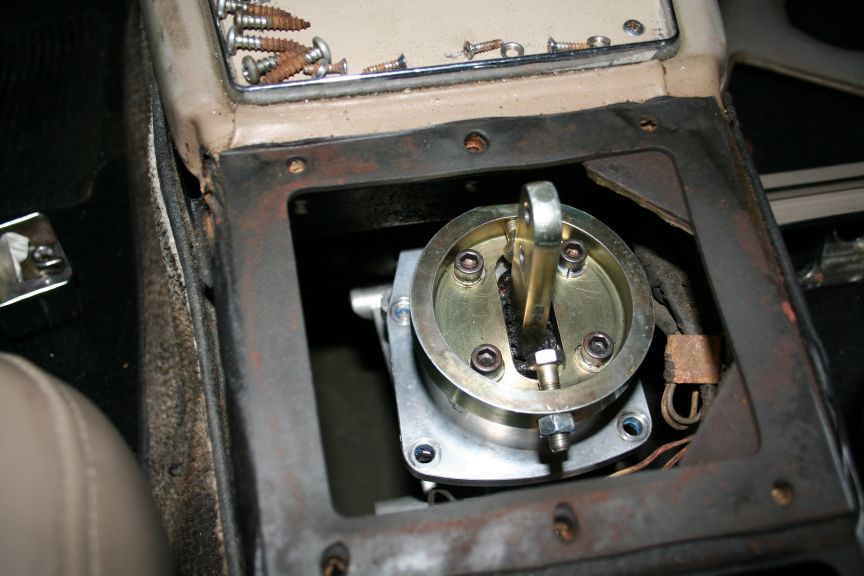
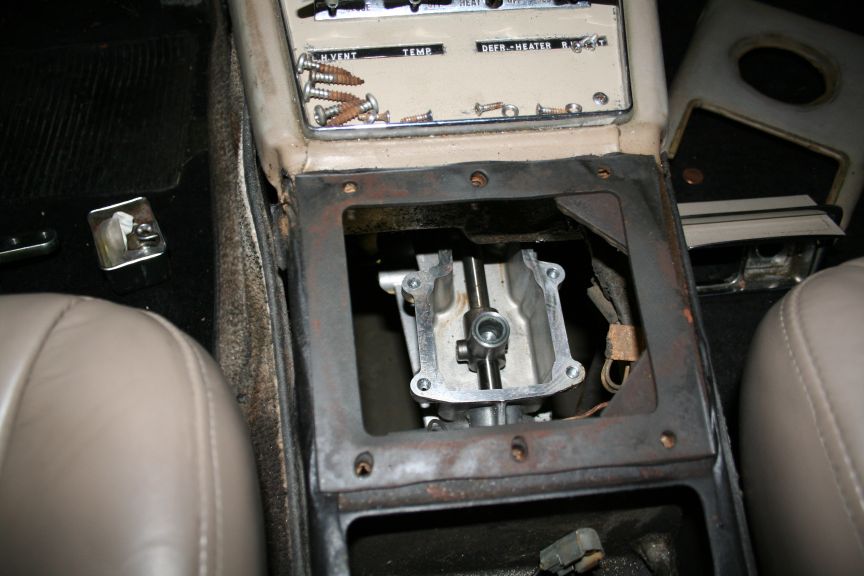
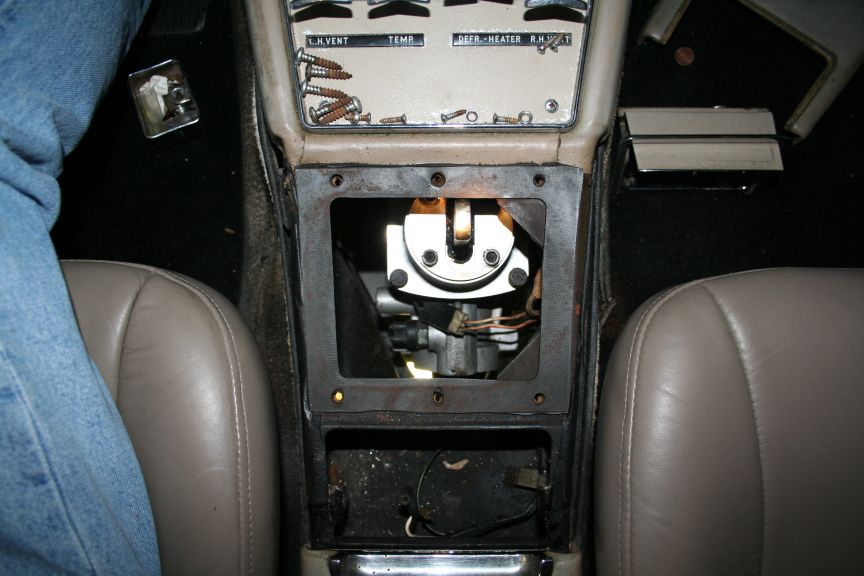
Here are a couple pictures of the Pro 5.0 shifter problem, and where
the trans ends up in relation to the factory opening.
NOTE : Keep in mind that the holes arent lined up, so the shifter will
move forward toward the firewall more than 1/2 inch from shown here.
Tom
Hmmm...I'm going to assume this is only for the true Tremec trannys (TKO, TR3550, etc) & NOT for T5 which they now manufacture. Having rebuilt more than a couple T5, I can assure you there are no stops inside a T5 & one of the leading causes of T5 failure is cracked/bent shift forks from "over shifting" - particularly the 3/4 fork.quote:Originally posted by sbca96
It seems that Tremec doesnt
want you to use shifter stops in after market shifters anyway. They
have internal shifter stops that do a better job and that misadjusted
shifter stops could result in a missed shift and a bent shift fork!
quote:NOTE:From Tremec dated 03/01
Tremec Transmissions
Service Bulletin 03.01
Subject:
Aftermarket Shifter Stops
Transmission Models Affected:
All
Severe damage may be caused by installing an aftermarket shifter with "shift stops" on any TREMEC transmission. All TREMEC transmissions are designed and manufactured with built-in shift stops to prevent over shifting. Therefore; shift stops on aftermarket shifters are totally unnecessary when used on a TREMEC transmission. TREMEC "TR series" transmissions have multiple shift rails with shift stops on the gearing. TREMEC "T series" transmissions have a single shift rail system with stops built into the guide plate.
When installing an aftermarket shifter on a TREMEC transmission it is best to remove the shift stops to avoid miss adjustment, and the potential of the screws vibrating lose. A misadjusted shift stop can cause an under-shift, which may lead to a gear jump-out situation. If the transmission jumps out of gear, the shift fork can be bent causing permanent damage to the transmission. Shift forks can also be damaged by "clash shifting". A clash is caused by a missed shift.
Neither an "under-shift", nor a "clash shift" can be prevented by shift stops. TREMEC shift forks are designed to take loads up to 1,000 lbs. However, a gear jump-out may well exceed 1,000 lbs. of force, which may result in a permanently damaged transmission.
I've got zero hands-on experience with the true Tremec trannys - I'm too cheap!
Daddy always said, if yer gonna be dumb, you gotta be tough & I'm one tough sumbitch!
Thats correct, the T5 suffers greatly from no shifter stops. This was
one of the many improvements they made in the TR-3550/TKO, T-56,
TKO-500 and TKO-600 transmissions.
Tom
Tom , theres nothing under that portion of the heater cont. box to worry about. putting a small notch in it wont hurt anything.
Thanks Karl ... but I think removing the shifter stop rim will solve
two problems. Once that extra crap is gone, I can more easily mount a
rubber boot on the top to seal out dirt. I am trying to decide the
best way to remove it. I think if I could get Bobby to do it at my
work, but they are eliminating the machine shop, and I am not back to
work until Jan 2nd.
Tom
grom what I could see in your pic. Just drilling a small hole would solve your problem.
Well, on the surface that might seem true, but keep in mind that the
engine rocks back and forth, so the hole would need to be at least 2
times the diameter of the nut, so that it wont contact fiberglass. It
also would need to clear when the engine is torqueing to the passenger
side, so the hole would need to be wider on the pass side. If the nut
is able to contact fiberglass, the nut will win, and I will end up with
cracks and noise. Avantis are noisy enough. Also, I dont have a good
way to seal the dust out of the shifter top, by removing the bolts and
the top rim, that boot I picked up, should easily slip over the top of
the shifter housing and clamp with a zip tie or hose clamp. Since the
TKO/TR-3550 doesnt need the shifter stops anyway .. it all makes sense.
Tom

Great thread, and pics, Tom- thanks!
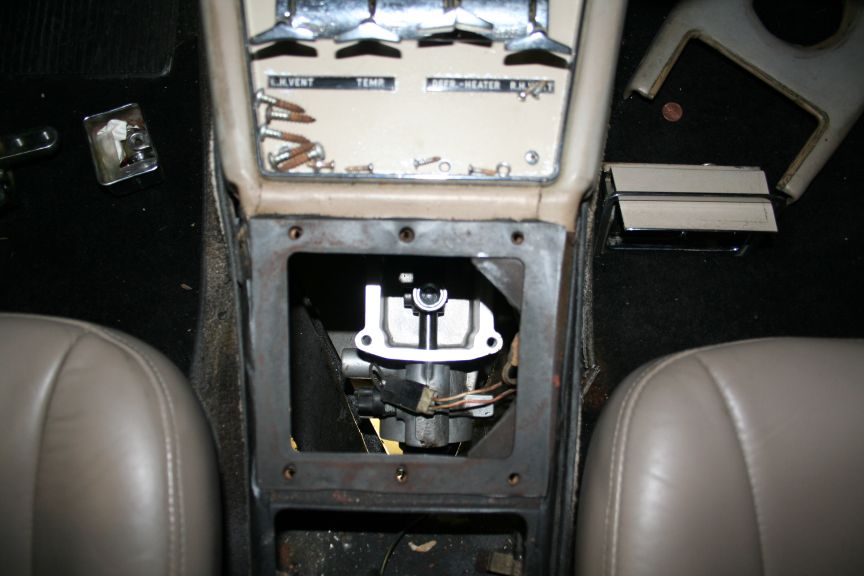
My question: Looking at the where the shifter is coming up through the floor, the last pic looks like the shifter is a good 6"-8" forward of the original and to install will require cutting way up into the tan area under the controls- is that the case? And if so, what do you do about that?
I hope that shifter/mount can move back quite a bit!
I can see that this install will be MUCH easier in my Lark
Robert (Bob) Andrews Owner- Studebakeracres- on the IoMT (Island of Misfit Toys!)
Parish, central NY 13131
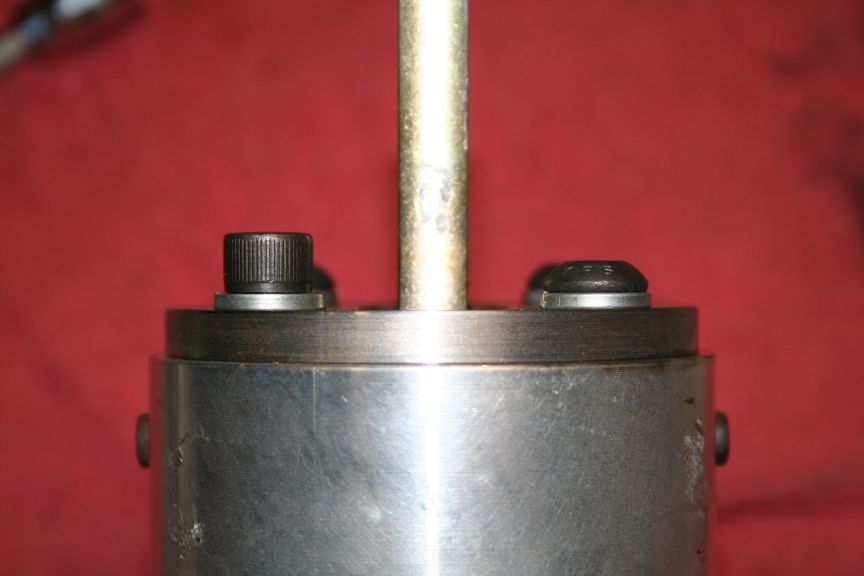
Here is the turned down top of the Pro 5.0 shifter, the shifter stops
are gone, and I think I will counter sink the holes to use flat head
allen screws instead of the ones shown. Also here is the boot I plan
to use as a dust seal on the shifter :
Here is the shifter bolted into place with the rear most screws. This
shows I have the clearance that I need now.
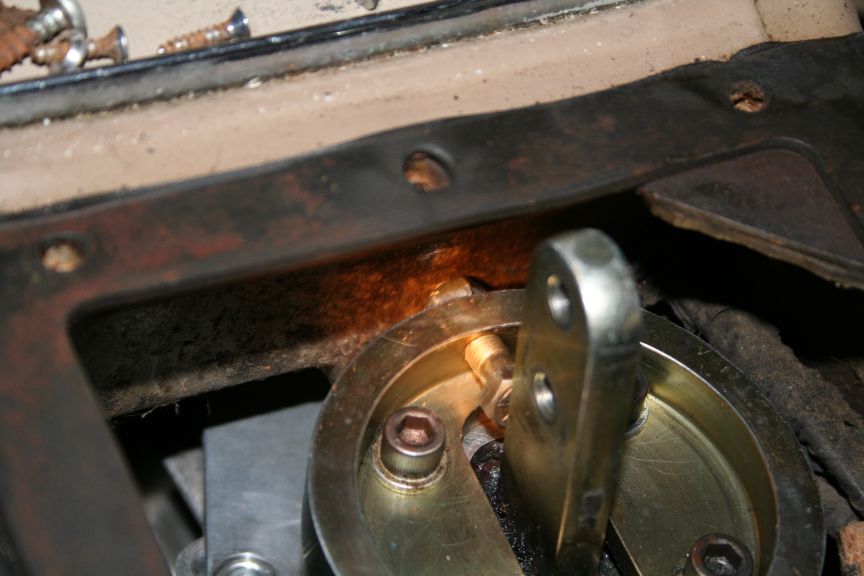
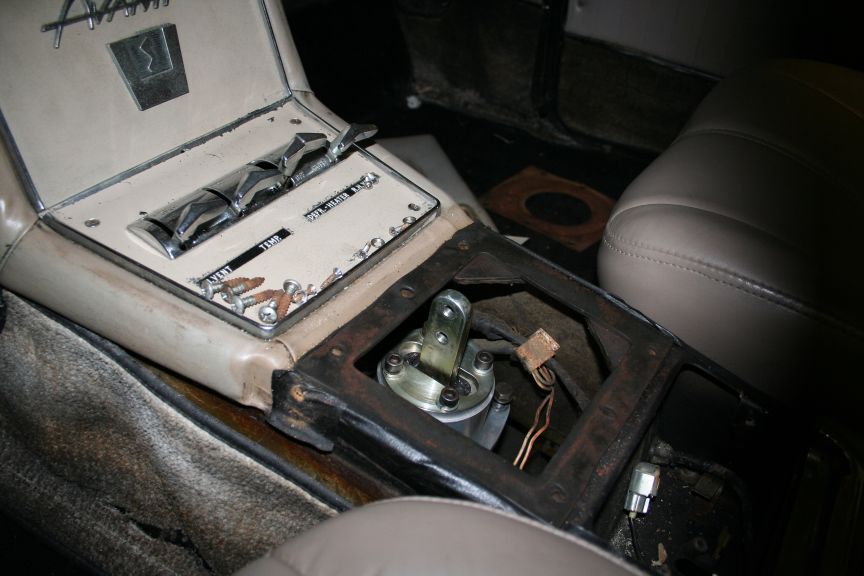
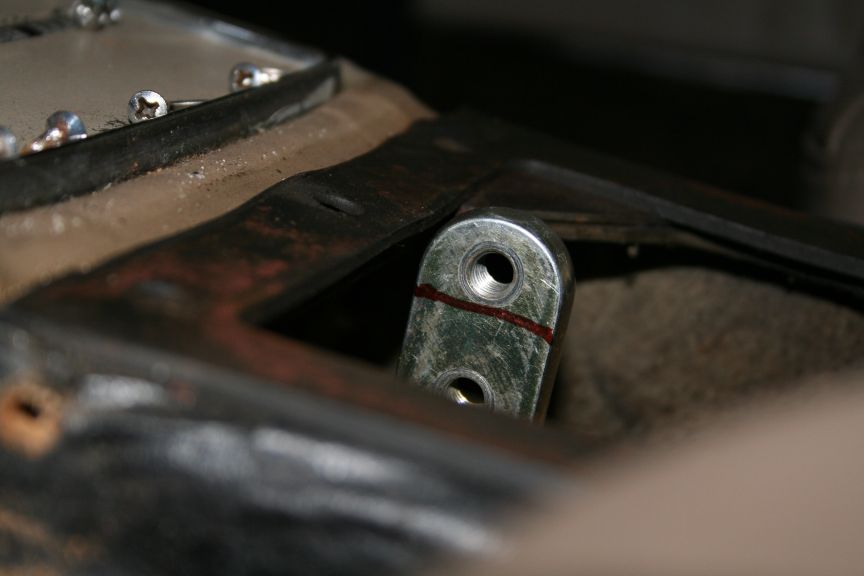
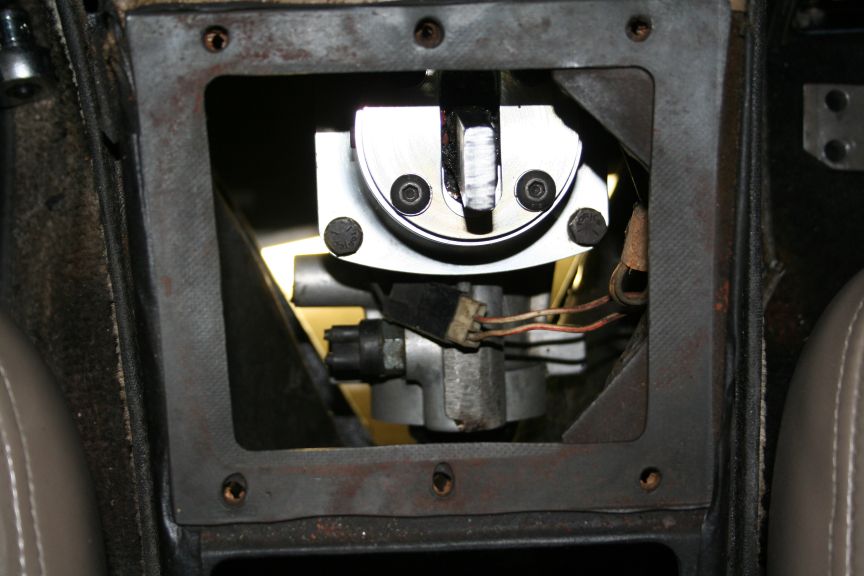
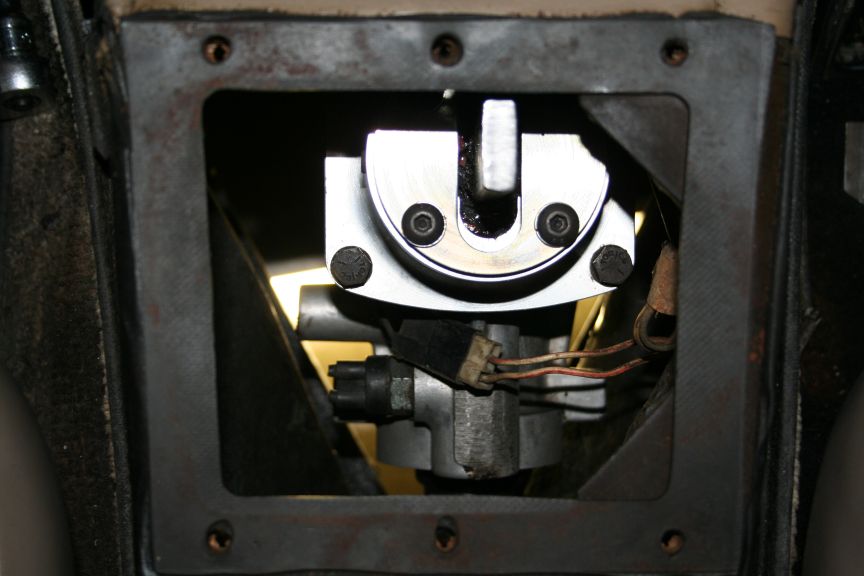
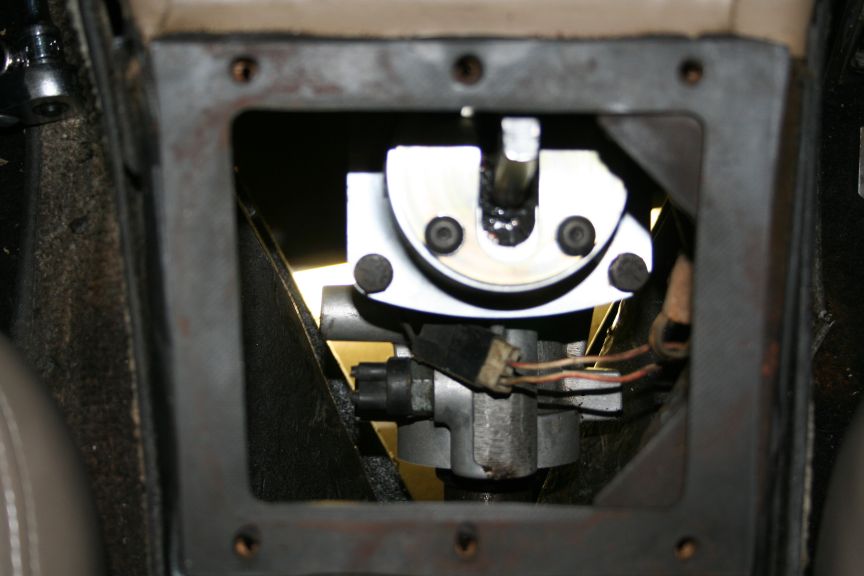
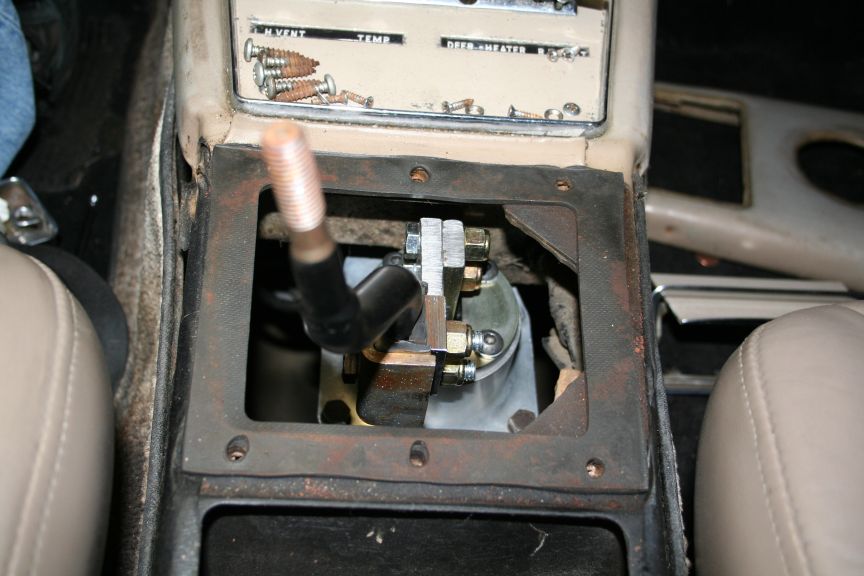
Robert, yes the shifter is coming up forward and to the passenger side
of where I want it. The work around for that is to bolt an bracket to
the shifter stub, which "moves" the two shifter stick mounting bolts
to the location we want. These pictures show that the stub is about
1 to 2 inches from where we want it :
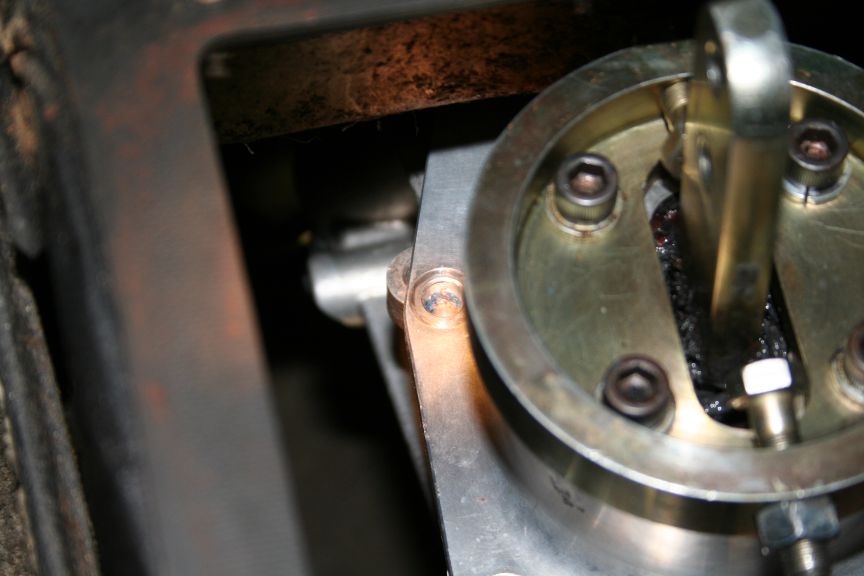
Unfortunately, another problem showed up, the shifter stub is too long
to fit under the trans tunnel shifter box top!
It seems that the solution is to cut the top off the shifter stub, and
drill two new holes lower on the stub. Thats why I feel I need to use
some flat head screws instead. Fun fun!
There are lower profile shifters than the Pro 5.0, I think that one of
the others might be a better choice, this one came with the trans.
Tom
It'll be interesting to see the finished installation, and how it works. I'm picturing a deep L shaped bracket with a T on each end to be able to bring the shifter back out from under the console to the original shifter hole to allow for comfortable reach and full throw, as well as locating it correctly in the console; am I seeing that correctly? If so, I'm worried how well it will work- and hold up- under spirited driving conditions...
I was looking at this shifter; looks to have a much shorter stub, but still has the stop collar to deal with:
https://cgi.ebay.com/ebaymotors/Hurst...sid=p1638.m118
I know I join plenty of others who are watching your progress with great interest; looking forward to updates!
Robert (Bob) Andrews Owner- Studebakeracres- on the IoMT (Island of Misfit Toys!)
Parish, central NY 13131
Robert, there are a few shifter relocation items you can buy, like
this trick Corvette one (bet its expensive) I just found. This looks
too far over for us, but its an example of whats out there.
https://www.classicchevy5speed.com/Co...nstall-WU.aspx
Tom
Tom, I'm impressed by the progress you're making.
Any chance you could make a vee notch in the shifter stub just below the lower hole, bend the stub back about 20°, and weld up the notch? That, combined with a complementary bend in the stick, might do the trick.
If the shifter stube has to be removed from the housing via the housing bottom, that puts a limit on how much bend or offset you can manage.
Gord Richmond, within Weasel range of the Alberta Badlands
Tom,
I have to run the higher octane in my 949c1 or it knock. I"m at 1200 ft altitude.
Russ Shop Foreman "Rusty Nut Garage"quote:Originally posted by sbca96
GM syncromesh is recommended (and so is 91 octane on my Impala SS), but
it also says you can use Dexron III. 87 Octane has worked fine in the
Camaro and the Impala for years, so it might just be hype. I was told
that Dexron works fine, and if you check the Mustang forums they back
that up. I will try it first, and if there is any issues drain it out
and switch to the more expensive. This way I can use the cheap Dexron
to flush out any dirt or metal that might have got into the trans.
Not much will be getting done on this until the wife is back from the
hospital, today I need to get the Christmas lights up before she comes
home tomorrow. I got Santa up just now, and got the lights down from
the attic (which is one of the reasons why the rush to get the Avanti
back on the ground). Once I get this done, its back 55 miles to S.B.
to visit her in the hospital.[:0]
Tom
57 SH (project)
60 Lark VIII 2dr sd (driver)
This is and easy fix.Cut and redrill the stub.Weld a flag on your shifter arm.Mount the shifter on the left side. This will move the shifter back and over. Im sure you welder friend at work could do this.
Thanks gordr, its coming along .. pretty amazing when you figure I get
a couple minutes a day to mess with it lately.
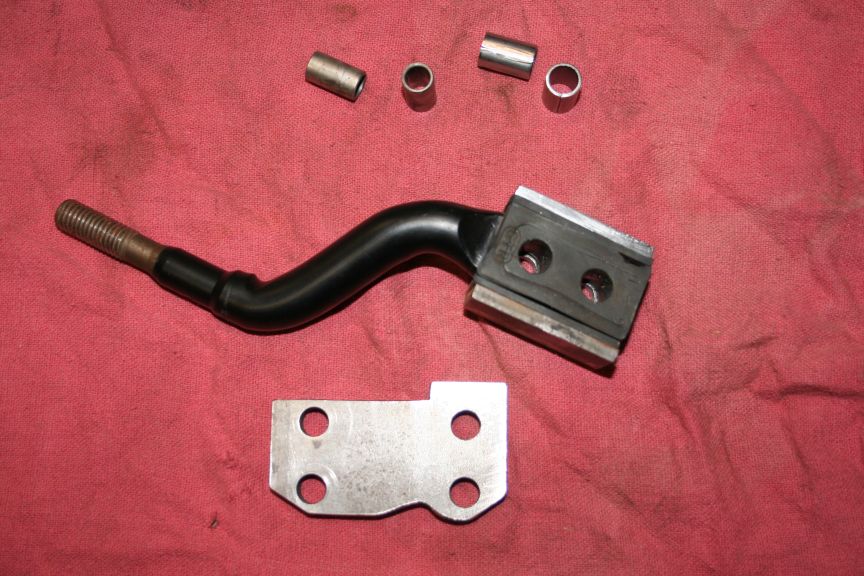
Thanks for the sketch Karl, I had a "flag" or bracket made at my work
before I went on FMLA. I had to massage it a little, and now its been
getting some more custom touches. I ended up getting some button head
screws, rather than having to counter sink the holes. I cut off the
top of the shifter stub this afternoon, and now that the wife is back
in bed sleeping, I will get back out there and redrill the holes in
the stub, and do some final massaging on the "flag" or bracket. The
trick here is to not have the stub, bracket or shifter stick hit any
of the fiberglass, shifter housing or screw heads! Sounds easy until
you start putting it together.[:0]
Hopefully pictures will follow later tonight. I still do not have a
shifter stick, will see if I can hit the salvage yard tomorrow after
the doctors appointment in S.B. - there isnt any manual trans Mustangs
in any salvage yards here in Lompoc!![B)]
Tom
Tom, Its a good idea to thread the shifter bolts into the stub then back them up with nylon lock nuts. They can get a little loose after banging a few gears. The nylon lock nuts do a great job though.
Other then that it looks like things are coming along great, should be on the road on in no time. My rear end change is coming along great. Just got the rear discs on with the flanged axles. When I get my new springs I will finish up my cal-trac bars and post some pictures.
Dan Giblin
Cincinnati, OH
Dan, the plan right now is to drill clearance holes in the shifter stub
and use 3/8-16 button head bolts with nylock nuts. I havent had time
to get to the salvage yard ... maybe today??
Ink me in for those Cal-Tracs (Gib-Tracs?), if I can avoid buying the
brackets and welding things to my Dana 44, I will be happy. I am very
tempted to do the fiberglass rear springs with your Gib-Tracs.
Tom


not to threadjack, but I too would be interested in a Cal-trac type setup if someone works something out that's a bolt on or close to it.
nate
--
55 Commander Starlight
https://members.cox.net/njnagel
I am not sure how the gib-trac will work with the fiberglass springs. I bent my 6 leaf springs and I have a lead on some NOS 5 leafs. I think I'm going to go that route if I can. The front spring shackle "gib-trac" is done (below the axle, not above) and when I get the leaf springs in I will being designing the axle moment arm. The sway bar may be changed to a more modern design. Who knows....I'll post some pics in a new thread in a week or so.
Tom, let us know what you think after that first drive. You sure are more paitent then me. I had a vise grip as my shifter when I first put the 5 speed in. What a world of difference!!
Dan Giblin
Cincinnati, OH
Oh, trust me, I am going ape waiting to drive it, but the wife is in
need of my help, and taking all my time. She was the reason I am off
from work - so the Avanti takes a back seat.[:I]
I was able to sneak away and go to the Pick-Yer-Part in the next town,
they had a BUNCH of Mustangs, but they were either autos, or someone
had beat me to the shifter stick. I DID find one on a '88 Thunderbird
Turbo coupe, but its got an odd "S" curve in it. I am not sure if it
will work, but they only charged me 5 bucks - no ball though.
Tom
quote:Originally posted by gibbsr1
Tom, let us know what you think after that first drive. You sure are more paitent then me. I had a vise grip as my shifter when I first put the 5 speed in. What a world of difference!!
Replaced the socket heads with some button heads on the shifter to get
a little extra room for the bracket to clear :
I also took a couple pictures showing the very short travel of the TKO
shifter, as you can see it doesnt move much :
4th :
Neural :
3rd :
Tom
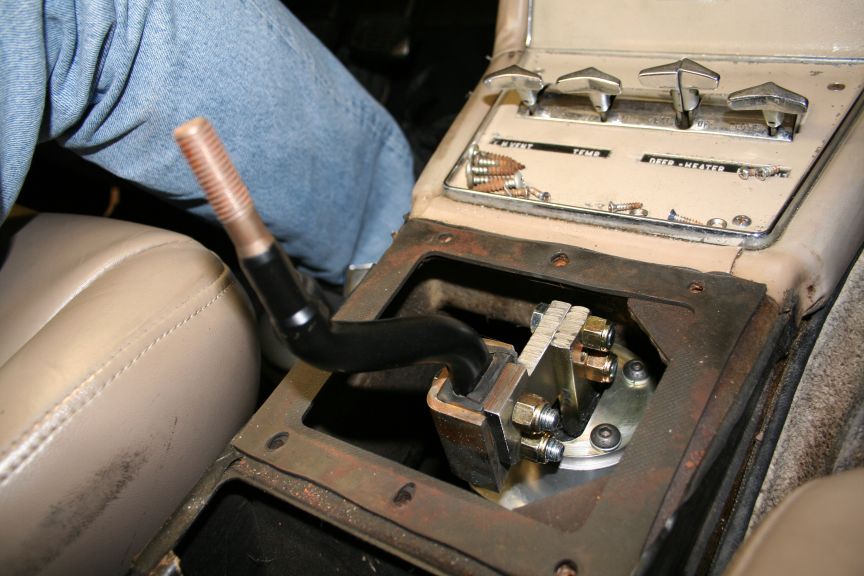
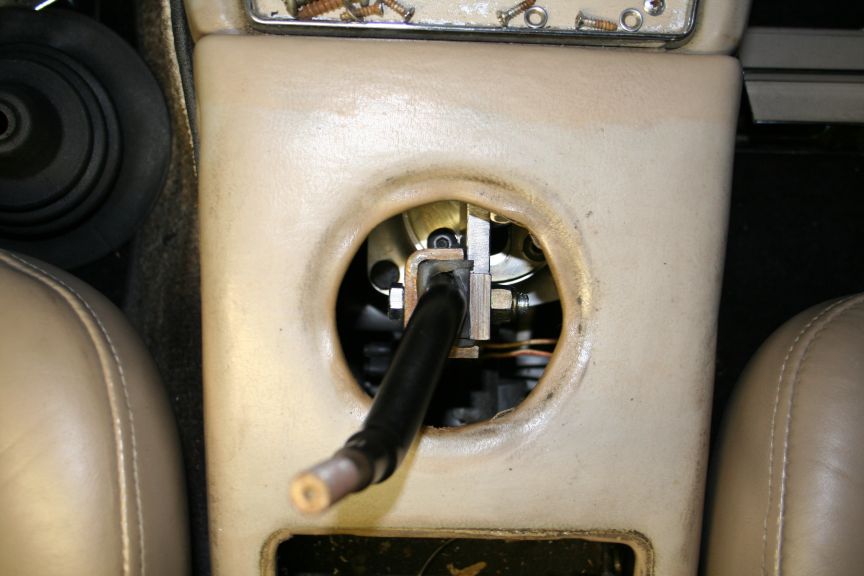
Got the shifter mocked up and bolted up, I was able to run through the
gears and everything clears (that rhymes).
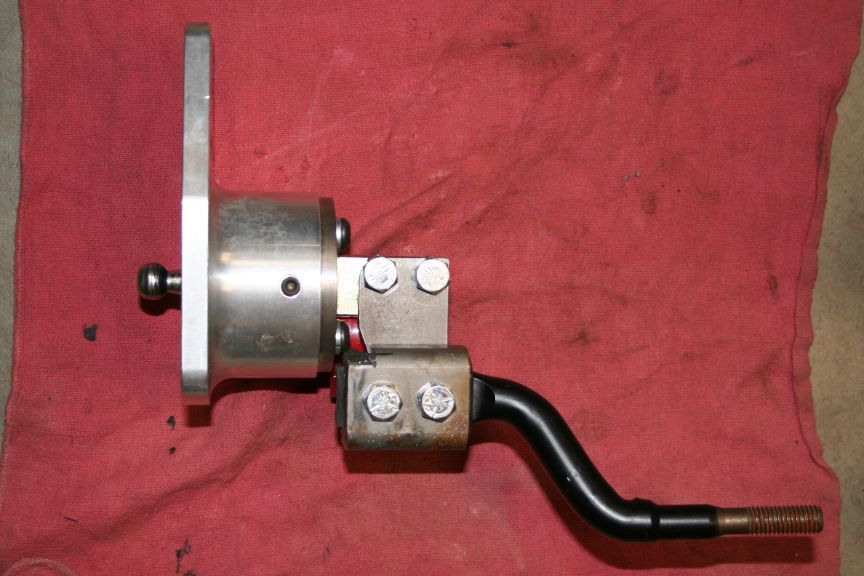
Here is the '88 T-bird shifter, and offset bracket :
It has a rubber piece that isolates vibration and makes the shift feel
a little softer and smooth. I decided to see if I could use it. There
was spots I had to cut off, and I had to drill it to 3/8 from metric
since I had already made my bracket 3/8. This opened a can of worms
as I had to replace the two sleeves inside. Ace Hardware carries some
steel split sleeve that worked perfect - you can see them in the photo
above. A little silicone lube and they slid right in.
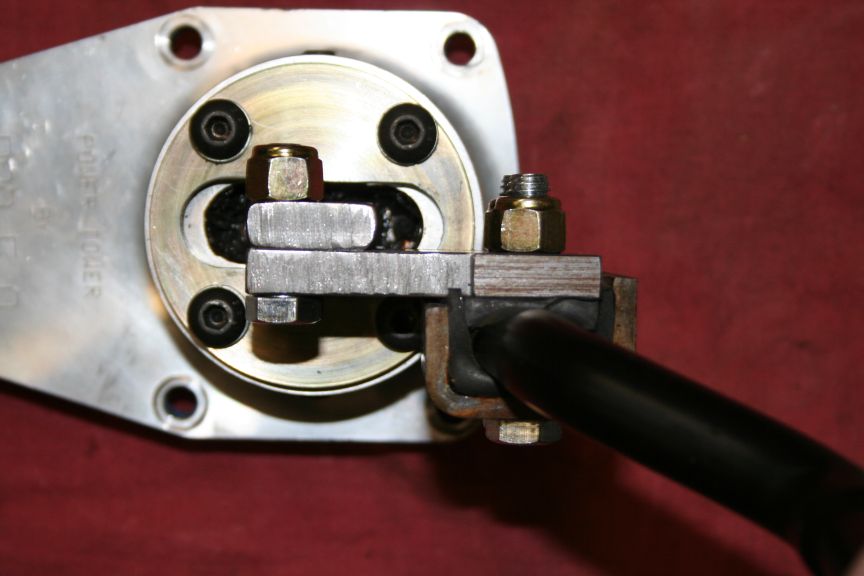
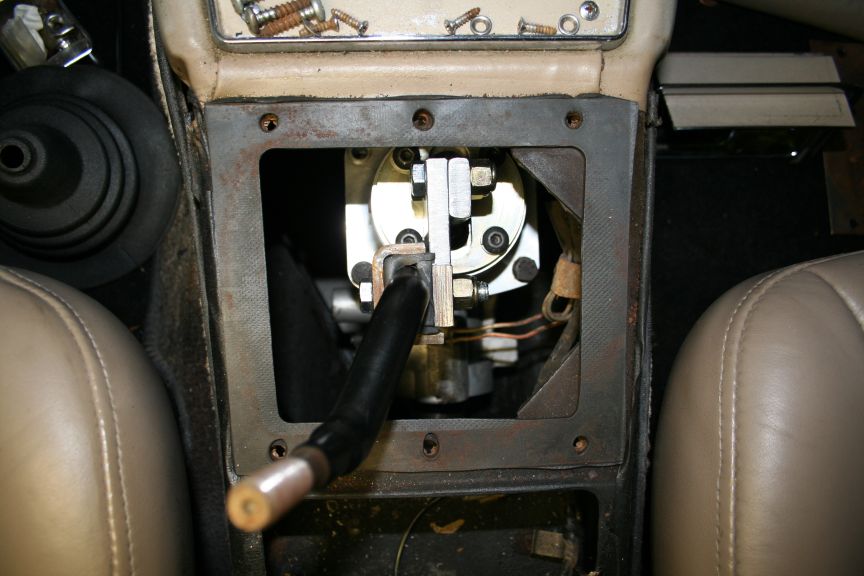
This is the arrangement of the shifter stub, bracket and shifter stick:
And a side view :
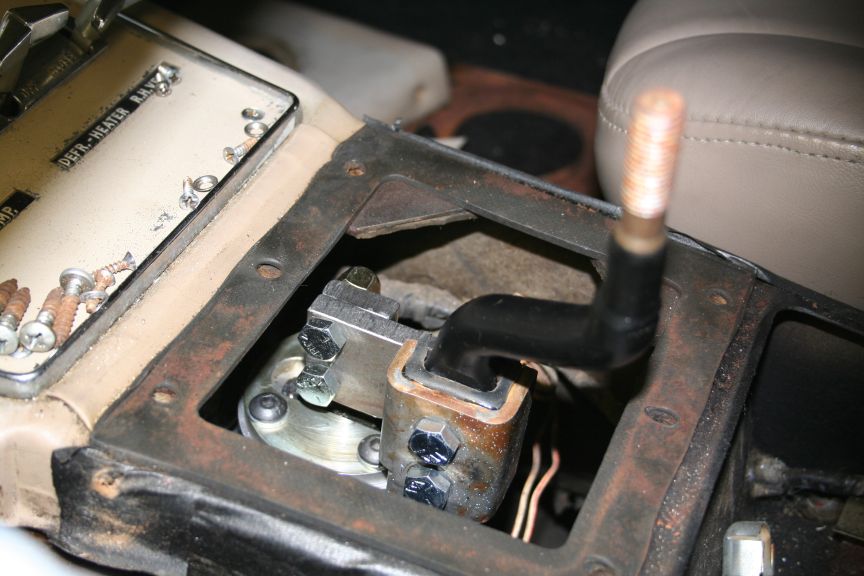
Bolted onto the trans, everything clears, though the bend in the T-bird
stick makes the bar touch the center console JUST barely :
A shot straight down :
And from the passenger side for giggles :
One more from the drivers side for good measure :
Finally with the center console piece back in place, got it pretty much
in the center if I do say so myself. I would rather have a straight
stick, I wonder if it will bend that easily??
Tom
Looks FANTASTIC!!!!
Dan Giblin
Cincinnati, OH
 Posting Permissions
 Reply
Reply