
Bob's Studebaker Resource Website
Studebaker Avanti Tachometer replacement
Dec 2012 - SDC Forum #67463
Rob Dudley, Moscow, ID
|
The tach on my Avanti didn't work so after troubleshooting I found the head didn't work. I took it apart and found that a wire was apparently broken in a tiny coil. I tried to find and repair it but after many attempts gave it up as hopeless in my hands. I managed to find another and got it working. The one I had was in decent shape and I hated the idea of tossing something so hard to find. It would at least fill the hole in a dash so I stuck it on the shelf. After a few years of having it sit there I finally decided to try to renew it. I wondered what was so special about it that it couldn't be rebuilt using parts from a modern tach. With the idea I had nothing to lose but time and money, I went out and bought a small (2 1/2 inch) plastic tach. I popped it open and checked out what I had to work with. The internals were small enough to fit inside the housing from the Avanti tach so I carefully pulled the needle and face and did some measuring. The pin the needle fitted on to was .007 too small but I figured I would come up with something. The face plate mounted differently too. Since it was an 8000 rpm tach it was going to read incorrectly so I attached it to an engine and hooked up my test equipment with tach and adjusted the guts to correct the reading. I started by building a frame to mount the guts into and then drilled a couple holes and tapped them to match the original 4-40 screws from the Avanti face. I drilled three more holes in the frame for the pin and the screws to mount the modern guts.
On the back of the frame I drilled two holes to support the 2 screws that held the guts into the plastic housing. 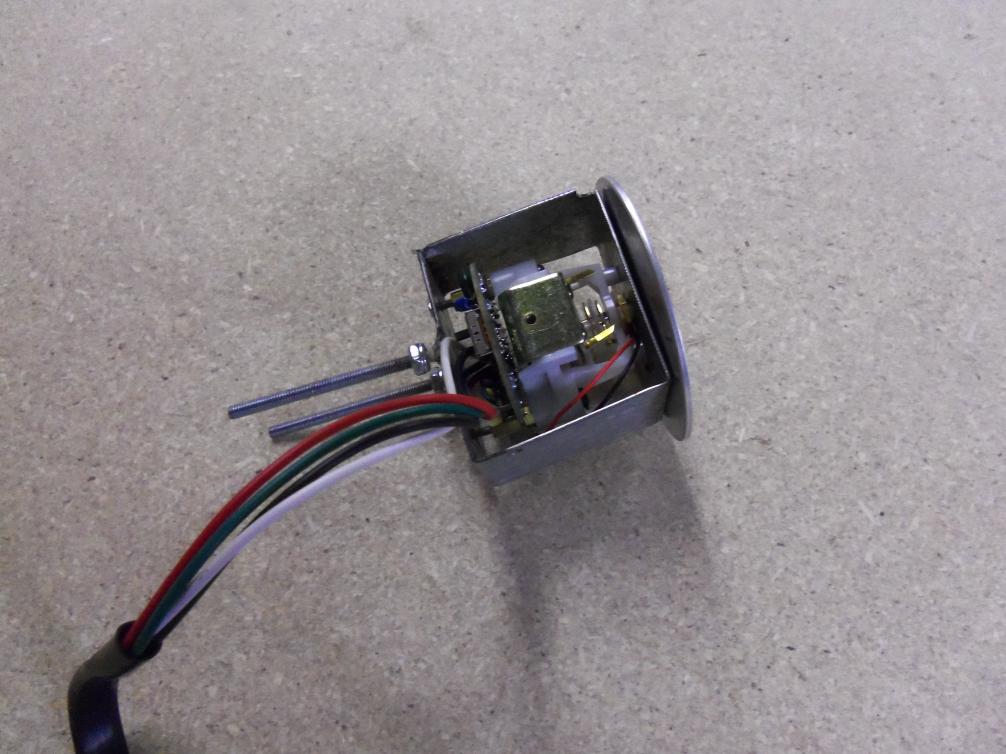
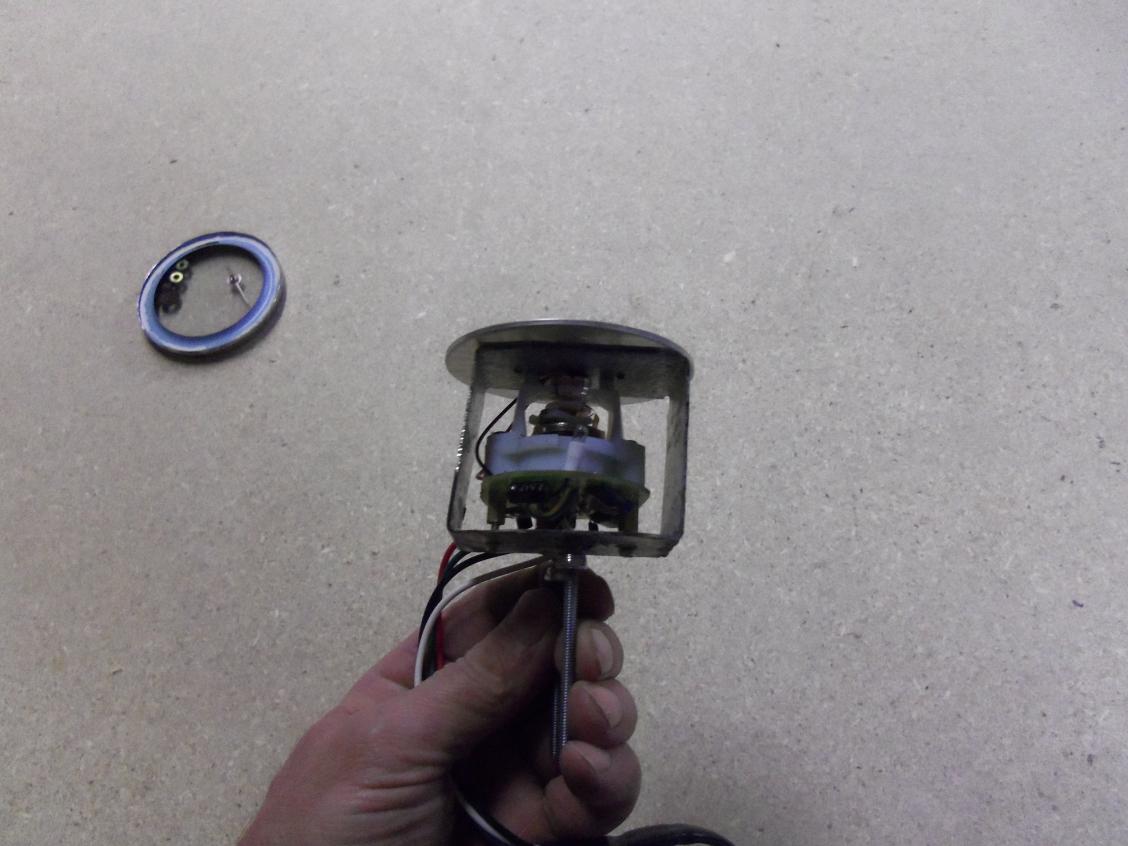
Finally I started putting it together and adjusting the fit in the housing. I cut the ground wire inside the housing and grounded it to the frame. I removed the wire for the dash light and discarded it. That left 2 wires to thread through the grommet, One to go to the distributer side of the coil the other to go to the ignition switch. I put the 2 nuts and washers on the outside of the housing and tightened everthing up nice and square. Since it is no longer nessesary to insulate the studs (screws) coming through the housing I was allowed some wiggle room. I had to pull it apart again when I realized the frame was partially blocking the original dash lights from being inserted fully into the housing. I finally put it together for the last time and and mounted the faceplate and installed the modern needle to test it one last time. It all worked. I removed the modern needle and cut some short strands from a #14 copper wire. They were .004 inches so I mounted several of them in the Avanti needle and pressed it onto the pin. It took some pressure but slid up to where it needed to be. I then installed the glass and the chrome bezzle and carefully rolled the lip back over the housing.
I guess I need to find another Avanti now that needs a tach... Rob 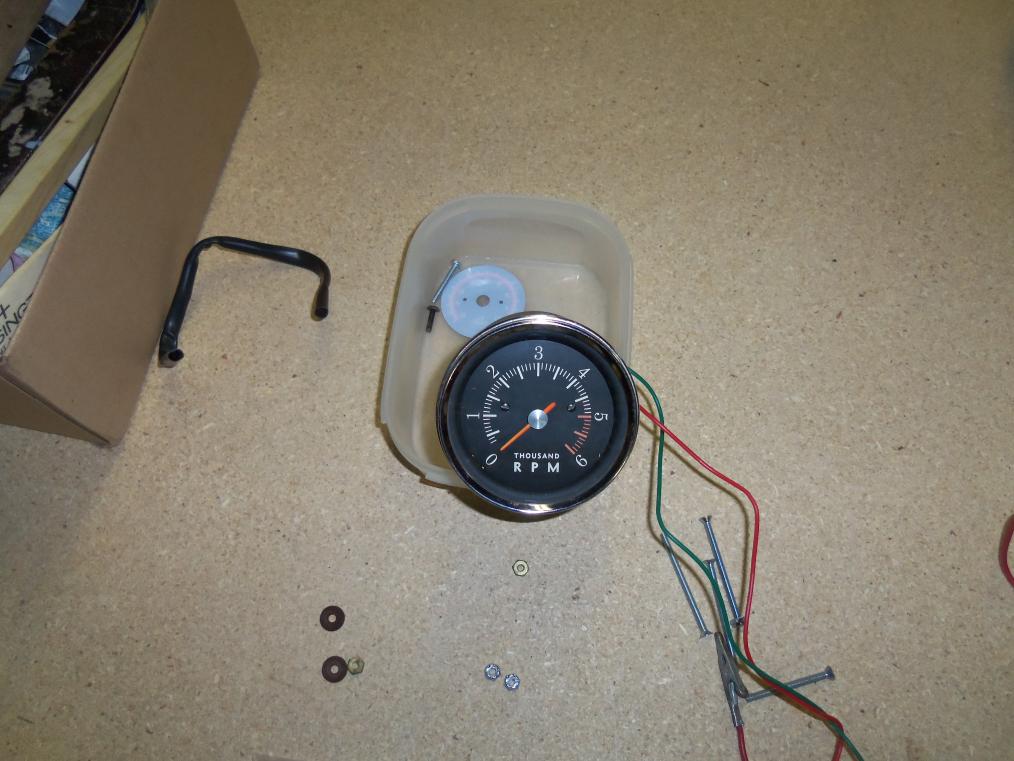
|