|
I managed to jury rig an installation tool for the a-arm bushing for my
55 President State Sedan. Someone prior to my purchase of the car in
83 appears to have tried to install the bushing by drawing it into the
inner shaft with the retainer? This only managed to bend the a-arm in
toward the cross member. (edit = wow, the attachments did not load in
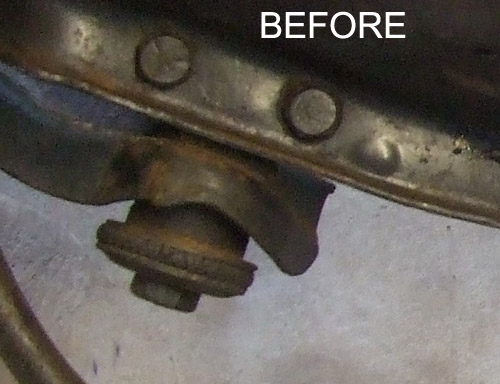
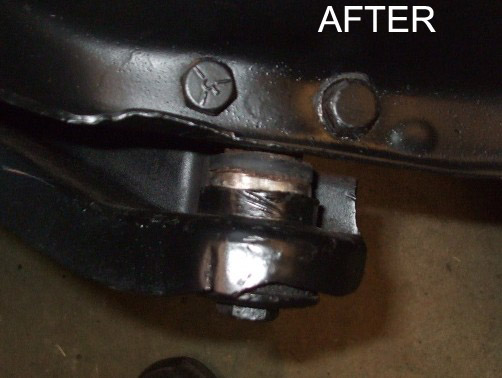
the sequence I had planned) One of the attachments below show the
bushing before the fix. It is very grainy because it was taken with the
quality set pretty high and had to be cropped way down to be accepted
per the attachment rules. I had already removed the engine and did not
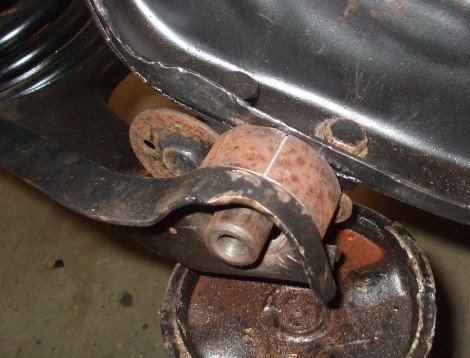
want to try to let the a-arm down if I could keep from it. After taking
the cap screw and retainer off the bushing I was able to remove it with
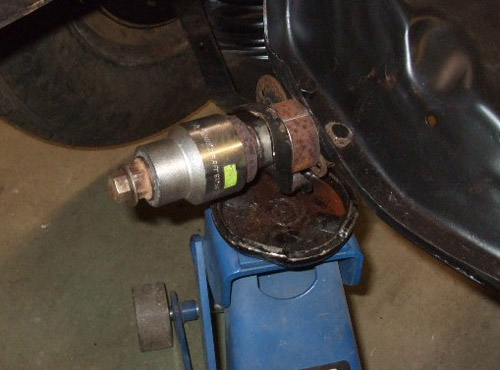
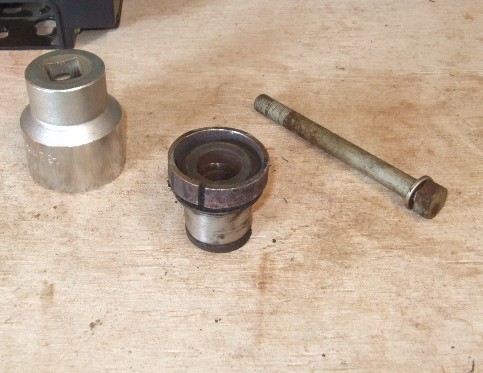
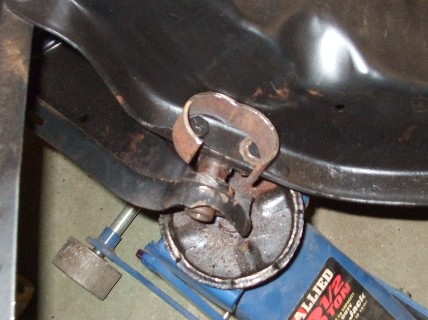
channel locks. It was barely pressed into the a-arm. Clark in San Diego (showbizkid) was very kind a few days ago to measure the installation tool he used for installing the bushings in his car. I came very close to hitting the purchase button more than once for one of those to use. After much pondering it dawned on me that the end of that tool would not fit because the opening in the semicircle that fits around the ear of the a-arm was less than the 1 5/8” diameter of the ear itself. It would not just slide down the way I had planned. I went out to my pile of oil field pipe (I had used one of the pipes to install my pinion seal a few weeks ago) and found some that was 1 ľ inside diameter and was already split. I cut a piece to fit between the a-arm and the cross member. Then a relief was sawed in it with my hack saw so that it could be opened up and fitted over the inner shaft and closed back up. A couple of washers finished off the spacing. Another piece was cut to go around the rubber and contact the flared part of the bushing itself. A 1 ľ socket would then press on the thin piece of pipe. A 4 ˝ inch or so ˝” fine threaded bolt was used to screw into the inner shaft and became part of the jury rigged installation tool. This rig got the bushing to within 3/16” of where it needed to go. The flared out part of the bushing started to bend inward a little so the rig was replace with the retainer and the cap screw itself which pressed the bushing the rest of the way in. It was than backed out to finger tight until I can get the car back together and let down before torquing to 65 ft-lbs. Before I joined this forum this past May I did not know what an a-arm was much less an a-arm bushing. I was an accountant and out of necessity an occasional shade tree mechanic. I was just looking at the chassis one day and one of the bushings looked different to me. Searching the site gave me great info concerning how to change out the bushings. In my case, all I wanted to do was get that bushing back in closer to the way it was supposed to be. I have found that with a book, good friends, and this forum just about anything can be accomplished. Charlie D. Tulsa OK, Jan 2011 (SDC Forum#47616)
How?
|
|
Addendum If I might clarify something for myself, and if I am correct offer a suggestion. You thread the bolt into the cross shaft and continue tightening the BOLT using the threads in the cross shaft to draw in the new bushing? Or did you use a NUT on the bolt threads to tighten and draw in the bushing? Reason I ask is critical. If you use the threaded hole in the cross shaft to draw the bushing in, its very possible to strip them out using that procedure. Its better to use a longer bolt, or threaded rod and do the threading on the rod instead. This way you bottom the threaded rod or bolt into the cross shaft and then are only pulling on the threads, not stressing them. Its the same way they put harmonic balancers on Chevys, threaded rod into the crank and a nut to draw the balancer. Tom (SBCA96) SDC Forum |
|
I used a long bolt and screwed it into the inner shaft female threads. That very question about the possibility of stripping the threads in the inner shaft was pondered quit seriously. Here is how I justified it to myself. The torque charts that I got off Mr. Johnstone’s site showed that a grade 5 ˝-20 bolt could be torqued to 85 ft-lbs. and a grade 8 to 120 ft-lbs. The depth of the threads in the inner shaft was 1 Ľ inch. My thinking was that if I could get about ľ to 1” bite with the bolt I should be able to pull a camel through the eye of a needle. To make myself feel better I ran a tap into the shaft to clean the threads and squirted it with WD-40 to hopefully allow the bolt to slide easier on the threads. What the attachments can not show was that when I bottomed out with the bolt I had to unscrew it, place another big nut on it to allow another ˝” or so of thread to keep pulling the apparatus and bushing into the a-arm. The biggest disappointment to me was when the flared part of the bushing started to bend backwards a little so that I had to stop using the piece of 1 ľ pipe as a pusher and went to the retainer itself with the cap screw to get it in the last 3/16” I was pleasantly surprised when that last setup drew the bushing into the ear of the a-arm relatively easy. I agree with you that the same thing could have been accomplished by using some sort of ˝-20 all thread screwed all the way into the inner shaft and then using a nut on the back side of whatever jury rigged apparatus one had. The tool that Showbizkid showed on his excellent kitchen table A-arm bushing replacement thread had an adaptor that was fitting over the bushing. If someone already had that tool and the various adaptors and that adaptor had a hole in it that would appear to be a very good pusher. The biggest thing that the setup did for me was keep that a-arm from being bent as the bushing was pulled into it. CharlieD
|
|
Good procedure and I agree with sbca96 that a threaded rod or long bolt is a better way to go. As a cautionary note, one should never use a tap to clean up threads, as the tap will remove metal and loosen the fit. There are thread chasers designed for that purpose that should be used and a part of all hobby mechanics tool boxes. Fortunately your threads didn't strip out. If you did use a chaser but simply referred to it as a die, then it is important to highlight the difference. WCP (SDC Forum |