Bob's Resource Website (2007)
Bob's Resource Website (2007)
Don't let the replacement of these plugs intimidate you
|
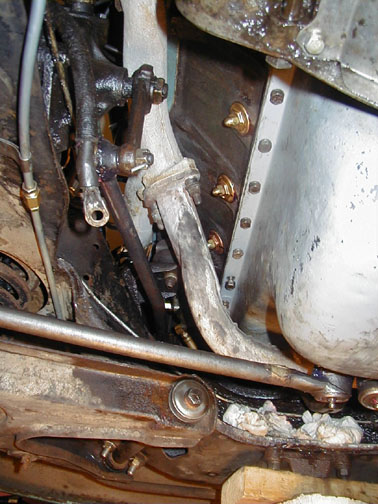
This job was performed on a 55 Sedan. The 55 and earlier engines used a different style plug than later engines, as there is a land behind the plug which the disc locks into. Later engines have the 'cup' type plug. I believe that both sizes are 1 1/2 inch, but if you use the rubber type, as a replacement on the early engine, you must use the 1 1/4 inch size to clear the land A Hawk has as much or more room underneath An Avanti can be difficult to work under, but you can get it done with some patience and determination Jack the car up and place stands under the axle or forward frame rails. A good idea would be to leave the floor jack supporting the center pin. Removing the wheels helps.
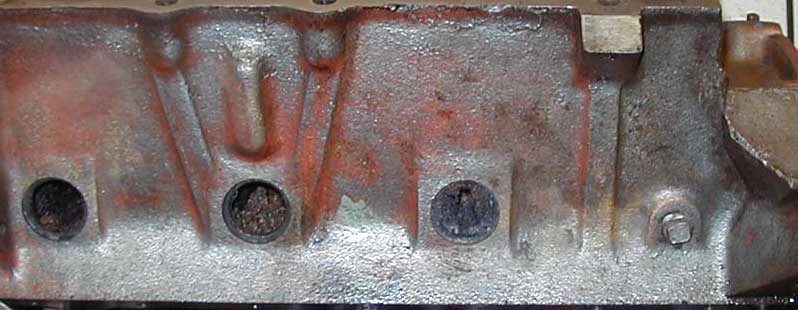
You'll need 6 plugs, discs or stoppers, whatever you want to call them. However, if you only buy 6, then you're bound to screw one up. So get 7-8 if you want to do it right the first time and if you're doing the Dorman DC9 plugs or the metal discs, get a tube of RED LOCKTITE Drain the radiator / remove the starter / place the tub under the one side of the engine / remove the rear block drain plug After draining the block, remove the core plugs by centering the punch and giving it a good smack with the hammer. You're trying to break through the plug a bit and then use the punch as a pry bar to twist it out. Once the seal is broken, it may just fall out. . Be CAREFUL to CENTER the punch, so as. to not damage the lip of the block or the land on earlier engines. Also, don't drive the punch in more than an inch or you can contact the cylinder wall on a couple of the cores.
INSTALLATION:
Rubber Plugs:
If you have to clean out the block
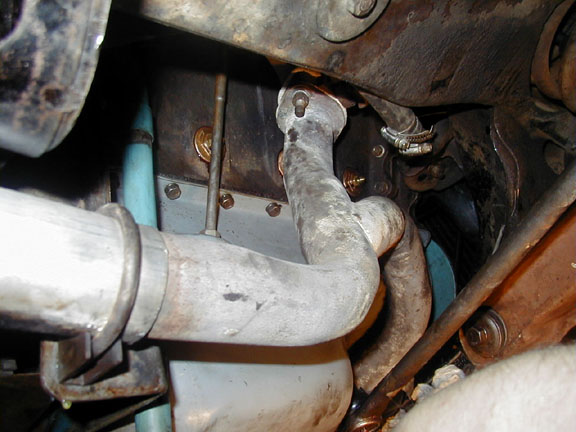
On a Sedan, you actually have the room to access all the plugs. This car is raised about 18" off the floor and has the starter and front wheels removed
To remove the old plugs, just position the sharp end of the pry bar on the center of the plug and sharply rap, until you break through the plug. When the bar is in about an inch, you can pry the plug out if it hasn't already fallen out.
You'll be greeted with some kind of crud behind the plug Don't be surprised if the pipe plug twists off and is corroded up to the head, leaving a dam of rust jam in the hole. The alloy in the Stude Block has a lot of nickel and does not rust easily, but everything else does.
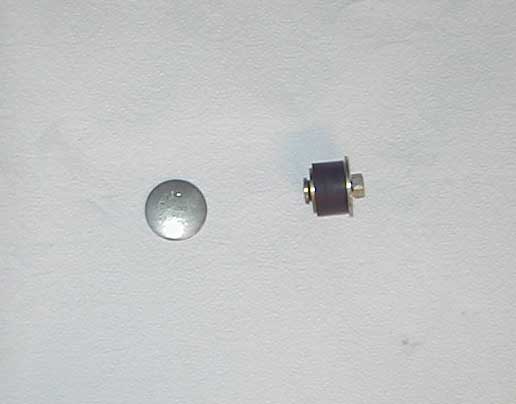
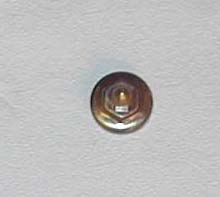
You have a choice of replacements, including a plain steel, concave disc, which is what you removed, a rubber expandable and the Dorman DC9, expandable copper unit
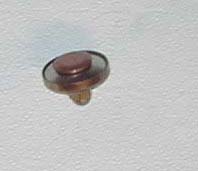
This is the Dorman DC9
The latest NAPA number I have is NAPA/Balkamp 600-4027 or Dorman 568-009.
CLEANING
Cleaning out the block is very important, although, not the point of this page. It is a dirty and tedious task, but will provide a much cooler running engine
Make your own tools to clean the block. A coat hangar, formed into various curved, pointy and hooked devices, along with small brushes are your best bet. The brushes can be rifle barrel cleaning types.
Remove the upper hose, thermostat housing and thermostat
Scrape and flush as many times as you can endure. You can't do a bad job here
One other thing...after you're finished with this entire job, it's recommended that you use a heavy duty cooling system cleaner to rid the block of the remaining rust and contaminants.
Fill system with water, including the heater circuit. Pour in a couple cans of Prestone HD Flush, Drive the car 10 miles, drain, flush, drain, flush, refill with antifreeze and water
Note: For cars that are only used in the warmer months, water is a much better heat exchanger than a mix of anti-freeze and water. Using plain water with an OTS additive to prevent rust, for the driving season, then draining the cooling system for the winter over, can save a bunch of $$$.
|
Also see The parts sheets
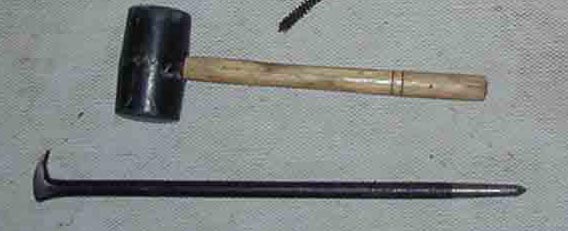
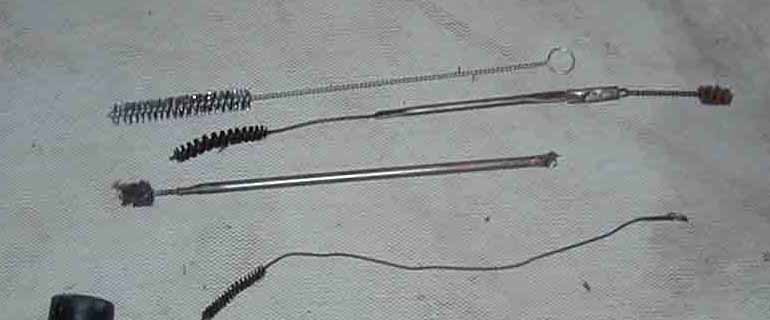 A few tools which I used in the process. In addition, get a couple coat hangars and create some small picks and scrapers.