+ Reply to Thread
Results 1 to 21 of 21

Thread: Studebaker Power Steering Hoses Replace - how to

  1. #1
    President Member
    Join Date
    Feb 2006
    Location
    Santa Barbara, California, USA.
    Posts
    3,727

    Studebaker Power Steering Hoses Replace - how to

    EDIT for picture location, and to add critical Q & A thread link.

    https://forum.studebakerdriversclub.c...?TOPIC_ID=7602

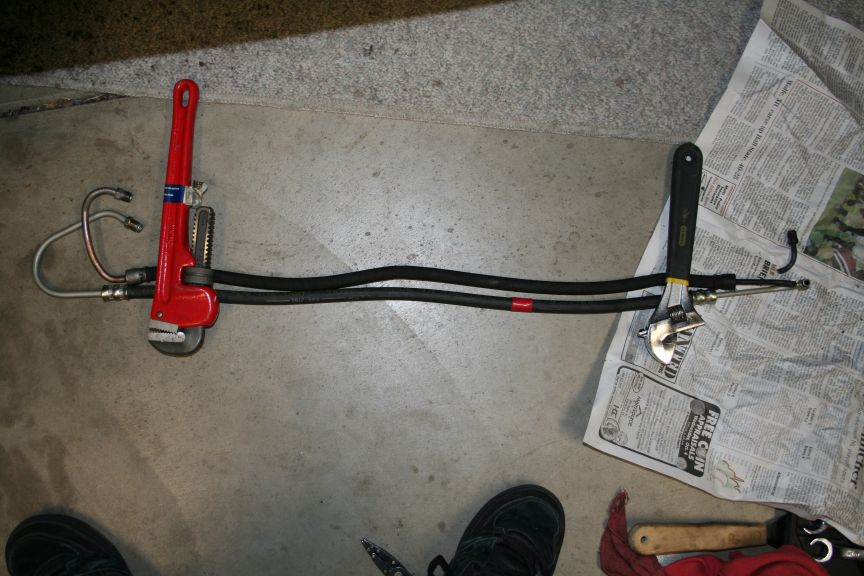
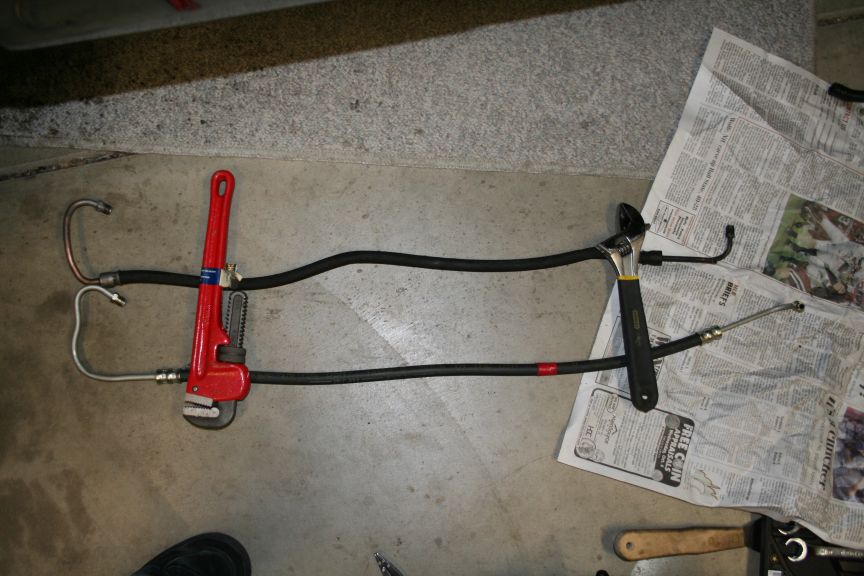
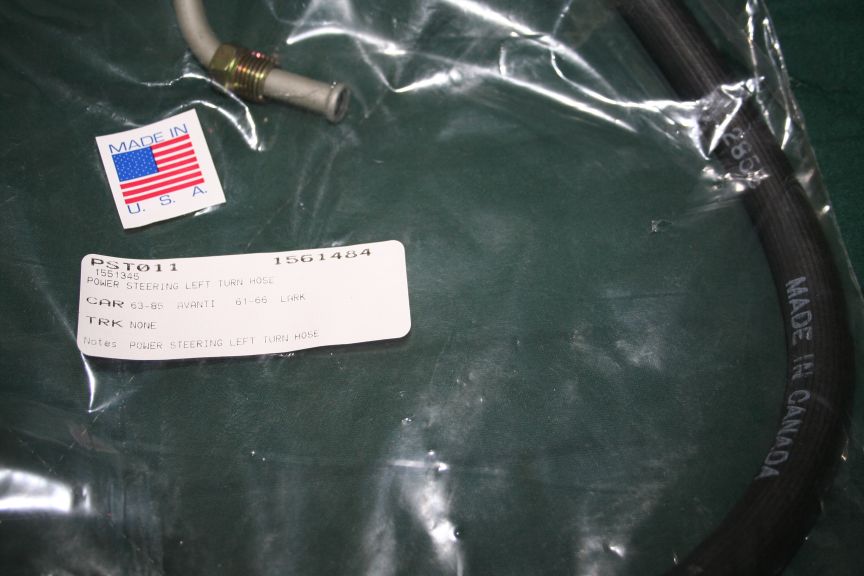
    The above link covers changes to the bends that were REQUIRED to use
    the SI hoses. As delivered the hose would NOT allow the wheels to be
    turned both direction. A tubing bender was required, along with a
    vice and some choice sware words. 12/31/08

    Now back to the original thread:

    This is something I am NOT looking forward too. Talk about messy. We
    had a '63 Wagonaire that needed hose replacement, I did that one too.
    That was [u]many</u> years ago, I was a bit more flexible .......[B)]

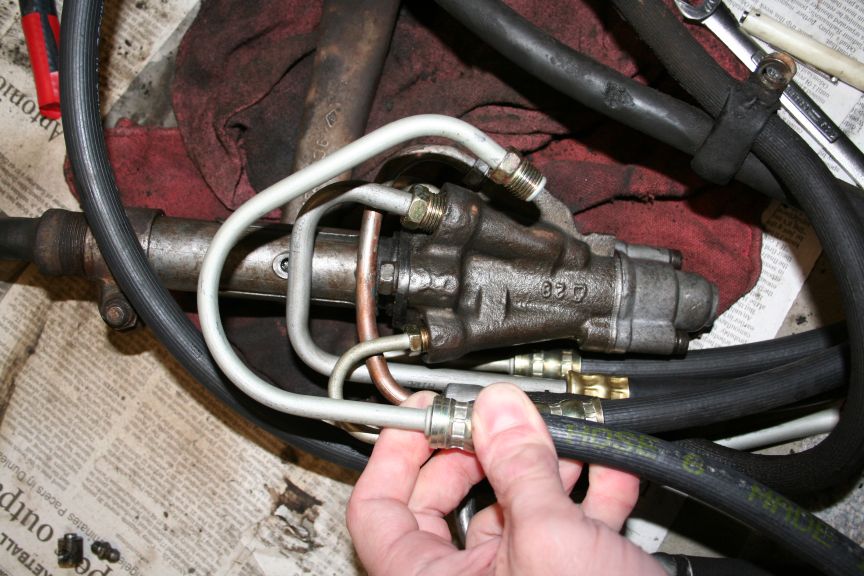
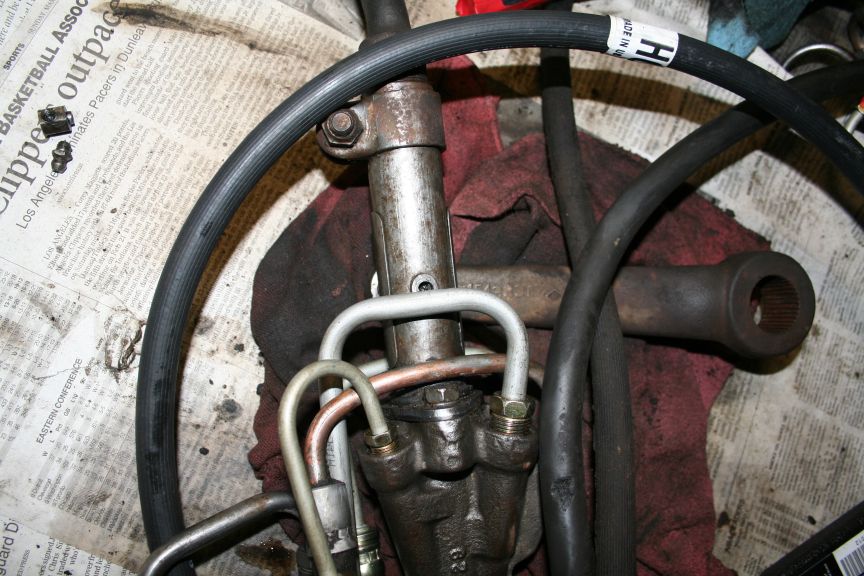
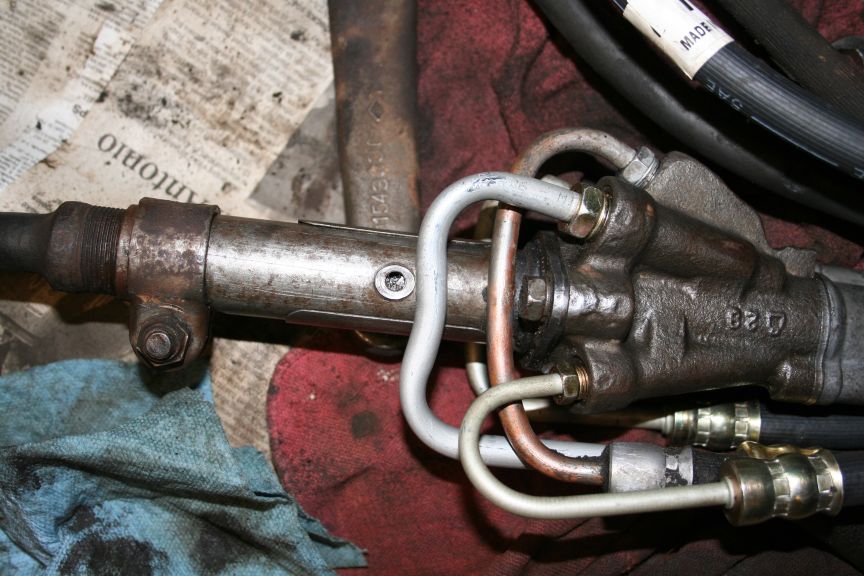
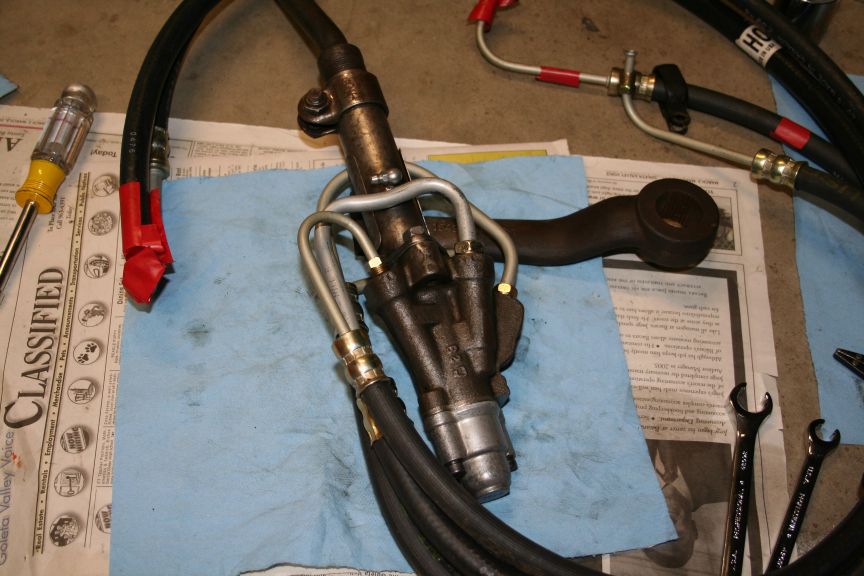
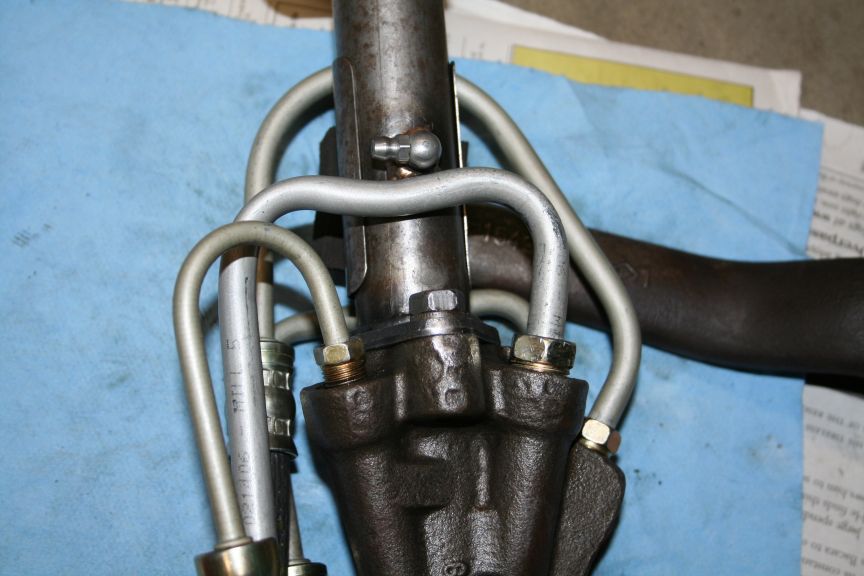
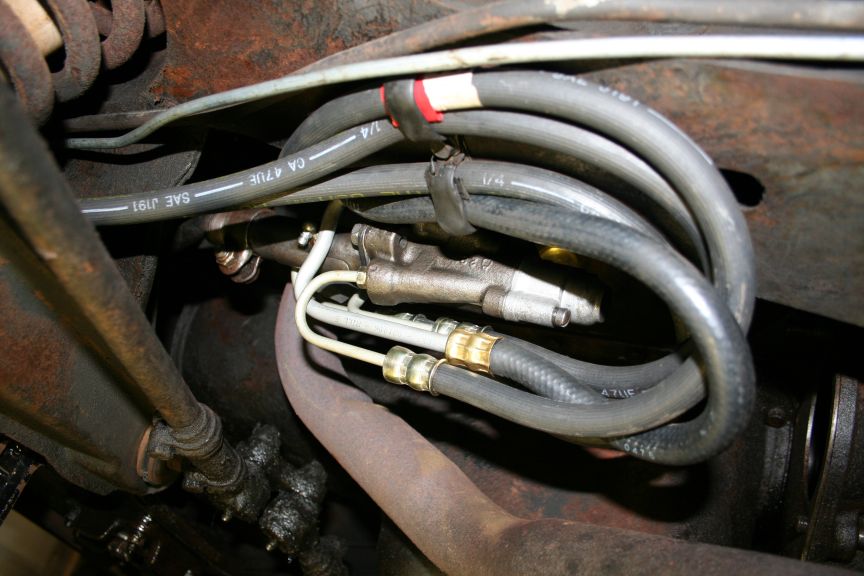
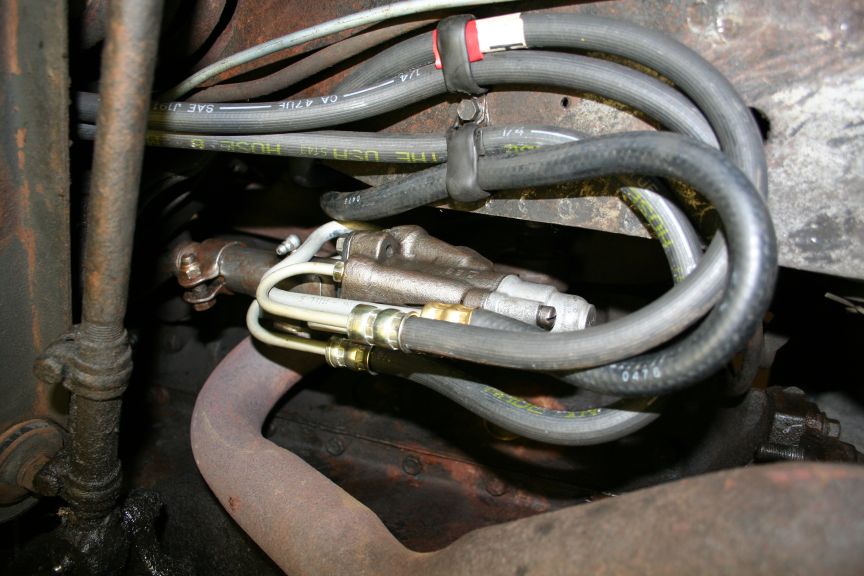
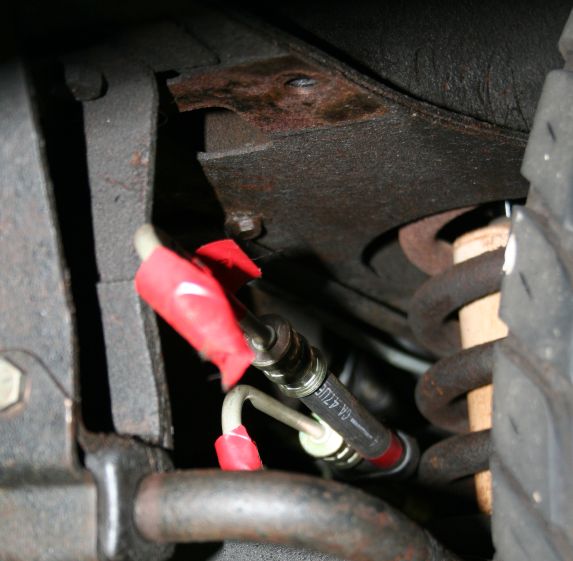
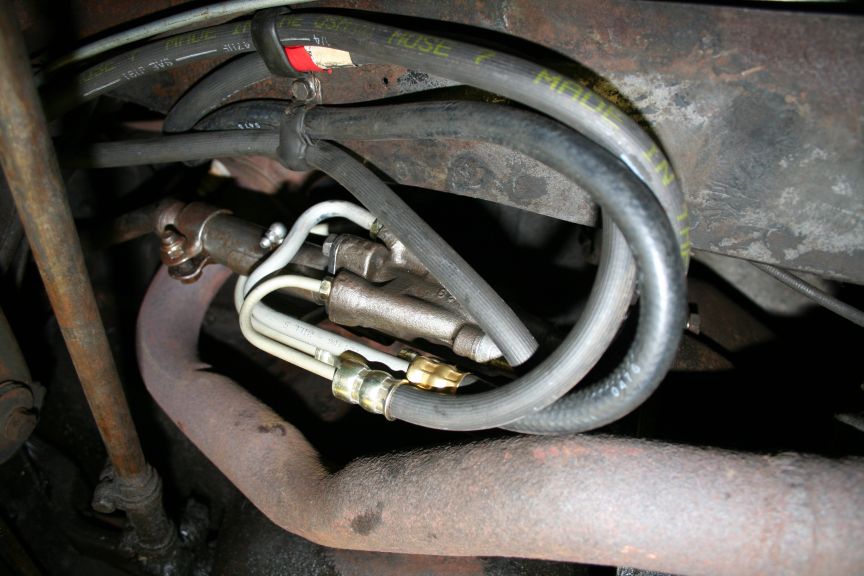
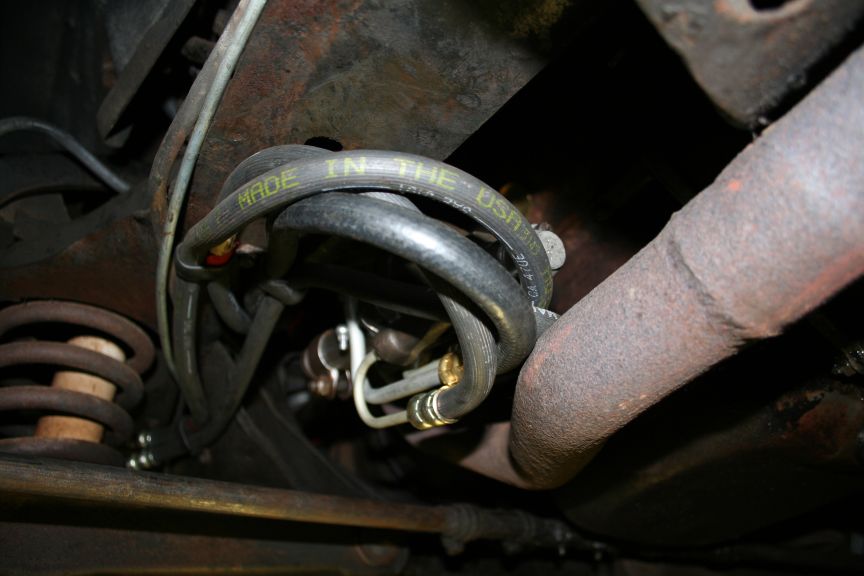
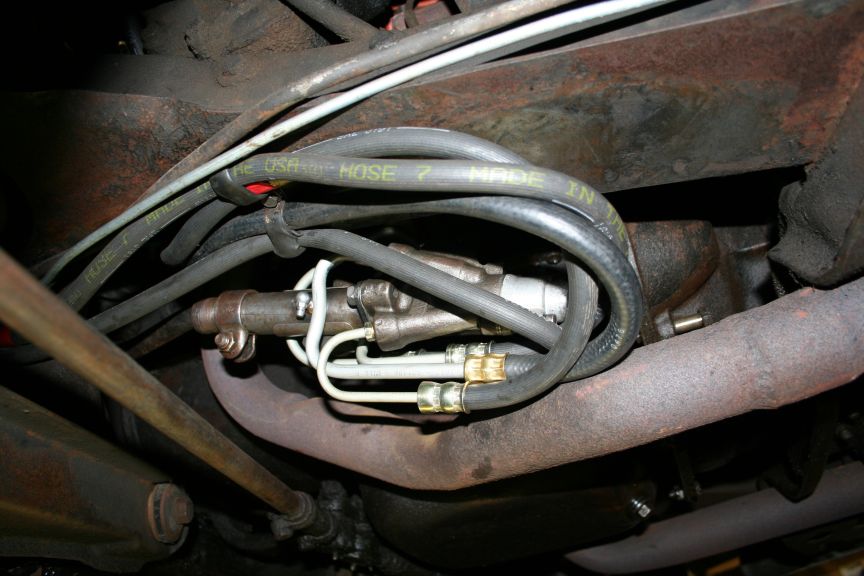
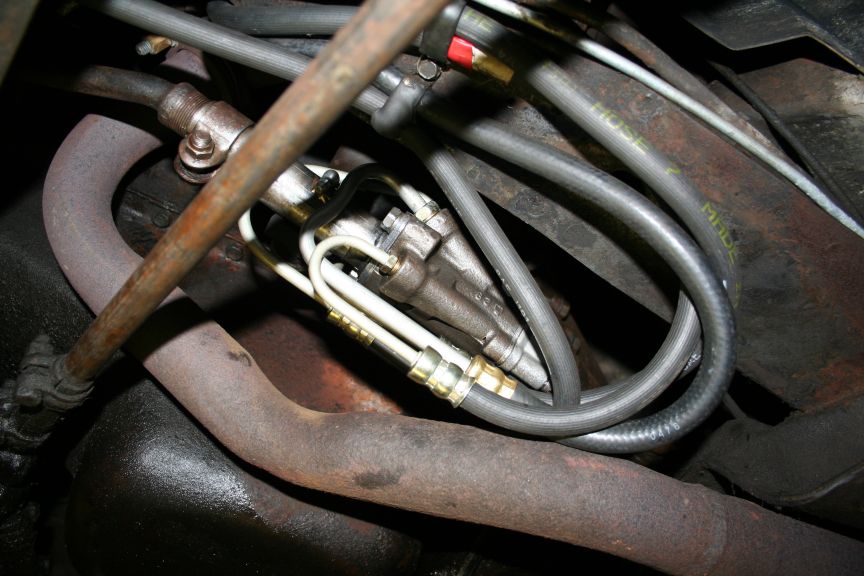
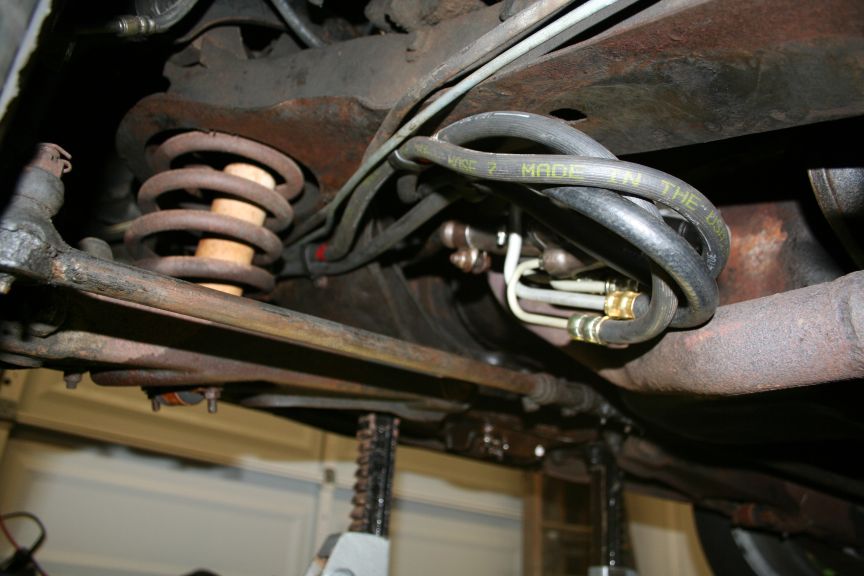
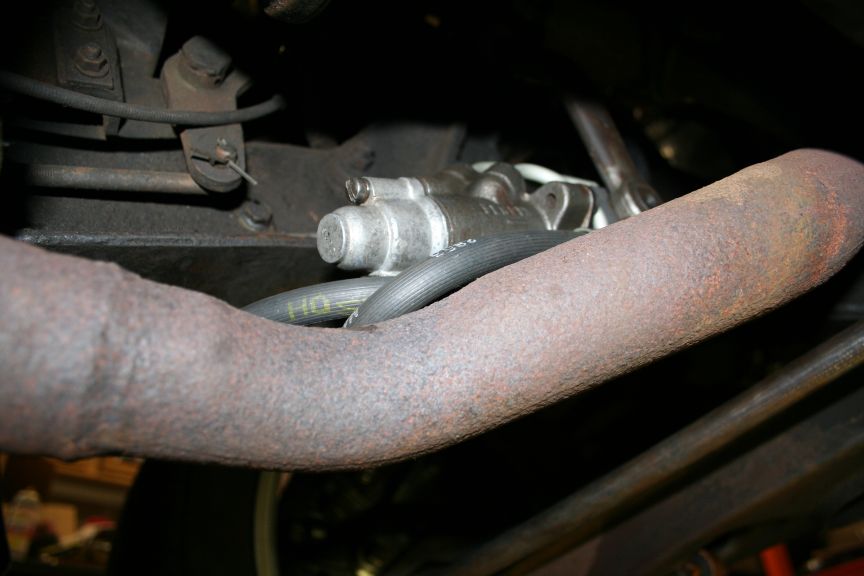
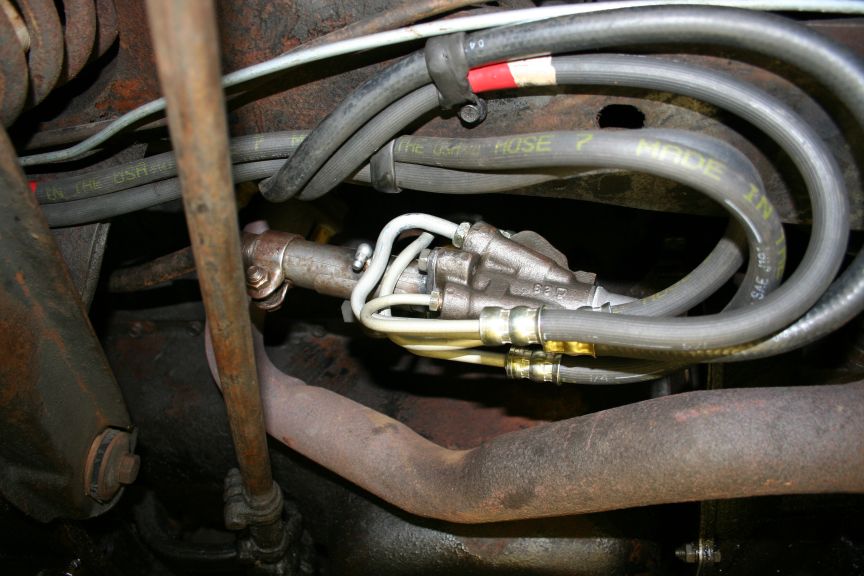
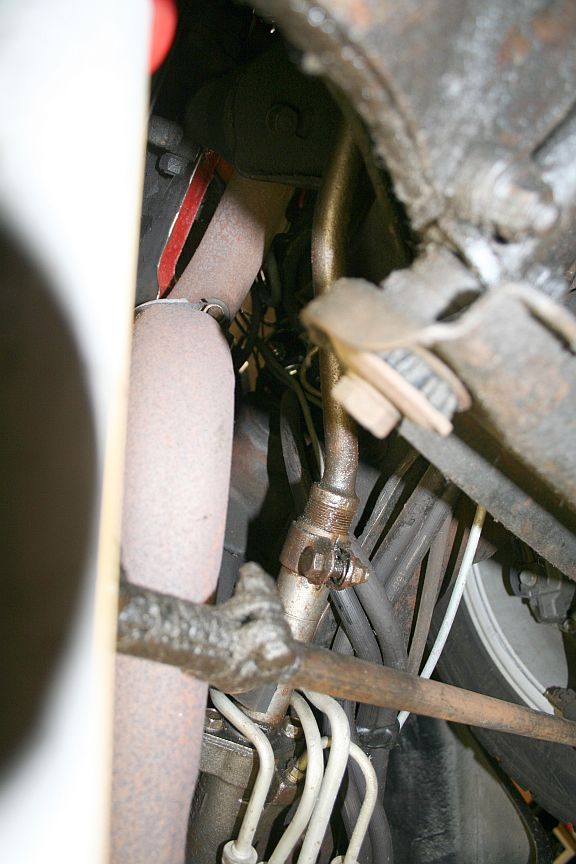
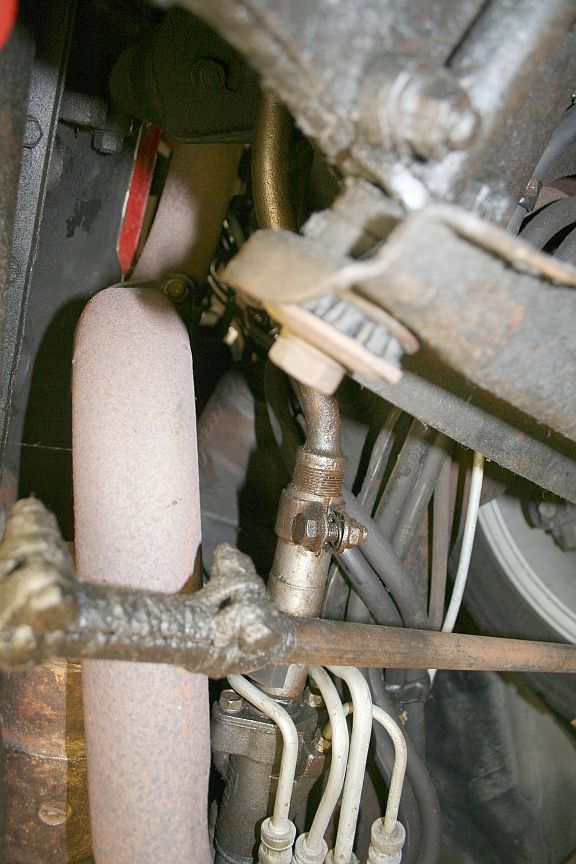
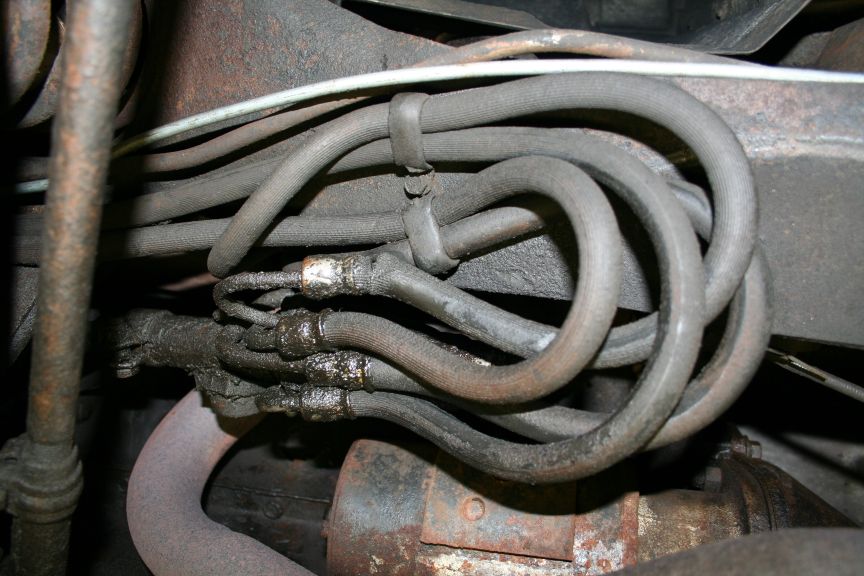
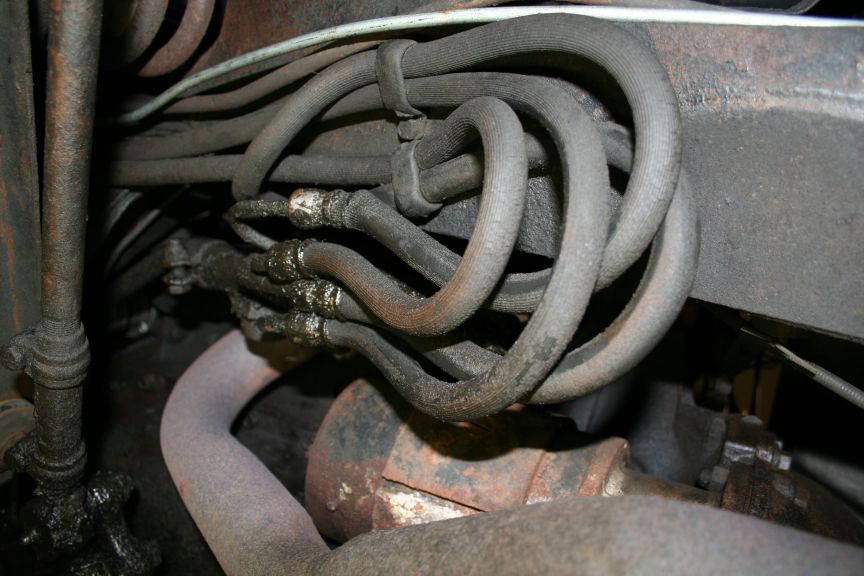
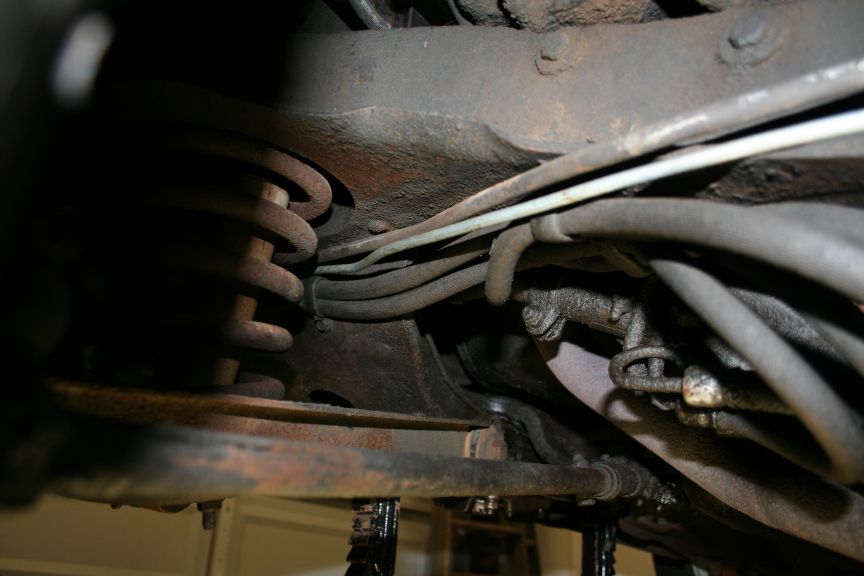
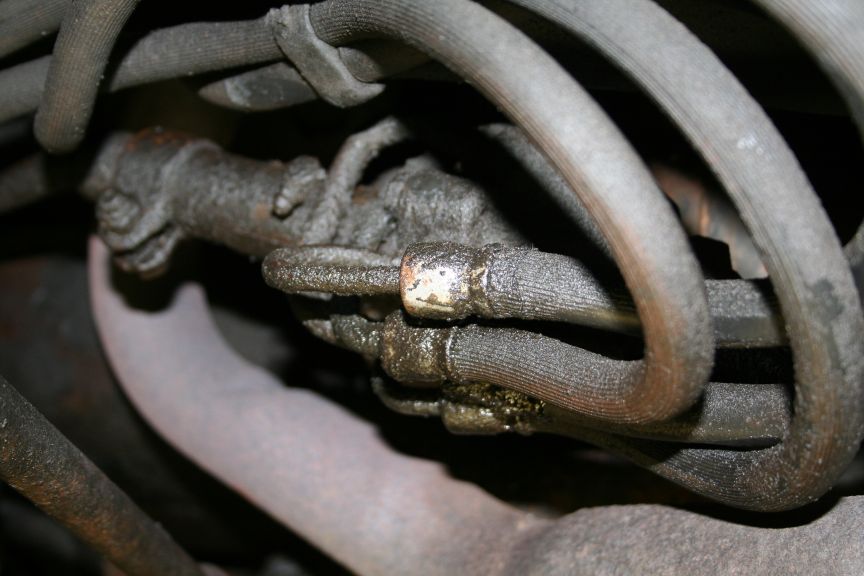
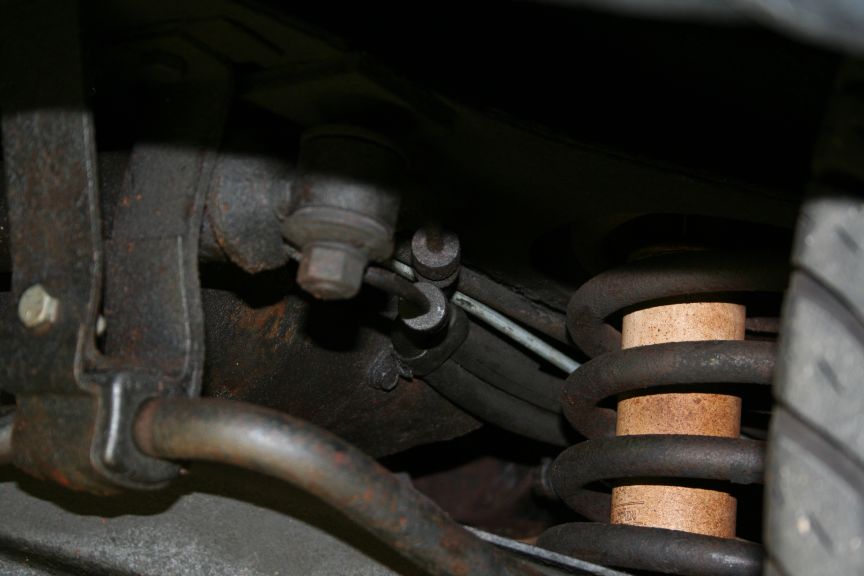
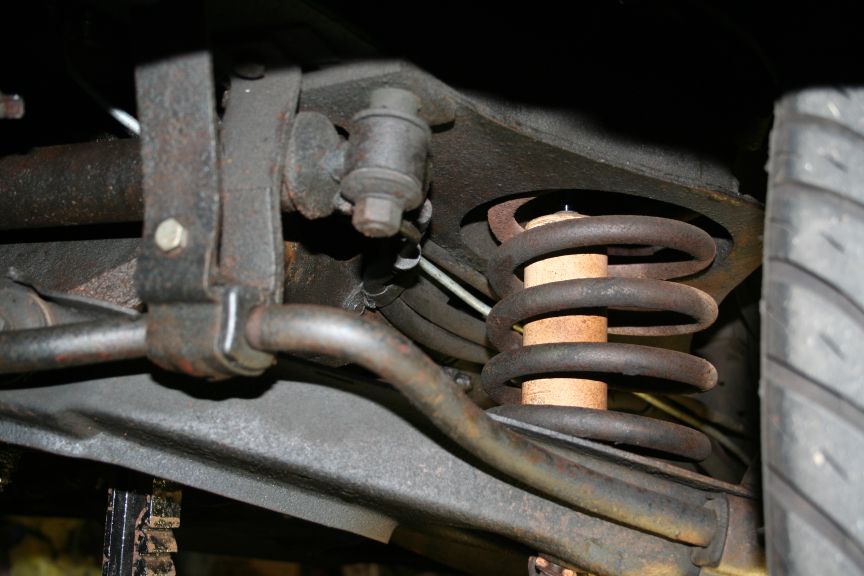
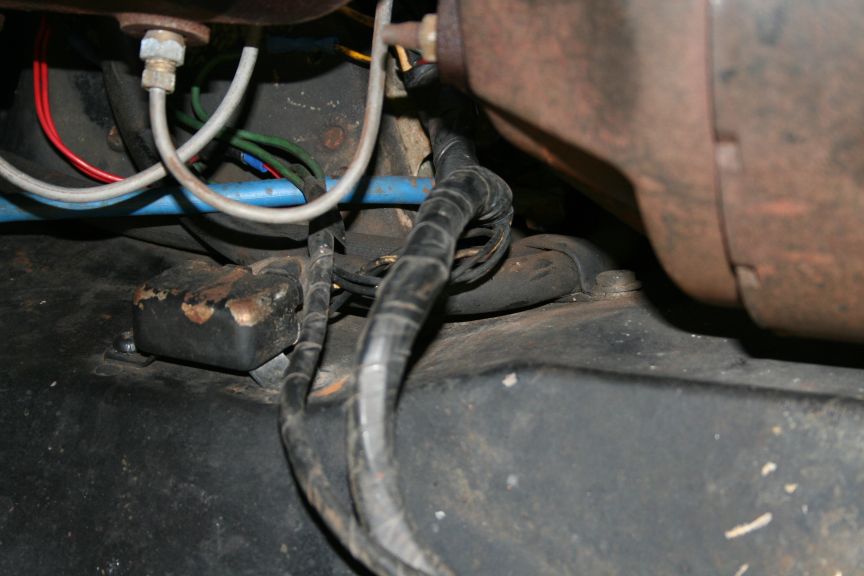
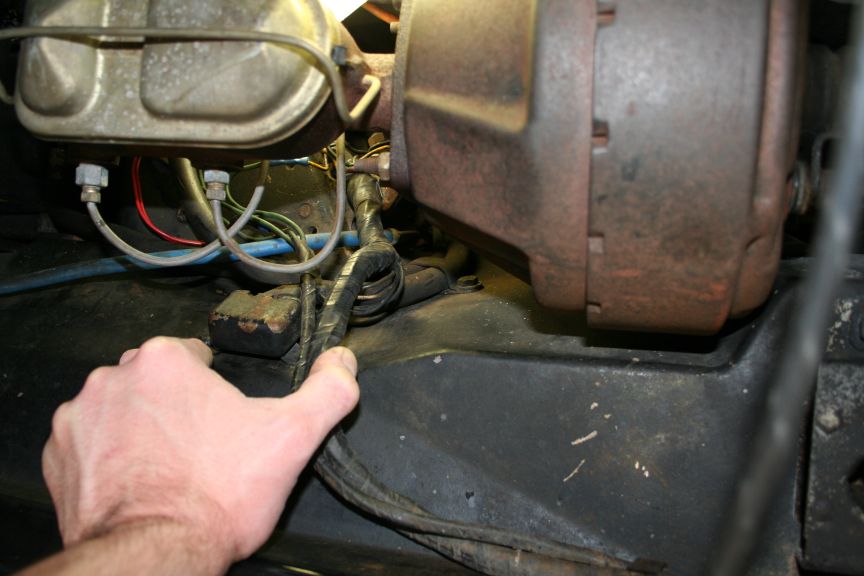
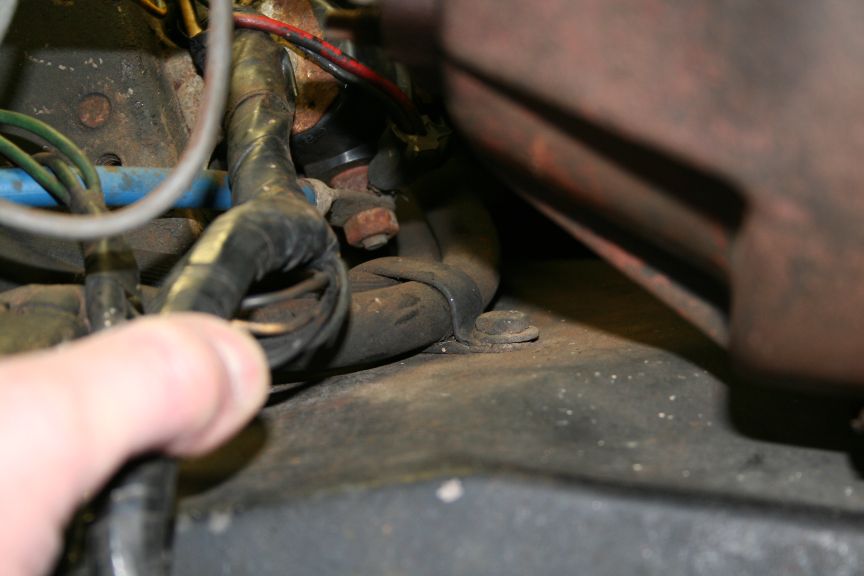
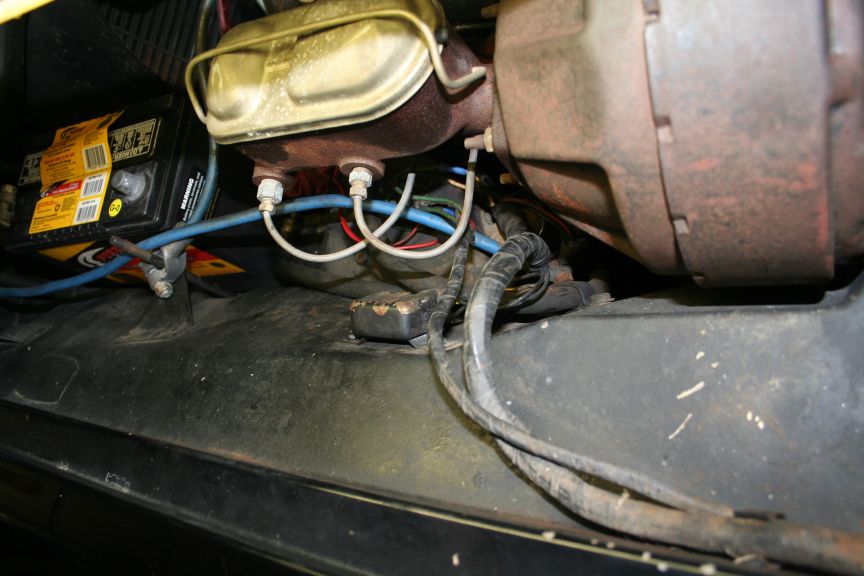
    I thought it was worthwhile to document as best I could how the hoses
    are routed from the factory. I took a bunch of pictures and thats how
    I will start this thread - by just posting them in the first entry.


    Tom

    '63 Avanti, zinc plated drilled & slotted 03 Mustang Cobra 13" front disc/98 GT rear brakes, 03 Cobra 17" wheels, GM alt, 97 Z28 leather seats, soon: 97 Z28 T-56 6-spd, Ported heads w/SST full flow valves, 'R3' 276 cam, Edelbrock AFB Carb, GM HEI distributor, 8.8mm plug wires

  2. #2
    Golden Hawk Member DEEPNHOCK's Avatar
    Join Date
    Oct 2004
    Location
    Brooklet, GA, USA. Planet Earth
    Posts
    14,768
    Good on ya' for taking before pic's.
    That will definitely help you when it comes to reassembly.
    Jeff[8D]

  3. #3
    President Member
    Join Date
    Oct 2004
    Location
    Southern Maryland
    Posts
    538
    Tom,
    Thanks for posting the great pictures. Power steering hoses are often routed badly, on Avanti's.
    The hoses to the ram, from the control valve, are well shown in the illustration from the parts book, and pictures Stan Gundry posted:
    https://www.studebaker-info.org/tech/Diagrams/PS2.JPG .
    https://talkshop.blogs.com/photos/photos/index.html .
    However, the parts book shows only an early version of the hoses to the pump. The metal portion of these early hoses goes straight forward on the control valve. They route up, to the rear of the steering box.
    The metal portion of later pump hoses, like the ones on your car, curves to the rear, like the hoses to the ram. I don't think Stude made a drawing that shows routing of these later hoses.
    My pictures of the hoses on the control valve are in the photos at the Yahoo Avanti site, or at:
    https://www.studebaker-info.org/tech/...valvehose.html . Identification is clearer with a little more punctuation, or if each hose is explained on a separate line. I think I was done in by "wrapping"!
    #1: Yellow, Ram, Bottom, Right Turn.
    #2: Green, Ram, Top, Left Turn.
    #3: Blue, Pump, Pressure.
    #4: Red, Pump, Return.
    Your excellent pictures show the clamp on the pump hoses that's on the fender apron of later cars. On these, the pump hoses route around the front of the power steering box, and up the apron. I posted a picture of the hoses on Paul Johnson's '64 Avanti, in "Files", at the Yahoo site. Contrast under the hood is better, because of the color of the car.
    I'm supprised to see the clamps nearest the control valve on your car. Do you think they are original? I have only one clamp at that spot; and it's used for the fuel lines. The rubber portion of my pump hoses curve up and forward, above the control valve. Then, they go around the front of the steering box, and up the apron, to the only clamp. The unrestricted length gives more flexibility; and doesn't leave them loose enough to hang down, or get into trouble.
    The hoses to the ram on my car have no clamp at the control valve either. The first one is as shown in the parts book; and there is a second further forward.
    My car is a '64. Neither power steering hoses or fuel lines were original when I bought it. I "rediscovered" the hole for the clamp in my fender apron when I replaced the hoses. I certainly can't guarantee I've routed them, or positioned them on the control valve, the way the factory did. Maybe I have. All the clamps and mounting screws in the late parts book are accounted for; and the hoses fit pretty well.
    Mike M.

  4. #4
    Silver Hawk Member N8N's Avatar
    Join Date
    Oct 2004
    Location
    Falls Church, VA
    Posts
    7,100
    All I have to say is "me three" - I wish more people would document original routing of hoses, lines etc. for those of us who inherit "not quite factory" cars

    nate

    (still wouldn't mind having a set of same for a '55 coupe with power steering)

    --
    55 Commander Starlight
    https://members.cox.net/njnagel

  5. #5
    President Member
    Join Date
    Feb 2006
    Location
    Santa Barbara, California, USA.
    Posts
    3,727
    I believe they are original, this car "only" has 100k on it, though
    it was 'restored' in the 80's. I dont know to what degree that means,
    and I have no clue what they did. After going through the car, I bet
    it was only interior and paint. Mechanically the car is in OK shape,
    but not rebuilt-in-the-80's shape. Since the 'restoration' the car
    has received MAYBE 600-1000 miles. Maybe others will confirm the two
    clamp setup, but the routing seems to work pretty good. Do you think
    that its an improvement?

    Tom


  6. #6
    President Member studeclunker's Avatar
    Join Date
    Apr 2005
    Location
    Lewiston, California, USA.
    Posts
    4,640
    The manual recommends pulling the motor to do this. I have to concurr. Getting to the lines to tighten them is a bugger when the motor is in place. If it is taken loose and raised about a foot (getting everything out of the way), the problem is solved. I had to pull the motor in my '63 wagon and that's when I replaced the hoses. The routing of the hoses is CRITICAL! I found this out when the exhaust manifold burnt through my return hose.


    Home of the famous Mr. Ed!
    Lotsa Larks!
    K.I.S.S. Keep It Simple Studebaker!
    Ron Smith
    Where the heck is Lewiston, CA?

  7. #7
    President Member
    Join Date
    Feb 2006
    Location
    Santa Barbara, California, USA.
    Posts
    3,727
    Yes, I have been told the best way (other then pulling the engine) is
    to remove the pitman arm with the control valve and the hoses still
    attached. Then, clean, put in a vice remove the hoses, reinstalling
    the new ones the same way, and snaking the hoses back where they were.

    The next step after taking the above pictures is to test this theory
    and see if it can be done. Looks possible. I need a larger pickle
    fork for the pitman arm though. I bought a threaded tierod puller, it
    is supposed to also pull pitman arms, but I dont know if it has the
    reach. Hopefully all will go well.

    Tom

  8. #8
    President Member
    Join Date
    Oct 2004
    Location
    Southern Maryland
    Posts
    538
    If the routing works pretty good, that's a strong argument in its favor! My interest in how the factory did it, is as much in finding a good way to do it, as for the sake of originality. Make sure the hoses don't kink or pull too tightly through the full range of control valve movement.
    I think your clamps are examples of the original Stude "clip, 1543994". I found only three listed for the whole car in the Dec. '63 parts book. Two are in the power cylinder and control valve section. They are secured to the frame with two self tapping 1/4" screws. I think these are the two used separately on the hoses to the ram, further forward than the pair in your picture.
    A third clip, with the same #, is listed with the pump parts. It's held to the fender apron by a 5/8" long 1/4 20 screw, nut, and washer. I think the fact that it's a through hole, without a nut plate in the fiberglass like the horn relay and regulator, indicates it was an after thought or revision. Early cars, with the other type pump hose, ran the hose beside the exhaust manifold; and wouldn't have used it.
    Since your car is a '63, it may have had the earlier type hose originally. Is the retainer spring or its bracket still in place on the steering box, like in the drawing I listed above? Maybe the later style hoses were installed in the '80's, with the double clamps as an innovation.
    I took a quick look at mine. The clamp on my fuel lines in that area is retained by a bolt through the flange at the edge of the frame; not the center of the bottom plate. Oddly enough, I used two "Adel" clamps held by one bolt, like your PS clamps, to hold the fuel feed and return lines. I don't know what the original arrangement there was.
    Mike M.

  9. #9
    President Member
    Join Date
    Oct 2004
    Location
    Southern Maryland
    Posts
    538
    I recommend removing and installing the control valve and pitman arm assembly with the hoses attached. That's how I did my Avanti.
    The pitman arm puller I used looks exactly like the one Summit Racing sells for $14.95, WMR-W142 @ :
    https://store.summitracing.com/egnsea...s=false&N=+115 .
    I replaced the puller's bolt with a short, 1/2" fine thread hex bolt, reversed, so the head bears against the end of the steering box shaft. I have two bolts in the box with the puller, 1 1/2" & 2" long, threaded all the way up. I'm not sure which worked. The shaft isn't tapered; and I remember the arm came off easily. There is a mark on the arm and shaft, so you can put it back in the same position.
    It's a good time to replace the seal on the steering box shaft.
    The tie rod end on the reach rod came loose with a pickle fork. It's easier to get to than the one for the ram, which I unscrewed, like you did.
    Total length of the reach rod and control valve is specified in the manual. It has to be right, as well as the pitman arm position on the shaft, to center the steering worm. The worm is wound to give progressively faster steering, away from center, when the wheels are pointed straight ahead. The lengths of the two tie rods should be the same, too.
    On the control valve, there are soft aluminum seats in the valve housing that the flared hose ends seat against. These are often pretty beat up. One really should come out, to clean a check valve behind it. These may be a standard hardware item. Does anyone know where to get them? I left mine as they were, and hoped for the best with the check valve; but it would be nice to know where to get them.
    Mike M.

  10. #10
    President Member
    Join Date
    Feb 2006
    Location
    Santa Barbara, California, USA.
    Posts
    3,727
    Dammit .. the one I just bought was like WMR-W80557. Think it might
    work? So the pitman arm is marked, I seem to remember that, but is it
    also missing one "groove" so that it only goes on one way? For some
    reason I seem to remember this being the case on my '60 Hawk. No?

    Also, did you find you needed to remove the started to get enough room
    to work on the pitman arm? Looks like it might help. I just do not
    want to remove anything more then I have too - after seeing the damage
    someone did to the Ram pivot bolt threads. My guess is it was put on
    with an impact gun. The bushing looks to be in TOO good of shape. So
    you might be right that the hoses and such were changed in the 80's.

    Tom

    quote:Originally posted by Mike

    The pitman arm puller I used looks exactly like the one Summit Racing sells for $14.95, WMR-W142

  11. #11
    President Member
    Join Date
    Oct 2004
    Location
    Southern Maryland
    Posts
    538
    The puller I used was definitely like Summit's WMR-W142. I just checked "opening" and "pull travel". I don't know what they mean by "3/8 inch drive", though. It isn't.
    The other one is only a little smaller. Maybe it will work. You will need to use a shorter, reversed, center screw.
    I did have the starter off.
    I think if the seal has been leaking badly enough, you might not need a puller!
    I don't remember if there is a groove missing on the pitman arm, so it will only go on one way. There was a mark. You should make one if you don't see it.
    Mike M.

  12. #12
    President Member
    Join Date
    Feb 2006
    Location
    Santa Barbara, California, USA.
    Posts
    3,727
    I wish .. thats not MY kind of luck though. Actually I dont see any
    leakage from the steering box. I bought the seal, but I am tempted to
    NOT change it. I hate disturbing things that are OK. But as you and
    I BOTH know, if I leave it .... THEN it will start leaking.[xx(]

    Tom

    quote:Originally posted by Mike

    I think if the seal has been leaking badly enough, you might not need a puller!

  13. #13
    President Member Lenny R2's Avatar
    Join Date
    Jul 2006
    Location
    Atlanta, GA, .
    Posts
    747
    Tom
    I just finished changing my P.S. hoses on my 64 Avanti R2.I removed
    the starter and took the exhaust pipe loose.It was a struggle but you
    can remove & replace the hoses with the control valve on the car.I
    hope i never have to change them again.I had to grind a few line wrenchs
    down to fit.

    Lenny

  14. #14
    President Member
    Join Date
    Sep 2005
    Location
    Dobson, NC, USA.
    Posts
    1,670
    I've done mine twice on the car. If you're replacing them just cut the tubing and use a socket to remove the nuts. There are replacement hoses that are bent wrong and I had to buy a second set from a different vendor to get hoses that worked.

    ErnieR


    On its way to a 15.097 Spring 2006.

  15. #15
    President Member
    Join Date
    Feb 2006
    Location
    Santa Barbara, California, USA.
    Posts
    3,727
    quote:Originally posted by bige
    There are replacement hoses that are bent wrong and I had to buy a second set from a different vendor to get hoses that worked.
    Thats covered on the link I just added to the top, yes the hoses had
    been bent incorrectly, here is the incorrect bend and rebend :


    Tom

  16. #16
    President Member 53k's Avatar
    Join Date
    Oct 2004
    Location
    Harpers Ferry, West Virginia, USA.
    Posts
    4,518
    When I replaced all four hoses on my '64 Wagonaire a couple years ago, I did it with the engine in and the pitman arm on. Like everyone has said, it's not easy, but I went out and bought a set of stubby end wrenches and was successful in tightening the hoses to the control valve with them. I ordered my hoses from Jon Myer and, while they were a little different from the originals, I didn't have any problem with the bends.

    Paul Johnson, Wild and Wonderful West Virginia
    '53 Commander Starliner (since 1966)
    '64 Daytona Wagonaire (original owner)
    '64 Daytona Convertible (2006)
    Museum R-4 engine
    1962 Gravely Model L (Studebaker-Packard serial plate)
    1972 Gravely Model 430 (Studebaker name plate, Studebaker Onan engine)

  17. #17
    President Member WCP's Avatar
    Join Date
    Feb 2008
    Location
    Glenburnie, Ontario, Canada.
    Posts
    1,165
    In reviewing Mikes photos on yahoo, I agree with the hose arrangement at the control valve, with the exception that the pressure hose (blue) is rotated to pass upward and tuck into the groove of the control valve where it comes together with the return hose toward the rear of the valve. Those hoses then loop forward around the front of the steering box and up and rearward to a clamp on the apron. The hoses then loop forward against the apron projection and under the regulator terminals, wrapping forward to the pump. I add an extra clamp at the inner regulator fastener to restrain the hoses from chafing on the left emission shield. There should be only one clamp on the frame opposite the valve and the one forward near the ram. The hoses should form a neat bundle toward the rear of the valve. There should be no hose crossovers necessary. I've never had to perform major rebending of hose ends - just some minor tweaking to "bundle" the hoses. My current Avanti is an early one (R1236) and has the spring clip mounted toward the rear upper steering box cover capscrew and no hole in the apron for the clamp as I recall. I think the hoses originally came around the steering box and were restrained by a spring as used on the Hawks and clipped to the steering box, and then would have followed the same path as I'm currently using. When I'm happy with the fit of the hoses, I add a hose clamp at the forward steering box to frame mounting bolt to minimze any chafing at that point by locking the hoses to the steering box. Do a full lock to lock check of the steering to check for any interference. Make sure on a full right turn that the pitman arm is not stiking the steel tubing of the turn hose. If it does, loosen the valve to reach rod clamp and rotate the valve a few degrees to give the necessary clearance. It's not enough to alter the steering geometry. Hope this helps. Some day I'll get set up to post pictures.

  18. #18
    President Member
    Join Date
    Feb 2006
    Location
    Santa Barbara, California, USA.
    Posts
    3,727
    Getting back to this on how I got from point A to point Z ...

    Also, I took some pictures of the new hoses. You can see the original hose on the control valve
    (brownish/gold), and I am holding the new hose, the bend is completely different:


    Also notice that there is NO way the return line will clear the tower I broke off ... whats going on
    here??


    According to the packaging I got the correct hose ...... BTW, is this new hose "made in USA" or
    "made in Canada"?


    I bought a tubing bender and mounted it into a vice at work. I put the handle in the vice, I then
    could use my body weight and hold the tube. I made a bend the opposite direction, and it seems
    to clear now :


    I got the control valve back on the car, I routed the hoses the way they were originally and one
    of the power ram hoses is not as long as the other!!!!!

    This is the funky long bent one that replaced that quick bend one on the valve before :


    I think I will have to remove this and rebend it so its a quicker bend which will in effect make the
    hose longer. I think that I would have had better luck having the hoses made locally, this is REALLY
    starting to piss me off now.

    Here they are :


    On the car :


    Tom

  19. #19
    President Member
    Join Date
    Feb 2006
    Location
    Santa Barbara, California, USA.
    Posts
    3,727
    OK .. I spent HOURS there routing and re-routing hoses. First I put the power ram back on the
    car to get a reference of where the ends of the two steering pressure hoses should be. So, my
    conclusion is that the one hose IS too short, I would say about 6 inches too short. With the all
    hoses clamped down like they were, I can ONLY turn the wheels until it is straight ahead. At that
    point the hoses pinch and hit the exhaust. The "short" hose is fully stretched, and I see no way
    to route it that would give me enough room. My solution is to remove the hose from the car and
    bring it to a local shop that makes pressure hoses. I will have them cut the hose in the center
    (between the two mounting clamps) and add a 6 inch length of tubing. I also noticed that the
    ends are NOT crimped on correctly, causing the hoses to be twisted to get them to line up on the
    car. I am very disappointed with this.

    Here are the pictures ..

    Wheels barely able to be pointed straight ahead :


    Notice a VERY stretched pressure hose at the halfway point??


    Tom

  20. #20
    President Member
    Join Date
    Feb 2006
    Location
    Santa Barbara, California, USA.
    Posts
    3,727
    I am stumped. I took the hose off tonight after work, and pulled the old one out of the bag. Side
    by side they are the same length. Seems that the new hose SHOULD be longer since it now goes on
    the opposite side then it did originally. I dont get it. I guess I can wait on getting it lengthened,
    and rebend the end to match the old hose, then I can mount it on the "correct" side, and the longer
    metal end will give me a little more length - maybe I wont want it then? I could do a rebend just to
    allow me to put it back on the "correct" side. Here is the picture I took of old vs new :


    Alright ... if it doesnt work ... redesign it ...


    Done. The hoses are on, everything clears, rebending the end gave me about 3 inches of extra length,
    and bringing it out on the CORRECT side of the control valve eliminates the problem of catching on the
    back of the control valve. I will post the modification pictures on a future thread. I just want this thing
    drivable again. Studebaker obviously did this a certain way originally, why S.I. decided to change it is
    beyond me.

    Tom

  21. #21
    President Member
    Join Date
    Feb 2006
    Location
    Santa Barbara, California, USA.
    Posts
    3,727
    A different angle of the hoses was requested :


    Tom

+ Reply to Thread

Quick Reply Quick Reply

Rich Text Editor

Similar Threads

  1. 55 Sedan power steering hoses SOLVED
    By Tom B in forum Tech Talk
    Replies: 7
    Last Post: 05-28-2009, 01:27 PM
  2. 63 Hawk GT-Need to replace P.S hoses-which ??
    By starlightchamp in forum Tech Talk
    Replies: 8
    Last Post: 01-05-2009, 03:49 PM
  3. power steering hoses
    By forrest in forum Tech Talk
    Replies: 6
    Last Post: 08-30-2006, 09:31 PM
  4. Saginaw Power Steering - Hoses
    By Frank Starr in forum General Studebaker-Specific Discussion
    Replies: 3
    Last Post: 06-04-2006, 10:10 PM
  5. Power Steering Hoses
    By S_Ferrell in forum General Studebaker-Specific Discussion
    Replies: 20
    Last Post: 10-06-2005, 05:35 PM

Tags for this Thread

Posting Permissions

  • You may post new threads
  • You may post replies
  • You may post attachments
  • You may edit your posts
  •