| Author |
 Topic Topic  |
|
|
Lark Parker
Cruiser Member

USA
235 Posts |
 Posted - 12/12/2007 : 9:19:33 PM Posted - 12/12/2007 : 9:19:33 PM


|
As a note prior to starting #3 I should "Never say never." and I know "Always" always has an exception. And so forth.
Therefore, if I make a statement to never do something, please do not try to think of an exception that will take away from the thought being presented. If it's not important, I was probably too lazy to include the statement anyhow, so just let it be.
I have had the experience of being "hired" to work on pieces and then the owner trying to tell me to to use his method (that he had used just one time). At my request, he took the pieces home with him to do his way.
The misleading term "hammering" will be used often. The force that the word implies is rarely true but I don't have a better word. A visitor to my stainless batcave watched me work for a while and then said, "I thought that you would hit it a lot harder than that."
The term "dent" will be assumed by different readers to be different things. Is it pea size induced by a high velocity bug impact? Or did it happen when the wheel well trim took the impact of a Hell's Angel kicking it? Slowing down to describe the dents is not within the scope of my hospitality.
Straightening damaged stainless usually requires a very light touch because the metal is so very thin. As mentioned before, the pieces typically are made of .022" thickness metal. Since the finished piece will have a natural finish, we do not have the luxury of using filler to cover imperfections of the straightening process. Let's try to not add damage to the already hurt piece. The two main ways to add damage is (1) to use tools that don't fit the shape of the piece, and (2) stretching the metal.
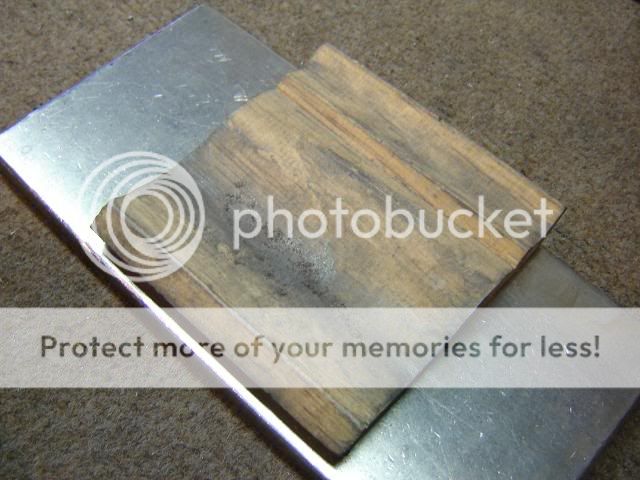
I use a 3/4" plywood bench top covered with a thin carpet/stair runner. A FEW times that alone is the backing for the hammering but, usually, I use a piece of polished metal on top of that and then cover the metal piece with something.
Two reasons for the metal piece (1) It takes away surface bounce, and (2) it just looks so darn professional<g>.
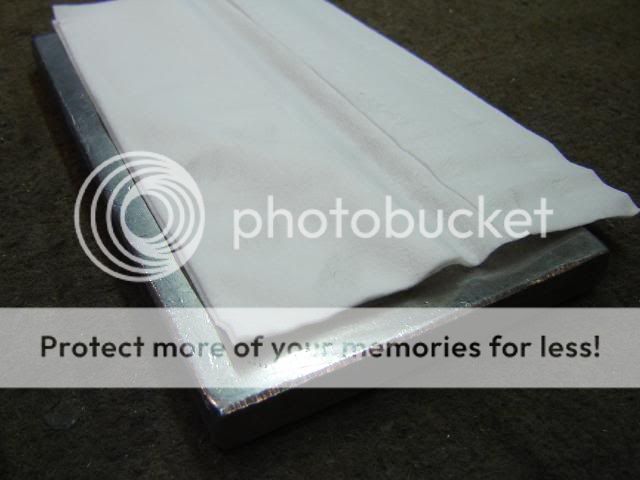
Lousy picture. My metal piece is 4"x 8" x 1/2", the exact dimensions for yours will depend upon what you can find for free to use. Always have at least a couple pieces of tissue on the metal piece.
NEVER hammer (tap) on the piece with bare metal below it. The force of the tap cannot be controlled accurately and you will mash (stretch) the metal. The result will be a bulge in the surface. Since we are working with thin metal, sanding off bulges should be avoided. The original hurt to the piece may have stretched the metal, or perhaps you couldn't avoid stretching it during repair hammering. A bulge can often be hidden by tapping along the edges of the bulge area to feather it out over a longer area. ( test question.)
This is a good time to say NEVER USE A PUNCH on the metal. To illustrate the reason: If you hammer/punch out a dent -- the trim's inside surface will look like a golf ball. The trim's outside surface will look like pebble grain. Congratulations, you have stretched the metal and at the same time created some very thin metal when those pebble grain bumps get sanded off. Additionally, the work was tedious because you needed to hold the metal, hold the punch and hold the hammer, all at the same time.
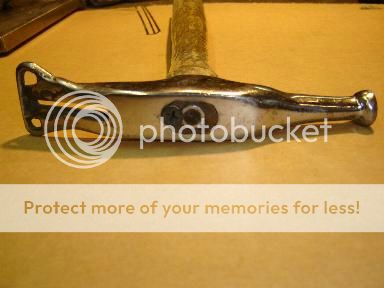
Here is the legendary Golden Hammer. It weighs about five ounces.
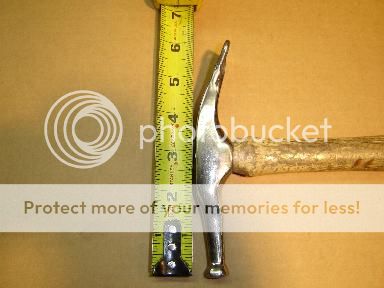
The legendary Golden Hammer is typically used for about half of my repair time, including the time spent sanding and buffing. For 90% of the time the hammer is used, the head's "claw end" is what is applied directly to the stainless. ( test question.)
The hammer was made from an upholstery hammer. The crude reshaping was mostly done by hand with a side grinder because lathes and mills were not up to the task. If the appearance offends you, your priorities need adjusting. The claw end of the head was modified by TIG welding a ten penny(?) nail bent into a hog ring shape. The nail is placed near the top of the claw for good visibility while "hammering". There is a very slight curve on the nail. The sharp corners of the nail will be handy for hitting small spots sometimes.
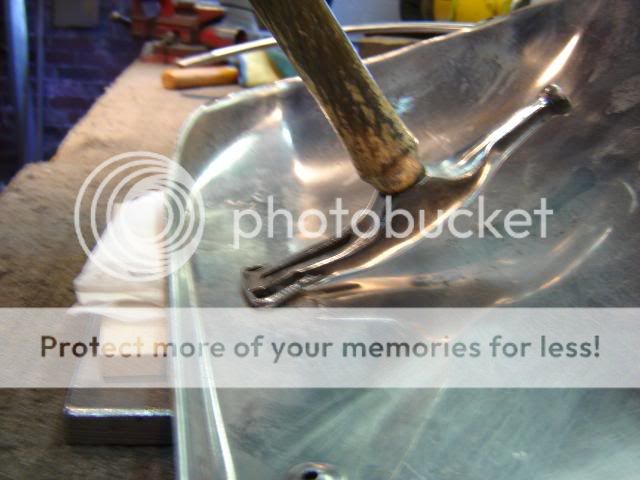
Observe the phony picture of the hammer being used on a stone guard. The angle that the hammer hits the metal is the important point. A sliding, glancing blow at this angle is about ideal. This ideal angle will not always be possible on narrower trim pieces but you get the idea. Rotating the stone guard 90 degrees would not work because the curve would no longer match the hammer and "out dents" would occur. As much as possible we are trying to bend the metal back to its old form --- not hammering it out. For very small (pea -- small marble) size dents it won't matter much that it may get more hammered than bent.
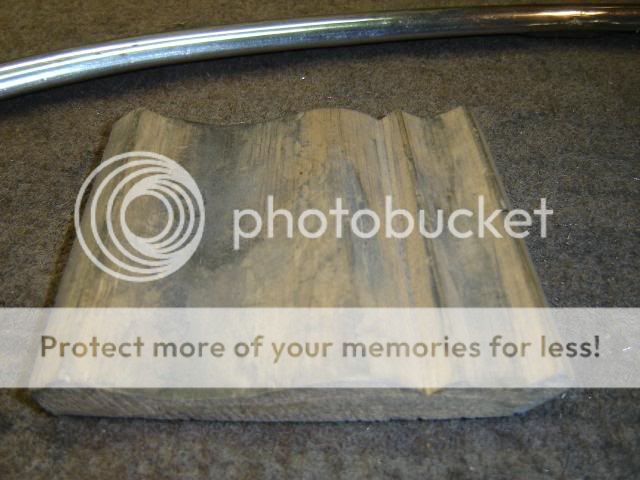
The wood pieces are good work surface backing. I use a hardwood molding scrap a lot as it has several curves that fit the pieces. This might be a lot like what the body shop guys might call hammering off the dolly. The idea of hammering off the dolly is to move metal that actually is not in contact with the surface. In the stainless and wood deal, the wood supports the metal on both sides of the small area being moved.
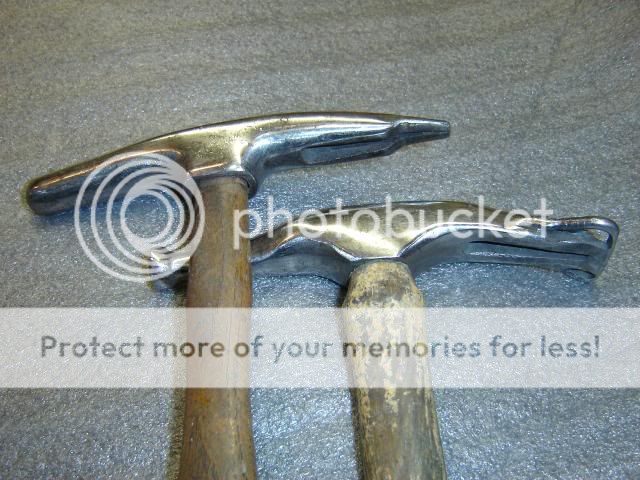
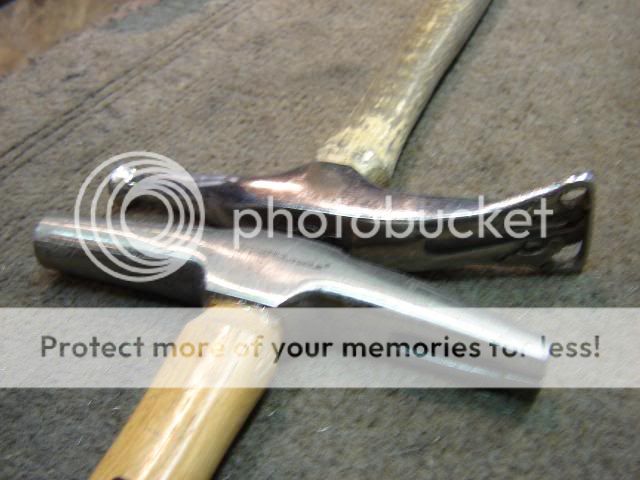
Here's another modified hammer.It is called the legendary Stupid Hammer. The round end seemed like a good idea but I have never found a use for it. The pointy end (formerly claw end) has been reduced in size (after welding into a single point) and that end has been useful for small spots that can't be reached with the legendary Golden Hammer.
I have not seen any "trim hammers" available at restoration suppliers that I think have any value. A guy might get by with a small hammer that has a chisel head on it for one small job if he smoothed and shaped the chisel end a bit.
Next episode: What child's toy can a responsible stainless craftsman use to responsibly repair stainless when his child isn't looking?
 Lark Parker Lark Parker
If at first you don't succeed -- you will get a lot of advice.
|
Edited by - Lark Parker on 12/17/2007 1:46:16 PM |
|
|
Henry Votel
Moderator

USA
104 Posts |
Posted - 12/13/2007 : 09:36:22 AM

|
Hi Dale,
Just a note to say I am really enjoying your series of topics and the tips & tricks of your restoration experience. Your Golden hammer is a neat thing and hoping you'll not mind if i attempt to make a similar one. Winter in Minnesota gives me a few days to patiently do some stainless repair and polishing. Do you plan any topics on welding holes or cracks in stainless and finishing such repairs?
Thanks,
Henry Votel, Editor
North Star Wheel
North Star Chapter SDC
www.northstarwheel.com |
 |
|
|
Lark Parker
Cruiser Member
USA
235 Posts |
Posted - 12/13/2007 : 10:33:54 AM
|
quote:
Originally posted by Henry Votel
Hi Dale,
Just a note to say I am really enjoying your series of topics and the tips & tricks of your restoration experience. Your Golden hammer is a neat thing and hoping you'll not mind if i attempt to make a similar one. Winter in Minnesota gives me a few days to patiently do some stainless repair and polishing. Do you plan any topics on welding holes or cracks in stainless and finishing such repairs?
Thanks,
Henry Votel, Editor
North Star Wheel
North Star Chapter SDC
www.northstarwheel.com
Hi Henry,
It is a legendary Golden Hammer, not just a Golden Hammer.
You do not have my permission for my LGH but you can make your own legendary Magic Hammer if you like. If you make it to look similar, it will work just as well.
The working end (nail) on mine is worn down and needs replacing so don't make yours that thin on the end. If you can't find an upholstery hammer you might have to settle for a tack hammer. I don't like tack hammers as well since they don't have as much reach and balance. Tack hammers heads are only 4"to 5" long and the handles are an inch or two shorter. They just don't feel right to me but we have to use what we can find. Hammer collectors are ruining the everyday hammer drivers market on eBay.
If you planning on doing many pieces, you might also want to make a magic Edge Bender, similar to the legendary Edge Bender that will be shown soon. It is not as large as the one made from pliers that was shown in Stainless restoration #1 and has been my second most useful hand tool after the legendary Golden Hammer.
I have not planned on covering welding to any extent. Polishing and buffing will also be difficult to take pictures of since they are two handed jobs. I don't have Igor to take pictures any more since lightning struck his hump while he was carrying a batch of stainless to the truck.
Lark Parker
If at first you don't succeed -- you will get a lot of advice.
|
Edited by - Lark Parker on 12/13/2007 10:36:58 AM |
|
|
|
Scott
Commander Member

USA
1495 Posts |
Posted - 12/13/2007 : 10:40:10 AM
|
Really nice. Is this restoration work new to you or have you been doing it for a while?
Reminds me of the saying about not making a silk purse from a sow's ear, except I think YOU can.
I don't have any legendary, magic or otherwise noteworthy tools in my collection. |
|
|
|
Lark Parker
Cruiser Member
USA
235 Posts |
Posted - 12/13/2007 : 2:35:05 PM
|
quote:
Originally posted by Scott
Really nice. Is this restoration work new to you or have you been doing it for a while?
Reminds me of the saying about not making a silk purse from a sow's ear, except I think YOU can.
I don't have any legendary, magic or otherwise noteworthy tools in my collection.
I haven't kept track of how long, maybe ten years for myself. Somewhat less for doing other people's trim, maybe seven years. I had some good help from JP, Mr Biggs, Studeman and others for getting business and stocking up on spare replacement Studebaker trim when I spread out. I have done a few high profile cars.
I am not quite as young as I look in my signature photo. I did OK and by word of mouth I ran into more business than I wanted. Now, my hands, back and legs don't want to do as much as I want to do.
Although I worked a relatively short time I did a LOT of Studebakers. I wasn't happy with the way things came about while using already accepted methods so I tried different methods to improve. I hate to see those improvisations just get lost without others giving them a try or passing them on.
I would rather show a tool and method than show a finished piece as there isn't anything to learn from those.
I am not looking for any jobs.
I am not selling anything.
I don't want anything.
Many of the polishing and buffing web sites have another motive. I'm not keen on repeating already published correct information. And I will try to cover a few disagreement points or the good info that is obscure.
Lark Parker
If at first you don't succeed -- you will get a lot of advice.
|
Edited by - Lark Parker on 12/13/2007 2:37:21 PM |
|
|
|
jbwhttail
Cruiser Member
USA
159 Posts |
Posted - 12/13/2007 : 9:05:08 PM
|
Lark Parker did Ellenore, I can assure anyone his work is flawless. While I know he is not writing to garner more business, his experience and quality does need to be duplicated
It is an addiction! |
|
|
|
mbstude
Commander Member
USA
3237 Posts |
Posted - 12/14/2007 : 4:34:46 PM


|
Thanks for posting, Mr. P! 
Keep 'em coming! Your style of writing is just as interesting as your topic. 
Matthew Burnette
'59 Scotsman
'63 Daytona
Hazlehurst, GA
 |
|
|
|
Karl
Regal Member

USA
340 Posts |
Posted - 12/16/2007 : 10:00:06 PM
|
Thanks for the up date. I like them hammers. I like them hammers. |
|
|
| |
Topic |
|
|
|