
64V2488 Rehabilitation
64V2488 Rehabilitation
(Picture Archive, Restoration, 64V-2488)
This is part of a personal diary of renovating a car. Some interesting situations come into play and this is one. Fortunately, the rear fenders were off and made the job somewhat easier....
Rear Leaf Spring Rehab / 19 - 20 May 2001
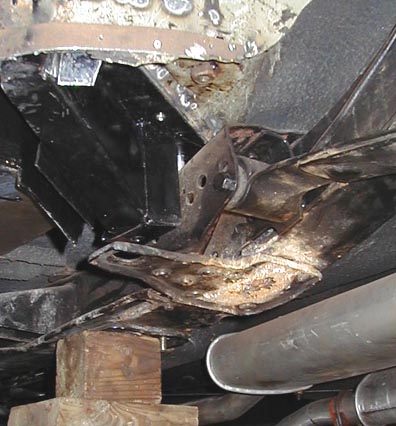
Day 1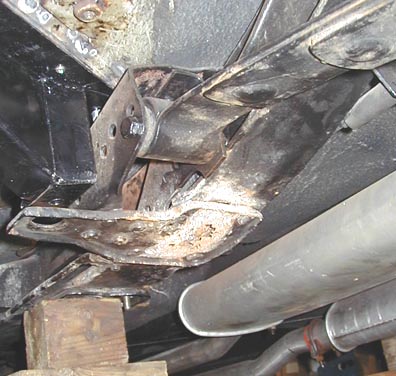 You can see under the leaf spring front mount where we're going with this. The leaf spring has to be removed anyway to get the mount off to repair the frame. Never having done this before, things went slow in removing the spring. |
 Didn't want any surprises caused by spring tension. Blocking the car on the frame and lowering the axle takes the weight off the spring. |
 The Manual doesn't say at what point the spring is unsprung, but if you drop the axle all the way, but keep it supported a bit by the jack, you can undo the front bolt and it will slide right out with no problem from the spring. |
 I had to destroy the nut to remove it though. |
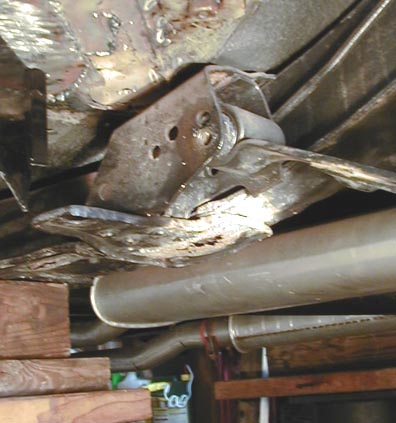
 The rear shackle wasn't that easy. The bolt heads were cut off and even that didn't free the 1/4" steel hangars. |
 The bolts seemed like they were welded onto the steel drops. A tie rod remover tool had to be used to pry and bend the bejeesus out of it to loosen these. |
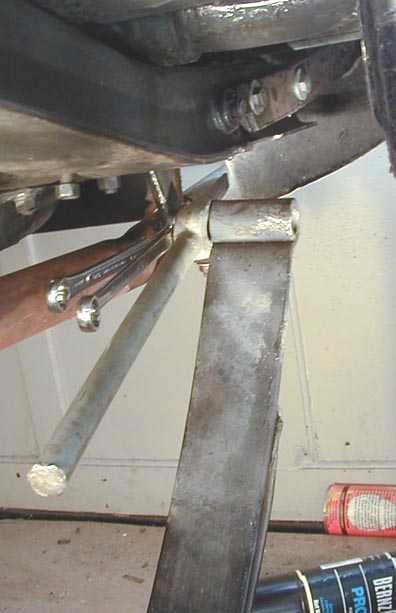 The joints were very well soaked with Kroil before this project, but none of the lube ever got into the sleeve to help things along. Using a hammer helped, but the rubber was still 'live' and soaked up a lot of the force. After a while, the drops were parted and the spring freed. Getting the pin out of the frame sleeve was also difficult and required some heavy blows with the sledge to break the rubber, even after cutting it with the drill bit.
|
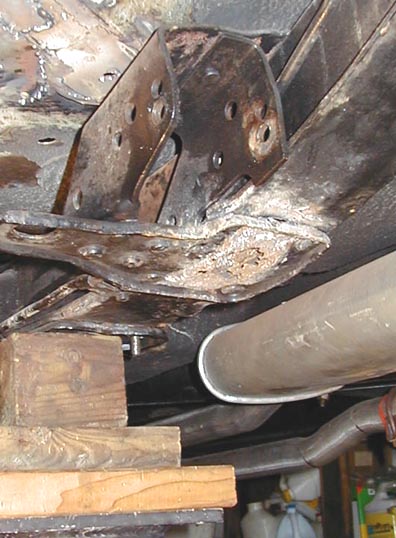
 Finally removed the spring and lined up all the parts to take inventory. |
|
DAY 2
|
|
 |
|
|
Note 1: The most difficult area to work on is the bushing retainer sleeve in the rear frame extension/ In reference to the recommended method of removing these bushings with various size sockets and threaded rods. The small bushing is 7/8" in diameter, the larger spring loop is 1 1/4". I didn't find a socket or anything usable in that exact size, including washers. You have to be precise and use something exactly the size of the bushing sleeve, especially for the frame sleeve. If your tool is a bit larger it will bind on the retaining sleeve or spring loop. If smaller, it will be drawn into the bushing sleeve and pull the rubber out. Don't discount the fact that the frame sleeve may be damaged from a previous attempt to repair, both being galled, dented and then include the rust possibility on top of that |
I have a set of bushing drivers, one of which fit, but felt the piece would
have been destroyed in using to REMOVE the old parts. It probably would have
been suitable to install the new bushings, but you don't have to use a
precision tool to install new ones, since the requirement is to slide them
in, using the retainer as a stop. Washers worked fine for this I DID use the grade 8 replacement bolts to later help install the new bushings.
|
|
Note 2: Since the old bushings had to be sequentially destroyed to remove, the sleeves wound up being the last component to get out. Unless you're being smiled upon, they will not give up the ghost, unless they're cut and chiseled out of the retainer.
|
|
 |
 |
|
Here are some of the remains
|
|
 |
|
 |
|
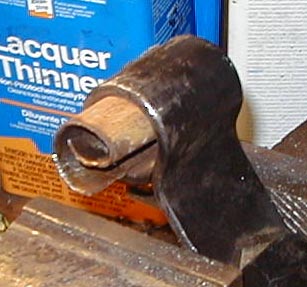
 | Cleaning out the loops is the next chore. The rust created an extra thickness that must be removed and the surface polished to ease the installation of the new bushings. File out the rust, sand it smooth. |
 | Then the bushings have to be cleaned off and polished up. The anti rust coating makes for extra thickness. Remove the coating and lubricate it with silicone grease. |
 |
 |
 |
 |
 |
 |
This is a "do as you need" process and there's no way to describe any other way than tedious. Getting the 3 bushings in took around 2 hours.
|
|

Final product.....now for the other side....... |
|
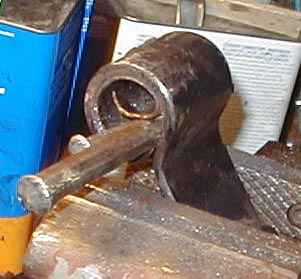 The next trick was to remove the remnants of the bushings inside the spring
loops and the rear frame housing. Whatever you hear about ways to do this,
the truth is it's a lot of work. I found that you could cut use a 1/8"
drill to cut the rubber away from the steel collars. If you get the bit
right next to the inner collar, it will walk around the perimeter and chew it
up. Next you have to punch the inner collar out, clean out the old rubber
and use a hack saw to cut thru the outer steel sleeve to create a breech and
get it to give up. A sharp chisel and edge punch are needed with a good deal
of patience. I was up to 5 hours on day 2 to just clean out the old shells.
The next trick was to remove the remnants of the bushings inside the spring
loops and the rear frame housing. Whatever you hear about ways to do this,
the truth is it's a lot of work. I found that you could cut use a 1/8"
drill to cut the rubber away from the steel collars. If you get the bit
right next to the inner collar, it will walk around the perimeter and chew it
up. Next you have to punch the inner collar out, clean out the old rubber
and use a hack saw to cut thru the outer steel sleeve to create a breech and
get it to give up. A sharp chisel and edge punch are needed with a good deal
of patience. I was up to 5 hours on day 2 to just clean out the old shells.